
Originally published on 23 Aug 2023
Last updated on 23 Aug 2023

In the realm of Jakarta EE development, orchestrating a smooth interaction between your application and the server is paramount. The Payara IntelliJ Plugin is one such tool that facilitates seamless integration between the Payara Server and the IntelliJ IDEA. This plugin empowers developers to efficiently manage and deploy Jakarta EE applications, and troubleshoot issues right from their development environment. In this blog post, we will explore the various features of the Payara IntelliJ Plugin and provide a step-by-step guide on how to make the most of its capabilities.
Installation and Configuration
- Ensure you haveIntelliJ IDEA Ultimateinstalled on your system.
- Access the Plugin Marketplace by navigating to "File → Settings → Plugins".
- Search for the "Payara" plugin in the Plugins window using the search bar.
- Install the Payara Platform Tools by clicking the "Install" button next to it. Follow on-screen instructions for installation. A restart of IntelliJ IDEA might be required to activate the plugin.

Creating a Jakarta EE Application
- Begin by creating a new Jakarta EE project in IntelliJ IDEA.
- Navigate to "File → New → Project" to initiate the project creation process.
- In the "New Project" dialog, on the left-hand side, choose "Jakarta EE".
- Configure the project settings, such as the project name, location, and other necessary details.
- Find the "Application server" field and click the "New" button to select the Payara Server and configure the server path.
- This action establishes the integration between the Payara Server and your Jakarta EE project.
- Complete any additional configurations required for your Jakarta EE project, such as selecting the desired version of Jakarta EE, Jakarta EE profile, and configuring other relevant options.
- Click "Create" to create your Jakarta EE project with the Payara Server integration.


Adding Payara Server Configuration to Existing Application
- If you're working with an existing application, integrate the Payara Server Configuration into your project.
- Click on the "Edit Configurations" option in the top-right corner of IntelliJ IDEA.
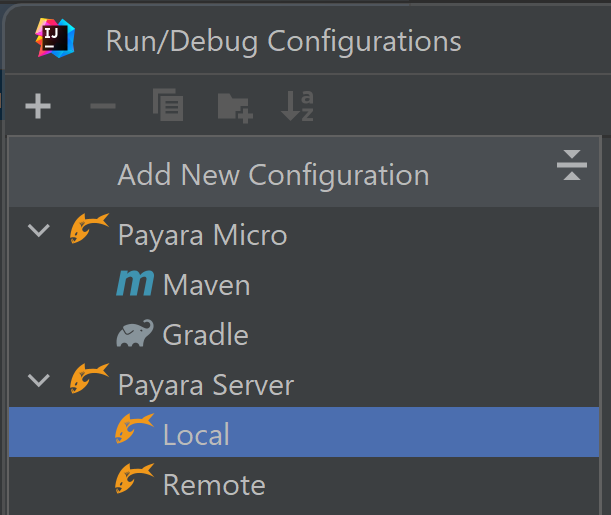
- In the "Run/Debug Configurations" dialog, click the "+" icon and select "Payara Server".
- Configure the Payara Server settings, including its path, version, and other relevant details.
- Navigate to the "Deployment" tab, which allows you to configure the artifacts you want to deploy on the Payara Server.
- Once you've configured the Payara Server settings and selected the desired deployment artifacts, click the "Apply" button. Your Payara Server Configuration is now saved and ready for use.


Deploying Applications
- Ensure that your Jakarta EE application is built and ready for deployment.
- Simply click the "Run" button (positioned close to the configuration option) to initiate the deployment process.
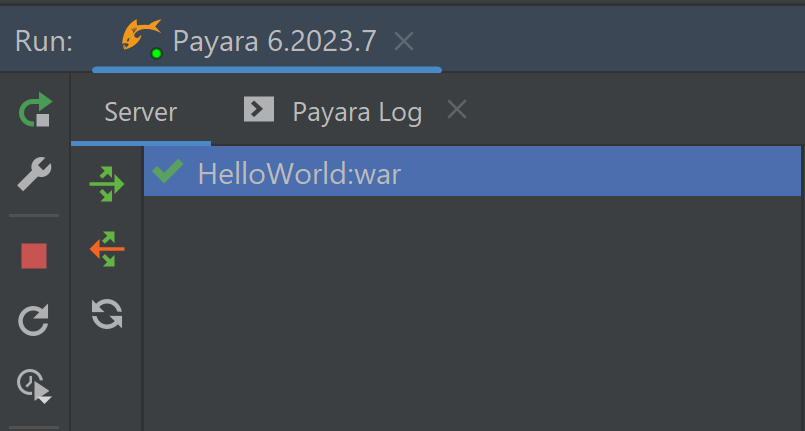
- A new tab should be opened with the Payara Server log, providing real-time insights into the deployment process and helping to streamline troubleshooting.
- This action will trigger the deployment of your Jakarta EE application onto the integrated Payara Server.
- Utilize the server controls within the Payara Server tool window to start, stop, restart, or undeploy applications as needed. This window provides convenient access to various management actions related to your deployed applications.
- Additionally, for those quick code iterations, you can enable the redeploy on update action in the Payara configuration window to rebuild and redeploy the application artifacts without restarting the server.
- For debugging purposes, you can set breakpoints within your code and press the Debug button in the configuration instead of the Run. This allows you to step through your code, inspect variables, and identify and fix issues more effectively.


Conclusion
The Payara IntelliJ Plugin is an essential bridge between Jakarta EE application development and server management. Seamlessly integrating with the IntelliJ IDEA Ultimate, it empowers developers to streamline deployment, monitoring, and troubleshooting tasks. This guide has provided you with a concise roadmap to understand the plugin's functionalities and leverage its potential to elevate your Jakarta EE development endeavours.
Additionally, it's worth noting that the Payara IntelliJ tools also provide support for Payara Micro, a topic that will be covered in an upcoming blog post. Stay tuned for more insights into utilizing Payara Micro within your development workflow.
Creating web applications using the Jakarta EE Web Profile application? You can use Payara Cloud, our fully managed cloud native application runtime, check out our Free Trial:
Fully managed Jakarta EE Cloud Deployment. ✅Handles Kubernetes for you.✅ 15 day free trial available.✅
Payara Cloud.
Related Posts
The Payara Monthly Catch - March 2025
Published on 31 Mar 2025
by Nastasija Trajanova
0 Comments

March was quite eventful indeed! ✨ This month, our Payarans were on the move — bringing their energy, insights, and expertise to not one, but two major Java conferences: Devnexus and JavaOne. With expert-led talks, exciting conversations at ...
Join our webinar! Deploying Jakarta EE Applications with Payara Server and Payara Cloud
Published on 18 Mar 2025
by Dominika Tasarz
0 Comments

Join us for the webinar with the Java Champion Mike Redlich, where you'll discover how Payara Server and Payara Micro support mission-critical deployments, and see firsthand how Payara Cloud simplifies running Jakarta EE applications in the ...