
Originally published on 24 Mar 2022
Last updated on 24 Mar 2022

One major issue when developing modern enterprise applications is the "works on my machine" problem: when an application works well on your machine but is not functional in production or even on a colleague's machine. An even more prevalent problem is to maintain the quality of ever-changing applications during development and maintenance.
This is especially prevalent when Jakarta EE applications are developed and not properly tested in an isolated and cohesive manner. Proper integration testing helps to avoid both the "works on my machine" problem, and ensures developers can change the application effectively without breaking it. However often teams struggle with it, due to a lack of standardized testing solutions and the unpredictability of real-world conditions.
Here, I present an effective method for Jakarta EE integration testing, using Payara Platform and Testcontainers in my example.
What Are Integration Tests and What Are Their Common Problems?
Integration tests are designed to make sure that an application and its dependencies, for example database engines, third-party services, data processors, work correctly together. They are intended to discover flaws in how interfaces are designed and how the multiple components communicate with each other.
However, in some cases Jakarta EE tests are difficult to set up since there's not a standardized solution that allows developers to create portable tests that allow Jakarta EE applications to be tested regardless of which vendor is chosen.
The previous problems are also present in the Payara Platform environment. Integration tests that guarantee Jakarta EE applications fulfilling their technical and functional requirements are difficult to implement, with a steep learning curve.
In some cases, sloppy tests may even complicate the "works on my machine" scenario and cause more headaches in general. As applications grow they need more tests to cover all essential workflows, meaning that integration tests must be designed to be maintainable and scalable in the long run.
What to do then? In recent years, new technology has come out to leverage the amazing power of containers: Testcontainers.
What are Testcontainers?
Testcontainers is, simply put, a library that provides object-oriented abstractions of a software component running in a Docker container that is quickly provisioned and discarded, often within the boundaries of a test. Any kind of software that has a Docker image available can be quickly plugged into Testcontainers. And if this isn't the case, these components can be easily wrapped in a custom image and be plugged in any way!
Hence, Testcontainers introduces a lightweight mechanism to provision the parts needed to run a real-world integration test and verify from the outside that these components work correctly. Testcontainers, then, is well suited for out-of-process testing and emulating how users and/or systems interact with the boundaries of the tested system in a very realistic way.
The goals of Testcontainers can be summarized in the following:
- Make sure that applications that rely on data storage solutions can correctly test the data layer access in a consistent manner without the hassle of the usual setup required.
- Facilitate the provisioning of your application's environment and its complete set of dependencies, like SQL or NoSQL databases, message queue brokers, web servers, etc.
- Guarantee that integration tests are fully portable in any environment compatible with which can run Docker containers.
- Extend user acceptance testing and make it more realistic: Testcontainers also support the use of web browser containers that are compatible with Selenium.
The focus of this article will be to illustrate how quickly and easy it is to set up a Testcontainers test suite for a small Jakarta EE application using JUnit 5 and run it with the help of the Payara Platform. After following the instructions outlined in the next sections you should be able to give it a try!
Getting Started
The only requirement needed to run Testcontainers is for your environment to have a valid Docker installation, whether on Windows, Linux, or Mac systems. We'll assume that you are familiar with how JUnit 5 Maven projects are structured in the following sections.
To start using Testcontainers in a Maven project, you'll have to add the Testcontainers Maven dependencies needed for JUnit 5:
<dependency>
  <groupId>org.junit.jupiter</groupId>
  <artifactId>junit-jupiter</artifactId>
  <version>5.8.1</version>
  <scope>test</scope>
</dependency>
<dependency>
  <groupId>org.testcontainers</groupId>
  <artifactId>testcontainers</artifactId>
  <version>1.16.3</version>
  <scope>test</scope>
</dependency>
<dependency>
  <groupId>org.testcontainers</groupId>
  <artifactId>junit-jupiter</artifactId>
  <version>1.16.3</version>
  <scope>test</scope>
</dependency>
Now, let's define a very basic Junit 5 test class like follows:
@Testcontainers
public class BasicApplicationIT{

  @Container
  GenericContainer microContainer = new GenericContainer("payara/micro-jdk11:5.2022.1")
                    .withExposedPorts(8080);

  @Test
  public void checkContainerIsRunning(){
      assert(isTrue(microContainer.isRunning()));
  }
}
Let's do a short breakdown of how this test class is structured:
- The
Testcontainersannotation will instruct the JUnit 5 engine to find all containers defined as fields in the test class that are annotated with@Container(see below) and handle their lifecycle events on a per-test basis. - The Container annotation will mark any static or instance field that extends the
GenericContainerclass as a managed container, which means that the Jupiter engine will be responsible for starting before tests are run and stopping the container when it is no longer needed. - The
microContainerinstance is created by instantiating a new GenericContainer and passing over aDockerImageNameobject, which must correspond to a reachable Docker image, which in this case, corresponds to the officialpayara/microDocker image. - The microContainer is configured to dynamically expose the internal port 8080, which is the default HTTP port used by Payara Micro to establish communications.
- Finally, the
checkContainerIsRunningtest verifies that the container is running by using the GenericContainer.isRunning method.
To verify that this test works as intended, here's the output of a sample run using a local Docker for Desktop installation:
[main] INFO org.testcontainers.dockerclient.DockerClientProviderStrategy - Loaded org.testcontainers.dockerclient.NpipeSocketClientProviderStrategy from ~/.testcontainers.properties, will try it first[ducttape-0] INFO com.github.dockerjava.zerodep.shaded.org.apache.hc.client5.http.impl.classic.HttpRequestRetryExec - Recoverable I/O exception (java.net.SocketException) caught when processing request to {}->http://127.0.0.1:58047[main] INFO org.testcontainers.dockerclient.DockerClientProviderStrategy - Found Docker environment with local Npipe socket (npipe:////./pipe/docker_engine)[main] INFO org.testcontainers.DockerClientFactory - Docker host IP address is localhost[main] INFO org.testcontainers.DockerClientFactory - Connected to docker:Server Version: 20.10.12API Version: 1.41Operating System: Docker DesktopTotal Memory: 12642 MB[main] INFO org.testcontainers.utility.ImageNameSubstitutor - Image name substitution will be performed by: DefaultImageNameSubstitutor (composite of 'ConfigurationFileImageNameSubstitutor' and 'PrefixingImageNameSubstitutor')[main] INFO org.testcontainers.DockerClientFactory - Ryuk started - will monitor and terminate Testcontainers containers on JVM exit[main] INFO org.testcontainers.DockerClientFactory - Checking the system...[main] INFO org.testcontainers.DockerClientFactory - ✔︎ Docker server version should be at least 1.6.0[main] INFO org.testcontainers.DockerClientFactory - ✔︎ Docker environment should have more than 2GB free disk space[main] INFO 🐳 [payara/micro:5.2021.10-jdk11] - Creating container for image: payara/micro:5.2021.10-jdk11[main] INFO 🐳 [payara/micro:5.2021.10-jdk11] - Starting container with ID: b1774549b287a5ee382b824f6b34664b096660a3c7d1ba5e3f37e9e621b1cf72[main] INFO 🐳 [payara/micro:5.2021.10-jdk11] - Container payara/micro:5.2021.10-jdk11 is starting: b1774549b287a5ee382b824f6b34664b096660a3c7d1ba5e3f37e9e621b1cf72[main] INFO 🐳 [payara/micro:5.2021.10-jdk11] - Container payara/micro:5.2021.10-jdk11 started in PT21.6437706S
The Testcontainers engine will inform of the following details and/or events:
- Details of the local Docker environment
- Basic checks that the Docker environment fulfils the requirements to run Testcontainers
- Pulling the image from a repository where it's available
- Starting the container, along with its ID and startup time
All of this is done with a couple of lines of code!
Payara Platform and Testcontainers
As mentioned before, any software component can be quickly plugged into Testcontainers, and the Payara Platform is no exception to this rule as its main distributions have up-to-date official Docker images:
- Payara Server Full Profile Docker Image:
payara/server-full - Payara Server Web Profile Docker Image :
payara/server-web - Payara Micro Docker Image:
payara/micro
We will focus on using Payara Micro in this article, as the intention is to showcase how quick and easy it is to run Jakarta EE tests using Payara Micro with Testcontainers.
A Very Simple Jakarta EE Application
Let's begin by expanding our previous example by deploying a simple Jakarta EE application to the container and testing a couple of JAX-RS endpoints. To this effect, let's build a Conference Management application that allows speakers to be registered to the platform and stored into an RDBMS database.
To build our sample application, we'll use Maven 3.x. Here's a quick outlook of how the project's POM file will look like using Jakarta EE along with the corresponding JUnit and Testcontainers dependencies:
<?xml version="1.0" encoding="UTF-8"?>
<project xmlns="http://maven.apache.org/POM/4.0.0" xmlns:xsi="http://www.w3.org/2001/XMLSchema-instance" xsi:schemaLocation="http://maven.apache.org/POM/4.0.0 http://maven.apache.org/xsd/maven-4.0.0.xsd">
    <modelVersion>4.0.0</modelVersion>

    <artifactId>conference-demo</artifactId>
    <version>1.0.0-SNAPSHOT</version>
    <name>Conference Demo [Speaker]</name>
    <packaging>war</packaging>

    <build>
        <finalName>microservice-speaker</finalName>
        <plugins>
            <plugin>
                <artifactId>maven-war-plugin</artifactId>
                <version>3.3.1</version>
            </plugin>
        </plugins>
    </build>

    <dependencies>
        <dependency>
            <groupId>jakarta.platform</groupId>
            <artifactId>jakarta.jakartaee-web-api</artifactId>
            <version>9.1.0</version>
            <scope>provided</scope>
        </dependency>
        <dependency>
            <groupId>org.junit.jupiter</groupId>
            <artifactId>junit-jupiter</artifactId>
            <version>5.8.1</version>
            <scope>test</scope>
         </dependency>
         <dependency>
            <groupId>org.testcontainers</groupId>
            <artifactId>testcontainers</artifactId>
            <version>1.16.3</version>
            <scope>test</scope>
         </dependency>
         <dependency>
            <groupId>org.testcontainers</groupId>
            <artifactId>junit-jupiter</artifactId>
            <version>1.16.3</version>
            <scope>test</scope>
         </dependency>
    </dependencies>
</project>
The core of our sample will be the SpeakerJPA entity that is used to model the data stored by the application (equals and hashcode methods omitted for brevity’s sake):
@Entity
@NamedQuery(name = "Speaker.all", query = "select sp from Speaker sp order by sp.name")
public class Speaker implements Serializable{

    @Id
    @GeneratedValue(strategy = GenerationType.IDENTITY)
    private Integer id;

    private String name;

    @Schema(description = "Organization that the speaker belongs", required = true)
    private String organization;

    public Speaker() {
    }

    @JsonbCreator
    public Speaker(@JsonbProperty("name") String name,@JsonbProperty("organization")  String organization) {
        this.name = name;
        this.organization = organization;
    }

    public Integer getId() {
        return id;
    }

    public String getName() {
        return name;
    }

    public String getOrganization() {
        return organization;
    }
}
As we are using JPA, we must define a persistence unit in its corresponding deployment descriptor:
<?xml version="1.0" encoding="UTF-8"?>
<persistence version="2.1" xmlns="http://xmlns.jcp.org/xml/ns/persistence" xmlns:xsi="http://www.w3.org/2001/XMLSchema-instance" xsi:schemaLocation="http://xmlns.jcp.org/xml/ns/persistence http://xmlns.jcp.org/xml/ns/persistence/persistence_2_1.xsd">
  <persistence-unit name="Speaker" transaction-type="JTA">
    <jta-data-source>DefaultDataSource</jta-data-source>
    <properties>
      <property name="javax.persistence.schema-generation.database.action" value="create"/>
    </properties>
  </persistence-unit>
</persistence>
You can observe that the data source used for this persistence unit is the java:comp/DefaultDataSource, which by definition of the JPA specification must be provided by the Jakarta EE runtime as a default data store for development purposes. In addition to this, we instruct the JPA engine to create the database tables when the application is deployed.
With this in mind, let's define a service boundary, i.e., a JAX-RS endpoint that allows clients to interact with this entity:
@Path("/speaker")
@ApplicationScoped
@Produces(MediaType.APPLICATION_JSON)
public class SpeakerResource {

    @PersistenceContext(unitName = "Speaker")
    EntityManager em;

    @GET
    @Path("/{id}")
    public Response getSpeaker(@PathParam("id") Integer id) {
        return Optional.ofNullable(em.find(Speaker.class, id))
                .map(Response::ok)
                .orElse(Response.status(Status.NOT_FOUND))
                .build();
    }

    @POST
    @Consumes(MediaType.APPLICATION_JSON)
    @Transactional
    public Response addSpeaker(Speaker speaker, @Context UriInfo uriInfo) {
        Speaker result = em.persist(speaker);
        return Response.created(UriBuilder.fromPath(uriInfo.getPath()).path("{id}").build(result.getId()))
                        .entity(speaker).build();
    }

    @GET
    public List<Speaker> getSpeakers(){
       return speakerService.getAll();
    }
}
The boundary is extremely simple. It defines the following method endpoints:
- a GET method that retrieves speaker's data based on its ID
- a generic GET method that retrieves all speaker data
- a POST method that adds/registers a speaker.
Lastly, let's not forget the corresponding JAX-RS configuration class:
@ApplicationPath("/")
public class SpeakerApplication extends Application{
}
And with this, our application is ready to be tested!
Payara Micro Testcontainer Deployments
Now that our application is ready, let's test it out by deploying it on Payara Micro using Testcontainers. To this effect, we need the WAR artefact ready, as the official Payara Micro Docker image requires the WAR file to be either copied over or be present in a volume mapped to the container's internal deployment folder (/opt/payara/deployments/). Additionally, we must instruct the Payara Micro instance running in the container to deploy the application when the instance is launched.
Here's how the container needs to be configured to fulfil the conditions described above:
@Testcontainers
public class SpeakerIT{

  MountableFile warFile = MountableFile.forHostPath(Paths.get("target/my-application.war").toAbsolutePath(), 0777);

  @Container
  GenericContainer microContainer = new GenericContainer("payara/micro-jdk11")

  .withExposedPorts(8080)

  .withCopyFileToContainer(warFile, "/opt/payara/deployments/app.war")
  .withCommand("--deploy /opt/payara/deployments/app.war --contextRoot /");
}
Let's breakdown what's new:
- The
withCopyFileToContainermethod will issue a docker cp command to copy the referenced mountable file that points the application's WAR file to the container's internal deployment folder. - The WAR file is referenced by creating a new MountableFile instance using the forHostPath factory method, which will create a new volume mount used to copy the file from the host system to the container. Observe that we configure the file to be copied over and have its permissions set to 0777 (which corresponds to Unix-like systems). This will allow the file to be read by the Java process that will launch the Payara Micro instance.
- Finally, to instruct the container to deploy the application, the
--deployand--contextRootarguments are used to pass over the application (in the container's file system) and its corresponding context root (the empty context root) to the Payara Micro instance. To this effect, the withCommand method is used to set the CMD instruction used by the container.
Now, when the container is started, the application should be deployed successfully and be ready to be tested.
There's a big caveat to keep in mind, however, as you may be aware the deployment of the application will occur on a completely different thread (and process) than the one running the JUnit tests. Therefore, there's no guarantee that by the time the JUnit engine starts running any test units, the deployment will be complete, and the application is ready to be tested.
So, what do we do in this scenario? We define a waiting strategy!
Let's Wait For Payara Micro To Be Ready, OK?
A waiting strategy is a specific configuration setting that instructs the Testcontainers engine to wait until a certain set of conditions are met before deciding that the container is ready and executing the corresponding tests. By default, it will wait for up to 60 seconds for the first exposed port in the container to be accessible from the tests. In the case of our Payara Micro container, that would be port 8080, but this is not a good indicator that the container is truly ready, since the application may not be fully deployed yet.
To this effect, Testcontainers offers additional waiting strategies that can be used to better control when the container is ready:
- HTTP Wait Strategy: Instructs the engine to probe an HTTP endpoint in the container and see if a valid OK response is obtained. It can be configured to probe for specific HTTP status codes if needed.
- Log Wait Strategy: Instructs the engine to wait until a specific log entry appears in the container's standard output. Regular expressions are supported to allow for greater flexibility in the type of entry expected to signal that the container is ready.
- Healthcheck Strategy: If the container's image has a valid HEALTHCHECK instruction configured, then the engine will wait until the container is deemed as healthy to be considered ready.
For the purposes of our simple test, let's use the log wait strategy and wait until the ".* Payara Micro .* ready in .*\\s" log entry is in the container's output. This message will always be generated by Payara Micro after all applications are deployed and the instance has started successfully and is ready for user requests:
@Container
GenericContainer microContainer = new GenericContainer("payara/micro-jdk11")
                                      .withExposedPorts(8080)
                                      .withCopyFileToContainer(warFile, "/opt/payara/deployments/app.war")
                                      .waitingFor(Wait.forLogMessage(".* Payara Micro .* ready in .*\\s", 1))
                                      .withCommand("--deploy /opt/payara/deployments/app.war --contextRoot /");
PRO-TIP: The Wait class has additional convenient methods that can be used to get a valid Wait Strategy.
Our First Test
Now that our application has been deployed and is ready to be fully tested, our first test will be to call the server instance's REST endpoints running in the container and verify that they work correctly. There are multiple ways to make REST client calls (from Java 11's improved HTTPClient to Jersey's RestClient APIs), so for this piece, we will use RestAssured due to its simplicity in testing the outcomes of these client calls.
Let's add their dependency to the project's POM:
<dependency>
    <groupId>io.rest-assured</groupId>
    <artifactId>rest-assured</artifactId>
    <version>4.3.1</version>
    <scope>test</scope>
</dependency>
Our first test would be to add a new speaker and check that the endpoint's response corresponds to a 201 - OK HTTP code:
@Test
@Order(1)
public void addSpeaker() {
    given().
            contentType(ContentType.JSON).
            body("{" +
                 "  \"name\" : \"Fabio Turizo\"," +
                 "  \"organization\" : \"Payara Services Limited\"" +
                 "}").
            when().
            post("?")).
            then().
            assertThat().statusCode(201);
}
You will notice that the test is marked as ordered and will execute first. The reason for this will be cleared up later, but it is important to understand that in most cases, integration tests will benefit from being run in order, especially when data manipulation is involved.
There's a big question mark with our test and it is simple: How do we reach the server instance running in the container?
Reaching the Container
Remember that the Payara Micro instance is running inside a container, so it cannot be directly contacted using port 8080, as this port will get mapped automatically to an available port in the host system by Testcontainers. To retrieve this port, we'll use the getMappedPort method:
when().
post(String.format("http://localhost:%d/speaker", microContainer.getMappedPort(8080))).
then().
There's another detail to keep in mind though: On some environment arrangements, the Docker daemon may be located on a completely different host from the test process themself, so it is recommended to use the getHost method instead:
when().
post(String.format("http://%s:%d/speaker", microContainer.getHost(), microContainer.getMappedPort(8080))).
then().
And with this, our test is complete! Running the test now should start the container, call the speaker registration endpoint and create a new speaker, yielding a positive test result!
Let's Keep Testing!
Let's add another test to verify that our speaker has been added successfully by calling the endpoint that retrieves all speakers from the database and verifying that exactly ONE speaker has been created:
@Test
@Order(2)
public void getSpeakers(){
    given()
            .contentType(ContentType.JSON)
            .when()
            .get(String.format("http://%s:%d/speaker", microContainer.getHost(), microContainer.getMappedPort(8080)))
            .then()
            .assertThat().statusCode(200)
                         .and()
                         .body("$", hasSize(1));
}
But unfortunately, this test will fail and it will yield this error:
java.lang.AssertionError:
1 expectation failed.
JSON path $ doesn't match.
Expected: a collection with size <1>
  Actual: []
What is happening in this instance? Why is the speaker set empty even after one was created on the first test? In addition to this, you may notice that the Testcontainers engine will report 2 containers being started:
[main] INFO docker[payara/micro:5.2021.10-jdk11] - Creating container for image: payara/micro:5.2021.10-jdk11
[main] INFO docker[payara/micro:5.2021.10-jdk11] - Starting container with ID: 0dc864894fde84b18ea46772ba9d2fd6f8d2bcbbfcd65be06608a02d05a79650
[main] INFO docker[payara/micro:5.2021.10-jdk11] - Container payara/micro:5.2021.10-jdk11 is starting: 0dc864894fde84b18ea46772ba9d2fd6f8d2bcbbfcd65be06608a02d05a79650

[main] INFO docker[payara/micro:5.2021.10-jdk11] - Container payara/micro:5.2021.10-jdk11 started in PT23.2078859S
[main] INFO docker[payara/micro:5.2021.10-jdk11] - Creating container for image: payara/micro:5.2021.10-jdk11
[main] INFO docker[payara/micro:5.2021.10-jdk11] - Starting container with ID: 24034b1101c3a1a10369f60b88796bae0bb80bd5598f3b780b86902434b19f0f
[main] INFO docker[payara/micro:5.2021.10-jdk11] - Container payara/micro:5.2021.10-jdk11 is starting: 24034b1101c3a1a10369f60b88796bae0bb80bd5598f3b780b86902434b19f0f
This is by design: A new container will be started and stopped for each individual test defined in the class if the Testcontainer definition is done on an instance field! If you need the container to be started once and then be used and re-used for all tests within the class, its definition must be done on a class member instead:
@Container
static GenericContainer microContainer = new GenericContainer("payara/micro-jdk11")
                                                .withExposedPorts(8080)
                                                .withCopyFileToContainer(warFile, "/opt/payara/deployments/app.war")
                                                .waitingFor(Wait.forLogMessage(".* Payara Micro .* ready in .*\\s", 1))
                                                .withCommand("--deploy /opt/payara/deployments/app.war --contextRoot /");
Running the tests again will generate a successful result, since the first test will create a new speaker, and the second one will verify that the speaker has been successfully stored in the database as intended.
In most scenarios, re-using the same container will be the best solution, as it will speed up the overall time needed to complete the test suite. Although Payara Micro's official container is fast to start, running sequential tests on one container will be enough to test most Jakarta EE features. There are also different patterns that allow to reuse the same container across different test classes, such as the Singleton Container Pattern.
A Real-World Test Scenario
Now that we understand the extent of what we can do with testcontainers, how about we do a real-world integration test? You may recall that our application's persistence unit uses the default data source provided by the Payara Platform, which relies on an embedded H2 database. This setting is certainly useful for a quick test and validation of the persistence layer, but in no way reflects good practices, as H2 is not recommended for production use.
The real-world equivalent of this scenario would be to use a production-grade RDBMS system like Oracle,MySQL, SQL Server, etc. The beauty of Testcontainers is that this requirement can simply be implemented by using a separate container to host our RDBMS system and then integrating it with our existing Payara Micro container. Even better, the Testcontainers project provides out-of-the-box container objects for the most popular solutions in the market! For this example, we'll use MySQL as our database of choice.
To prepare our application, let's define a new data source in the application's JAX-RS configuration class:
@ApplicationPath("/")
@ApplicationScoped
@DataSourceDefinition(
        name = "java:global/speakerDS",
        className = "com.mysql.cj.jdbc.MysqlDataSource",
        user = "${ENV=DB_USER}",
        password = "${ENV=DB_PASSWORD}",
        url = "${ENV=DB_JDBC_URL}",
        properties = {
            "allowPublicKeyRetrieval=true",
            "useSSL=false",
            "requireSSL=false"
        }
)
public class SpeakerApplication extends Application{
}
The corresponding data source will use a MySQL 8 compatible database driver, so our application's POM file should add it as a compile-scoped dependency too:
<dependency>
    <groupId>mysql</groupId>
    <artifactId>mysql-connector-java</artifactId>
    <version>8.0.21</version>
</dependency>
You may notice that the database user credentials and the JDBC URL are configured using environment variable placeholders (this is a specific feature of the Payara Platform). This allows the transition of the application between environments but also simplifies how the setup of this data source is done on our test suite.
Our persistence.xml deployment descriptor will use this new data source in place of the default one:
<?xml version="1.0" encoding="UTF-8"?>
<persistence version="2.1" xmlns="http://xmlns.jcp.org/xml/ns/persistence" xmlns:xsi="http://www.w3.org/2001/XMLSchema-instance" xsi:schemaLocation="http://xmlns.jcp.org/xml/ns/persistence http://xmlns.jcp.org/xml/ns/persistence/persistence_2_1.xsd">
 <persistence-unit name="Speaker" transaction-type="JTA">
   <jta-data-source>java:global/speakerDS</jta-data-source>
   <properties>
     <property name="javax.persistence.schema-generation.database.action" value="create"/>
   </properties>
 </persistence-unit>
</persistence>
Now that our application is ready, we'll need to create a Testcontainer that will host the MySQL database used to test the application. To this effect, we'll use the MySQLContainer class like this:
@Container
private static MySQLContainer dbContainer = new MySQLContainer<>(DockerImageName.parse("mysql:8.0"));
The container can be created by specifying a valid DockerImageName, which in this example corresponds to the MySQL 8.0 version tag. Since this is not much different from the usual container instantiation, what is the point of using this class? Simple, this class provides the following utility methods that we can use to simplify the usual connection management:
getUsername:Retrieves the name of a sample user prepared by the container.getPassword:Retrieves the password credentials of the user.getDatabaseName:Retrieves the name of a sample database that the user "owns".
With this in mind, we need to connect the database container with our Payara Micro container. How do we do this? As both components live in separate Docker containers, we can create a Docker network and allow each other to communicate by fulfilling the following criteria:
- Both containers must live in the same network.
- The database container must be assigned a network alias, which will function as its hostname. The Payara Micro container in turn will use this alias to connect to the database on port 3306 (MySQL's default port).
- The Payara Micro container will be configured to depend on the database container, meaning that it will only start when the database container is deemed ready.
- Finally, we'll pass over the database user credentials and location as environment variables to the Payara Micro container at startup.
And here's the complete code snippet that demonstrates how to do all the above using the matching Testcontainer mechanisms:
#Here's the network where both containers will join
static final Network NET = Network.newNetwork();

#The database container will join the network under the 'mysql' alias
@Container
static MySQLContainer dbContainer = new MySQLContainer<>(DockerImageName.parse("mysql:8.0"))
                                            .withNetwork(NET)
                                            .withNetworkAliases("mysql");

#The Payara Micro container will also join the network and be configured to depend on the database container
@Container
static GenericContainer microContainer = new GenericContainer(DockerImageName.parse("payara/micro-jdk11"))
                                              .withExposedPorts(8080)
                                              .dependsOn(dbContainer)
                                              .withNetwork(NET)
                                              .withCopyFileToContainer(warFile, "/opt/payara/deployments/app.war")
                                              .waitingFor(Wait.forLogMessage(".* Payara Micro .* ready in .*\\s", 1))
                                              .withEnv("DB_JDBC_URL", String.format("jdbc:mysql://mysql:3306/%s", dbContainer.getDatabaseName()))
                                              .withEnv("DB_USER", dbContainer.getUsername())
                                              .withEnv("DB_PASSWORD",  dbContainer.getPassword())
                                              .withCommand("--deploy /opt/payara/deployments/app.war --contextRoot /");
Let's re-run our tests and observe that the Testcontainers engine will also report details on the lifecycle of the newly declared MySQL Testcontainer:
[testcontainers-lifecycle-0] INFO docker[mysql:8.0] - Starting container with ID: 494df375925a521c846ad557eee11dc7b1cd1aa29332a27fb485fd9a83a954a7
[testcontainers-lifecycle-0] INFO docker[mysql:8.0] - Container mysql:8.0 is starting: 494df375925a521c846ad557eee11dc7b1cd1aa29332a27fb485fd9a83a954a7
[testcontainers-lifecycle-0] INFO docker[mysql:8.0] - Container is started (JDBC URL: jdbc:mysql://127.0.0.1:51913/test)
[testcontainers-lifecycle-0] INFO docker[mysql:8.0] - Container mysql:8.0 started in PT32.2550699S
And both tests should be executed without issues. With this, we have demonstrated that our integration tests are closely mirroring what a potential production environment would look like!
Testcontainers Cloud
Testing with Testcontainers will make you extremely productive, but there's an interesting challenge to consider: as your applications grow, so will the overall size and number of integration tests needed to establish a good quality threshold. Although Testcontainers make it quite easy for integration tests to run in most environments, the added cost of using Docker means that you must factor more computing power and resources for them. For bigger test suites, your common development environment might not be enough to fill this criterion. In this situation, you might consider using Testcontainers Cloud!
Testcontainers Cloud, as its obvious name implies, is a software-as-a-service solution offered by the team at AtomicJar that can be used to delegate running containers used in any Testcontainers tests to a cloud instance where the Docker environment is automatically managed in a seamless manner.
Testcontainers Cloud is currently in a private beta and you can get access by signing up for it. Using Testcontainers Cloud is extremely simple:
- Download the client software from https://app.testcontainers.cloud
- Install the client on your development environment: Windows, Linux, and macOS are supported.
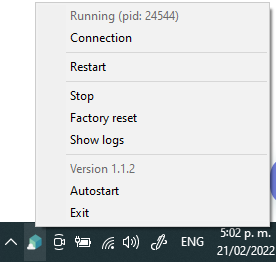
- Run the client software. The client software will automatically open a browser window pointing to https://app.testcontainers.cloud to retrieve the token needed to link your user account:
- You're good to go! Testcontainers Cloud is ready to power your Testcontainers based tests.

Here's how the Testcontainers Cloud client looks in a Windows environment:
Now, when running the same test suite that we created in the previous sections, we'll see that when the Testcontainers engine connects to the Docker environment it will use a "leased" environment courtesy of your cloud account:
[testcontainers-lifecycle-0] INFO org.testcontainers.DockerClientFactory - Connected to docker:
Server Version: 66+testcontainerscloud
API Version: 1.41
Operating System: Ubuntu 20.04.3 LTS
Total Memory: 11.145 MB
You might be surprised by the benefits of using this solution. It allows for truly portable tests that can run anywhere with zero impact on the development environment and the ability to test the full extent of any Jakarta EE application and ecosystem in detail!
In Conclusion
Testcontainers is a powerful testing framework that simplifies the provisioning of test environments, so you can effectively and quickly run real-world integration tests. The Payara Platform, along with its official Docker support, is a great match to use along with Testcontainers and write comprehensive and detailed tests for most Jakarta EE features.
If you are interested in a more detailed look at additional Testcontainers samples, the tests that were written in this article have been greatly expanded on a more detailed Conference demo application hosted on this GitHub repository. All integration tests are implemented on a separate Maven module named CombinedTestModule,in case you want to see how multiple service modules interact with each other by running on separate containers.
Consider using Testcontainers for your next project to create a stable and solid integration test suite of your Jakarta EE application features. Even better, the Payara Platform will let you easily write these tests with minimal overhead!
Related Posts
The Payara Monthly Catch - August 2025
Published on 02 Sep 2025
by Dominika Tasarz
0 Comments

Welcome aboard the August 2025 issue of The Payara Monthly Catch! With summer in full swing, things may have felt a little more quiet across the Java world - but certainly not less interesting! We hope you managed to get some rest and recharge, ...
How to Build Cost-Effective Cloud Architectures
Published on 19 Aug 2025
by Chiara Civardi
0 Comments

Cloud adoption has transformed how developers build and scale applications, but it also brings new challenges in controlling costs. As cloud bills grow alongside usage, designing cost-efficient cloud architectures becomes essential for ...