
Originally published on 26 Jul 2023
Last updated on 10 Aug 2023

Apache NetBeans is a popular IDE for Java development, offering a wide range of features for streamlining the development process. Payara Server, a robust and scalable option for deploying Jakarta EE applications, seamlessly integrates with Apache NetBeans. In this blog, we explore the seamless usage of Payara Platform 6 within Apache NetBeans, highlighting the benefits and demonstrating how it enhances your development workflow. Whether you're starting a new project or working with an existing app, this guide helps you leverage the power of Payara Server in your development process. Follow the steps in this blog to set up Apache NetBeans to use Payara Server for running your web apps.
If you haven't made a project to test yet, carry on to the first section of this guide. If you already have an app to run, then you can skip this section.
Creating a Test Maven Application
This first section will guide you through creating a Maven project which can be deployed to Payara Server. If you already have one in mind, you can skip to the next section.
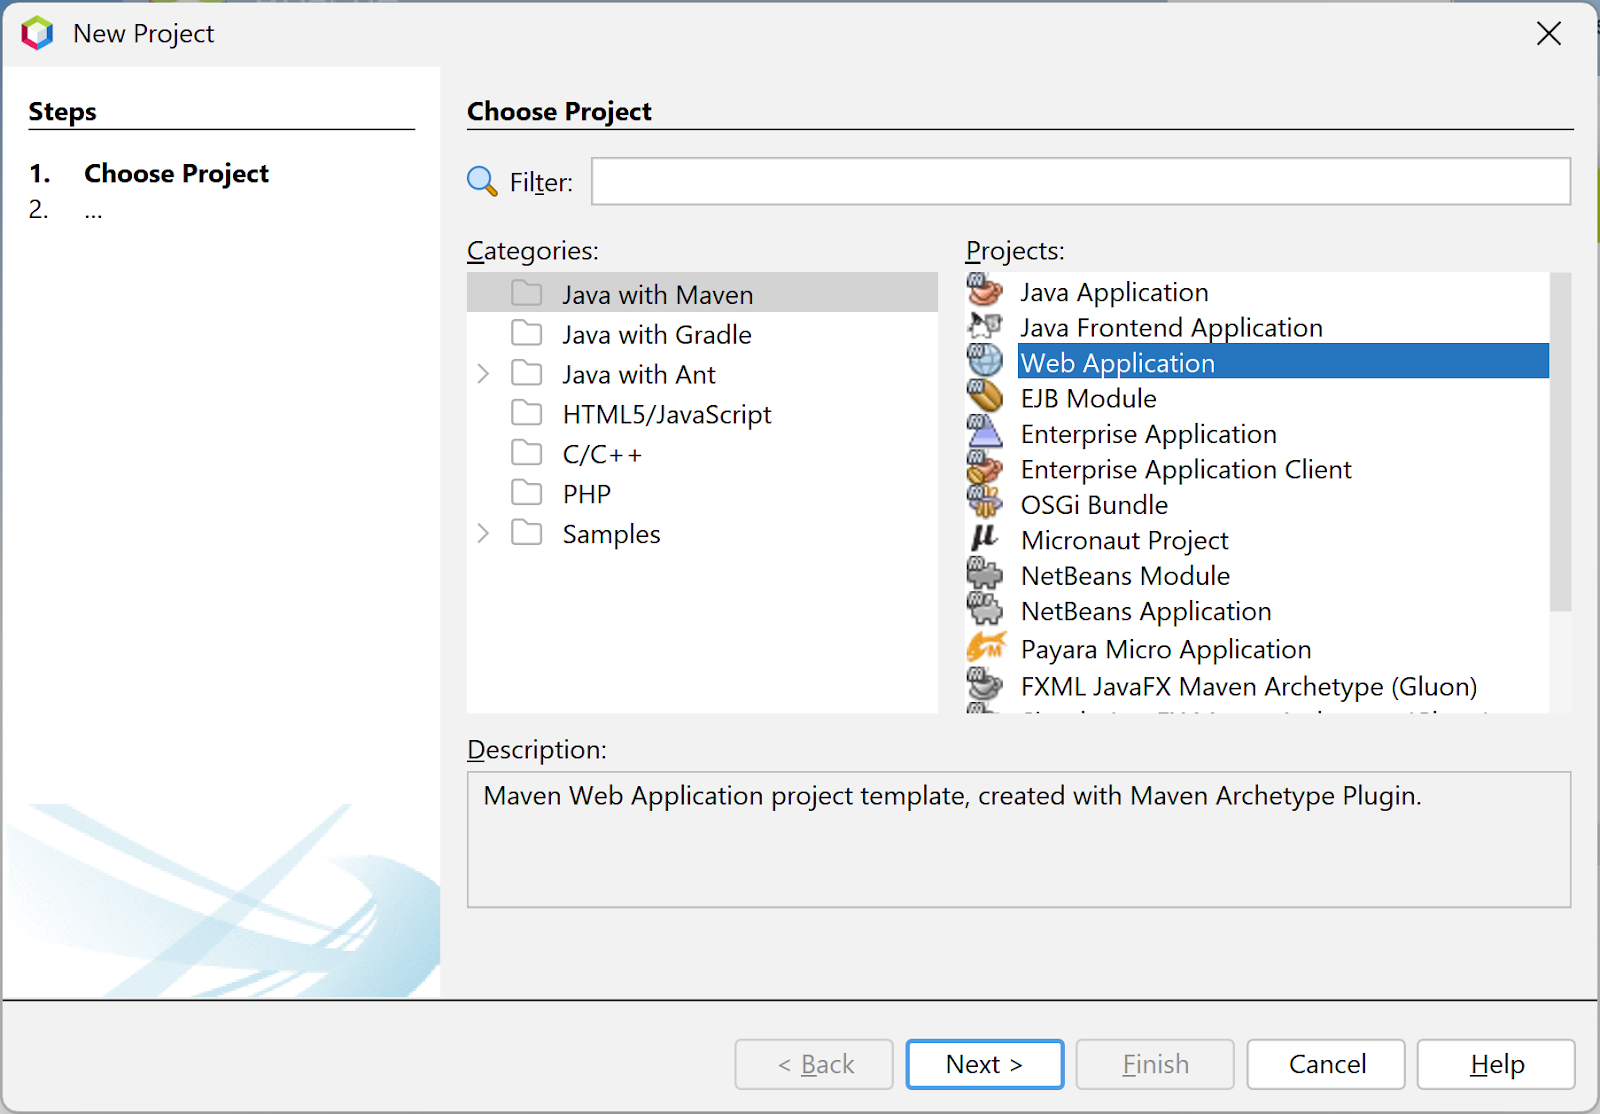
- First, create a project using the new project wizard. Go to the Java with Maven category, and select Web Application. Click next.
- Select a project name and location. The bottom 4 settings are for Maven.
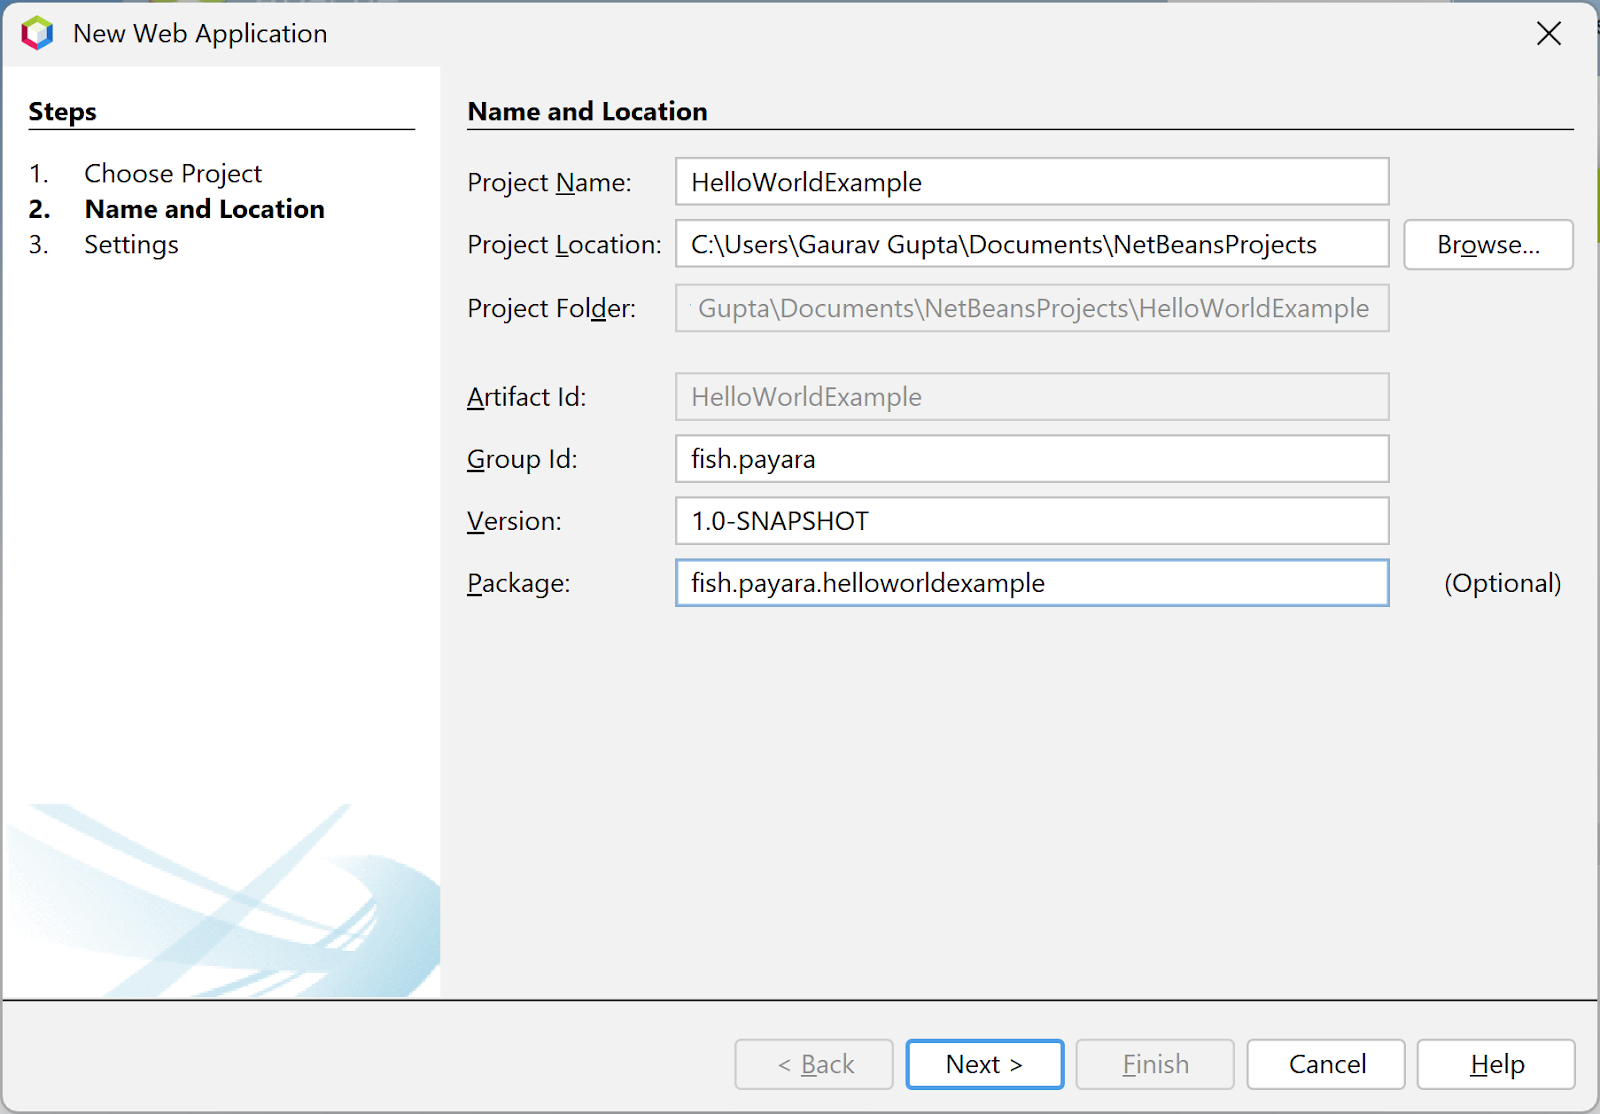
3. The final section will give you the option to select a server. You can select Payara Server here if it's already configured. If not, click Add and continue to the next section.


Setting up Payara in Apache NetBeans
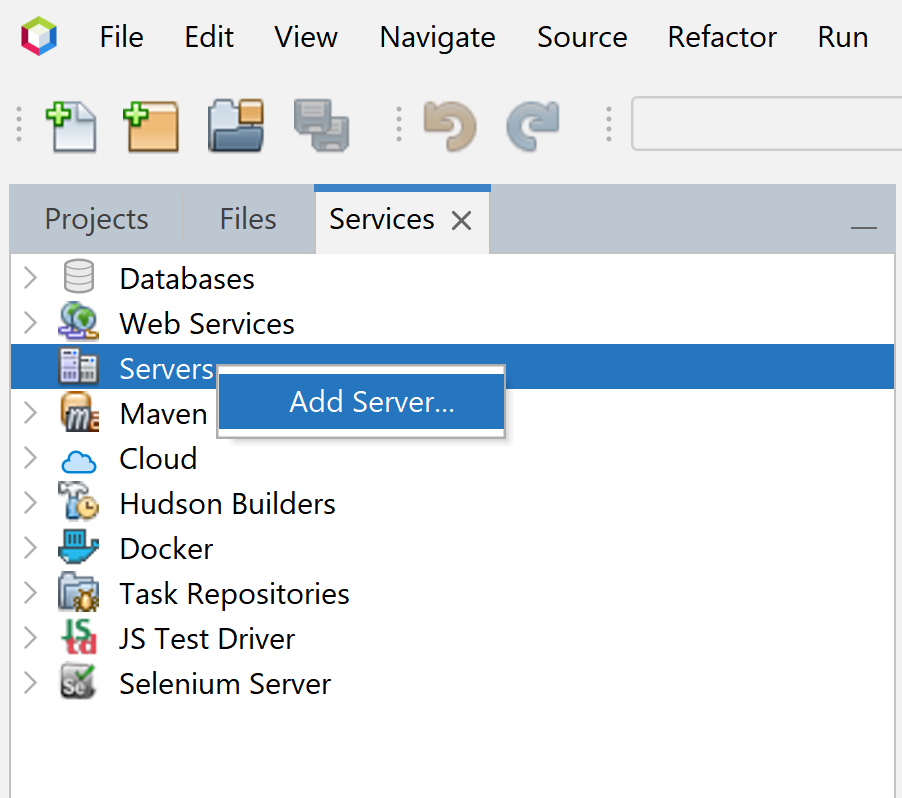
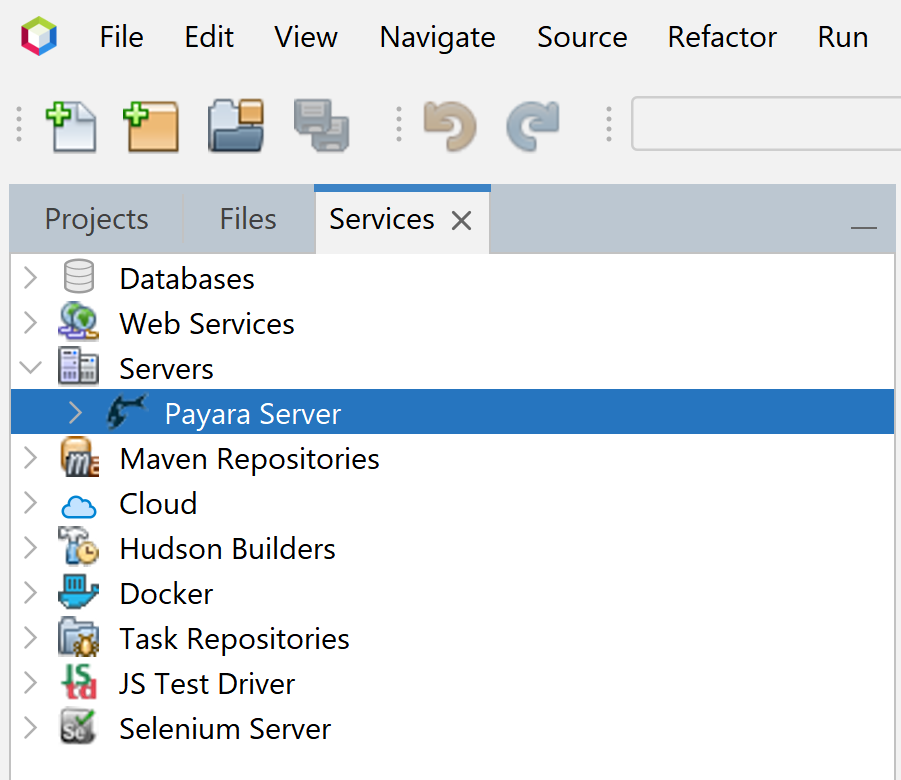
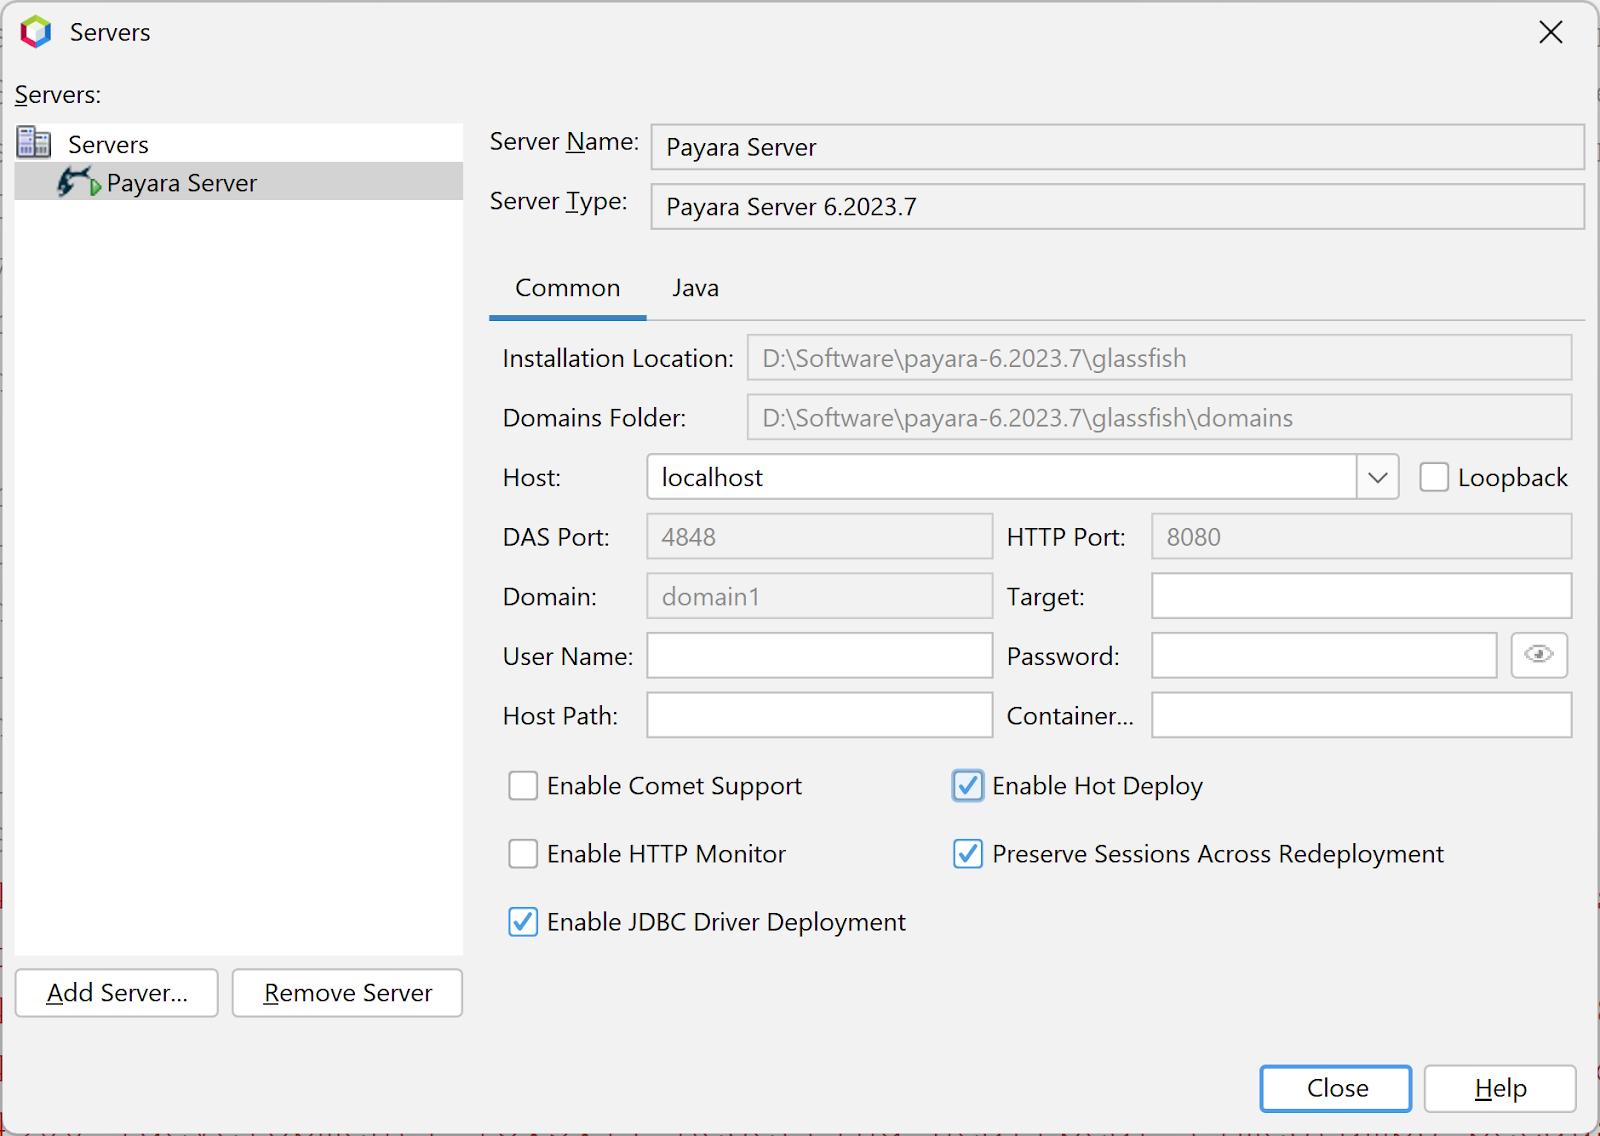
- Go to the Services tab or Tools menu → Servers and click Add Server (if you created a project as per the earlier section you're already here).
- Select Payara Server, and name the server whatever you want. For this example, I've named it 'Payara'. Click Next.


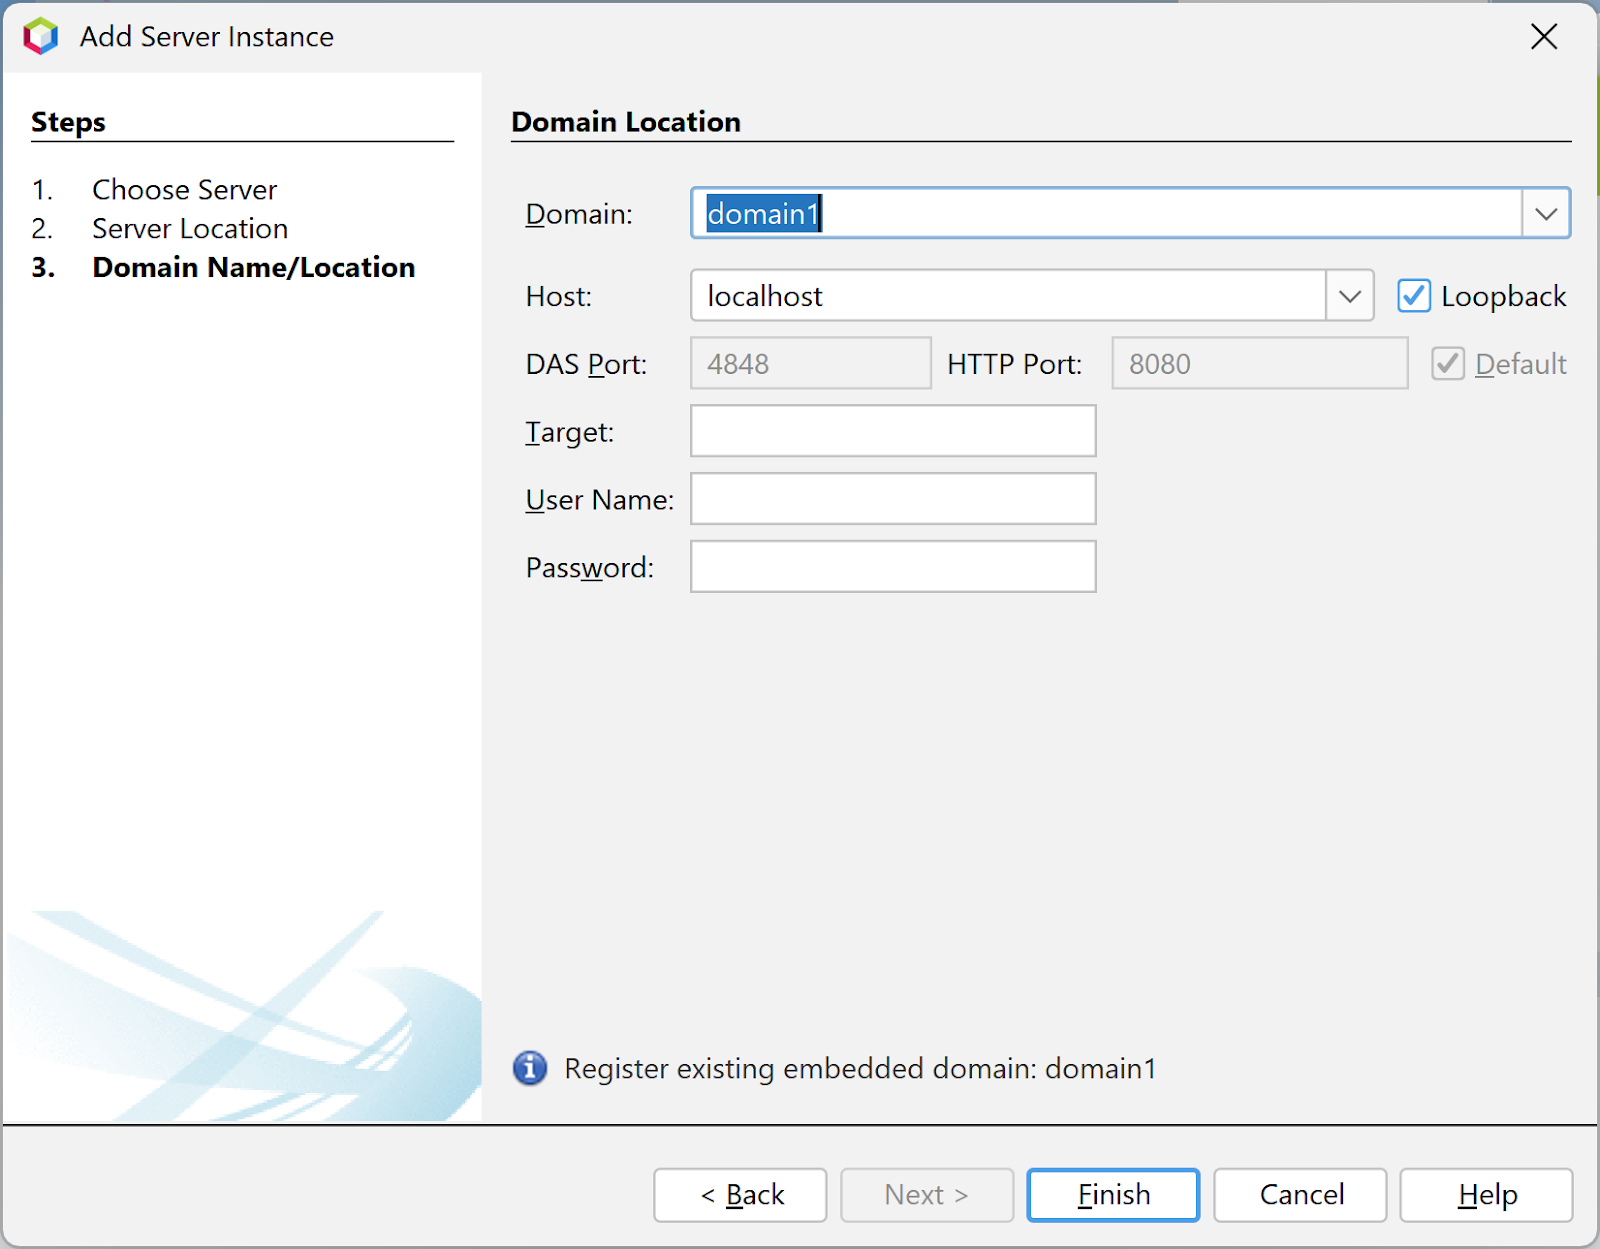
4. Select a domain. A domain is essentially a server at runtime. Unless you've created your own, you can use domain1 as it's the default domain. Enter admin as the username and leave the password field blank.
5. The server is now created!
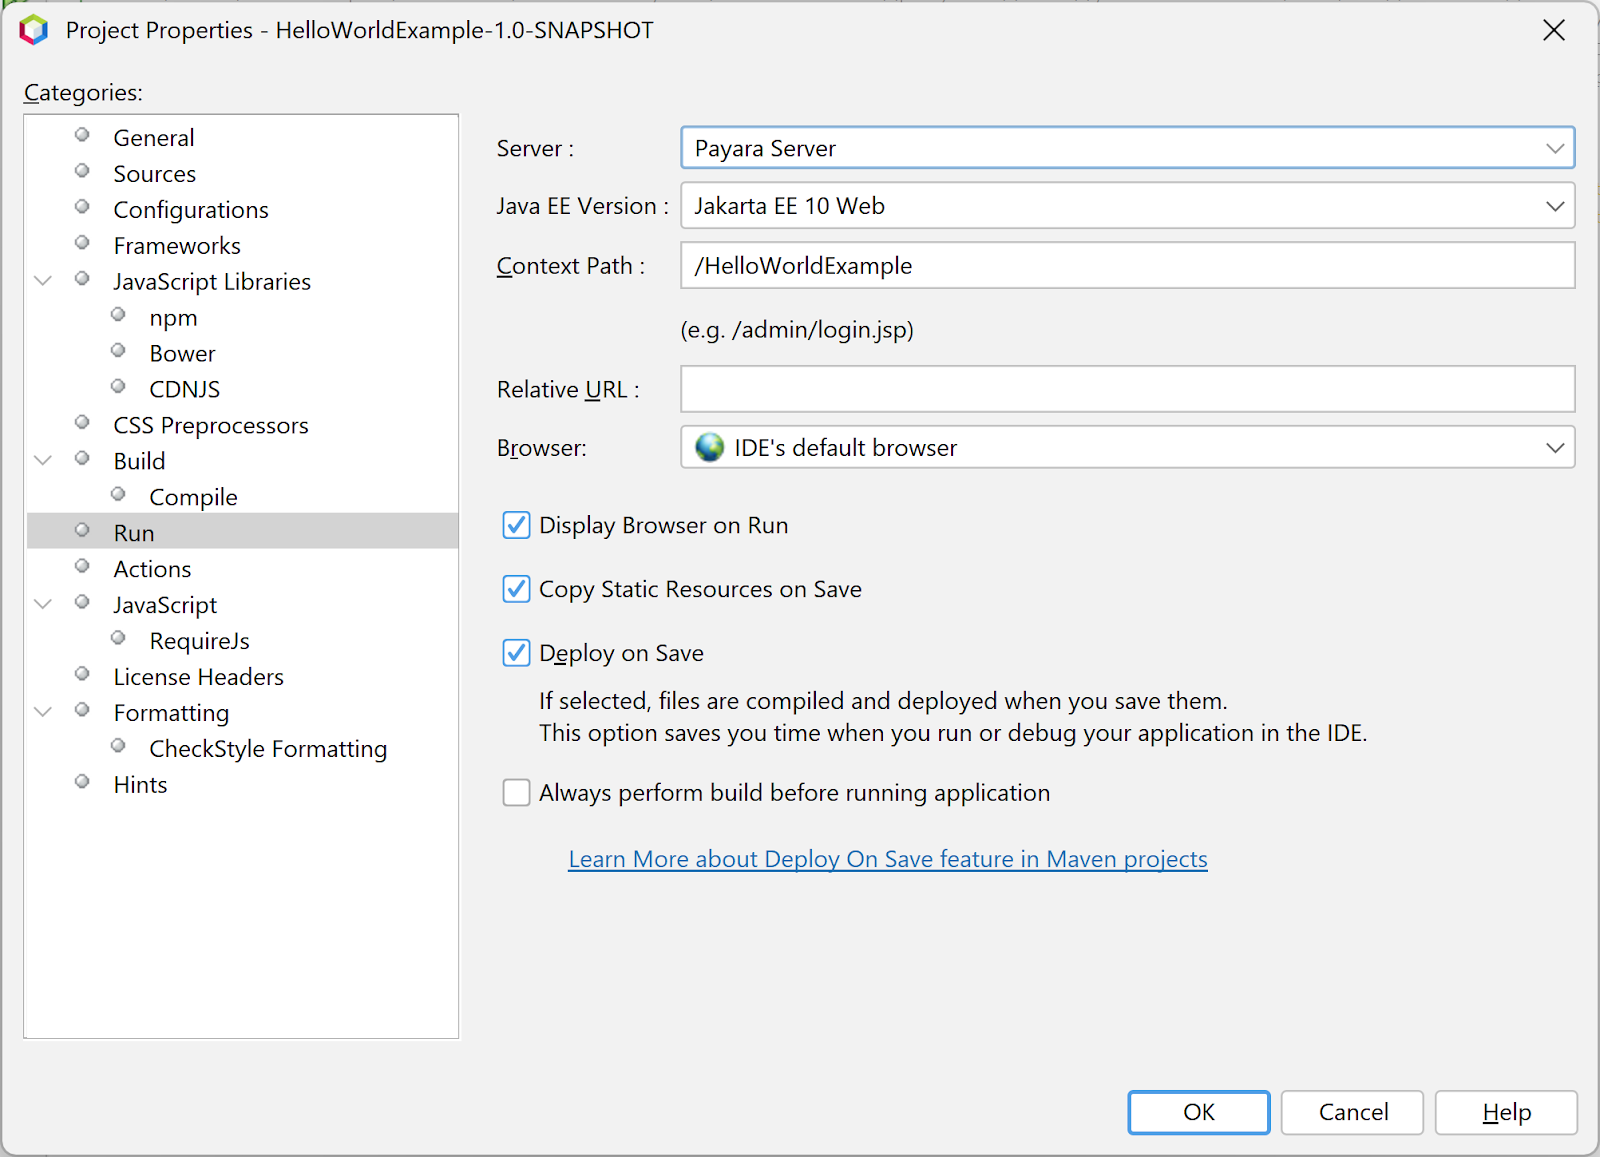
6. If you want to add the server to an already existing project, right-click the project and select properties. From this menu, go to Run and select the new Payara Server as a target server.
Running the Payara Server Application
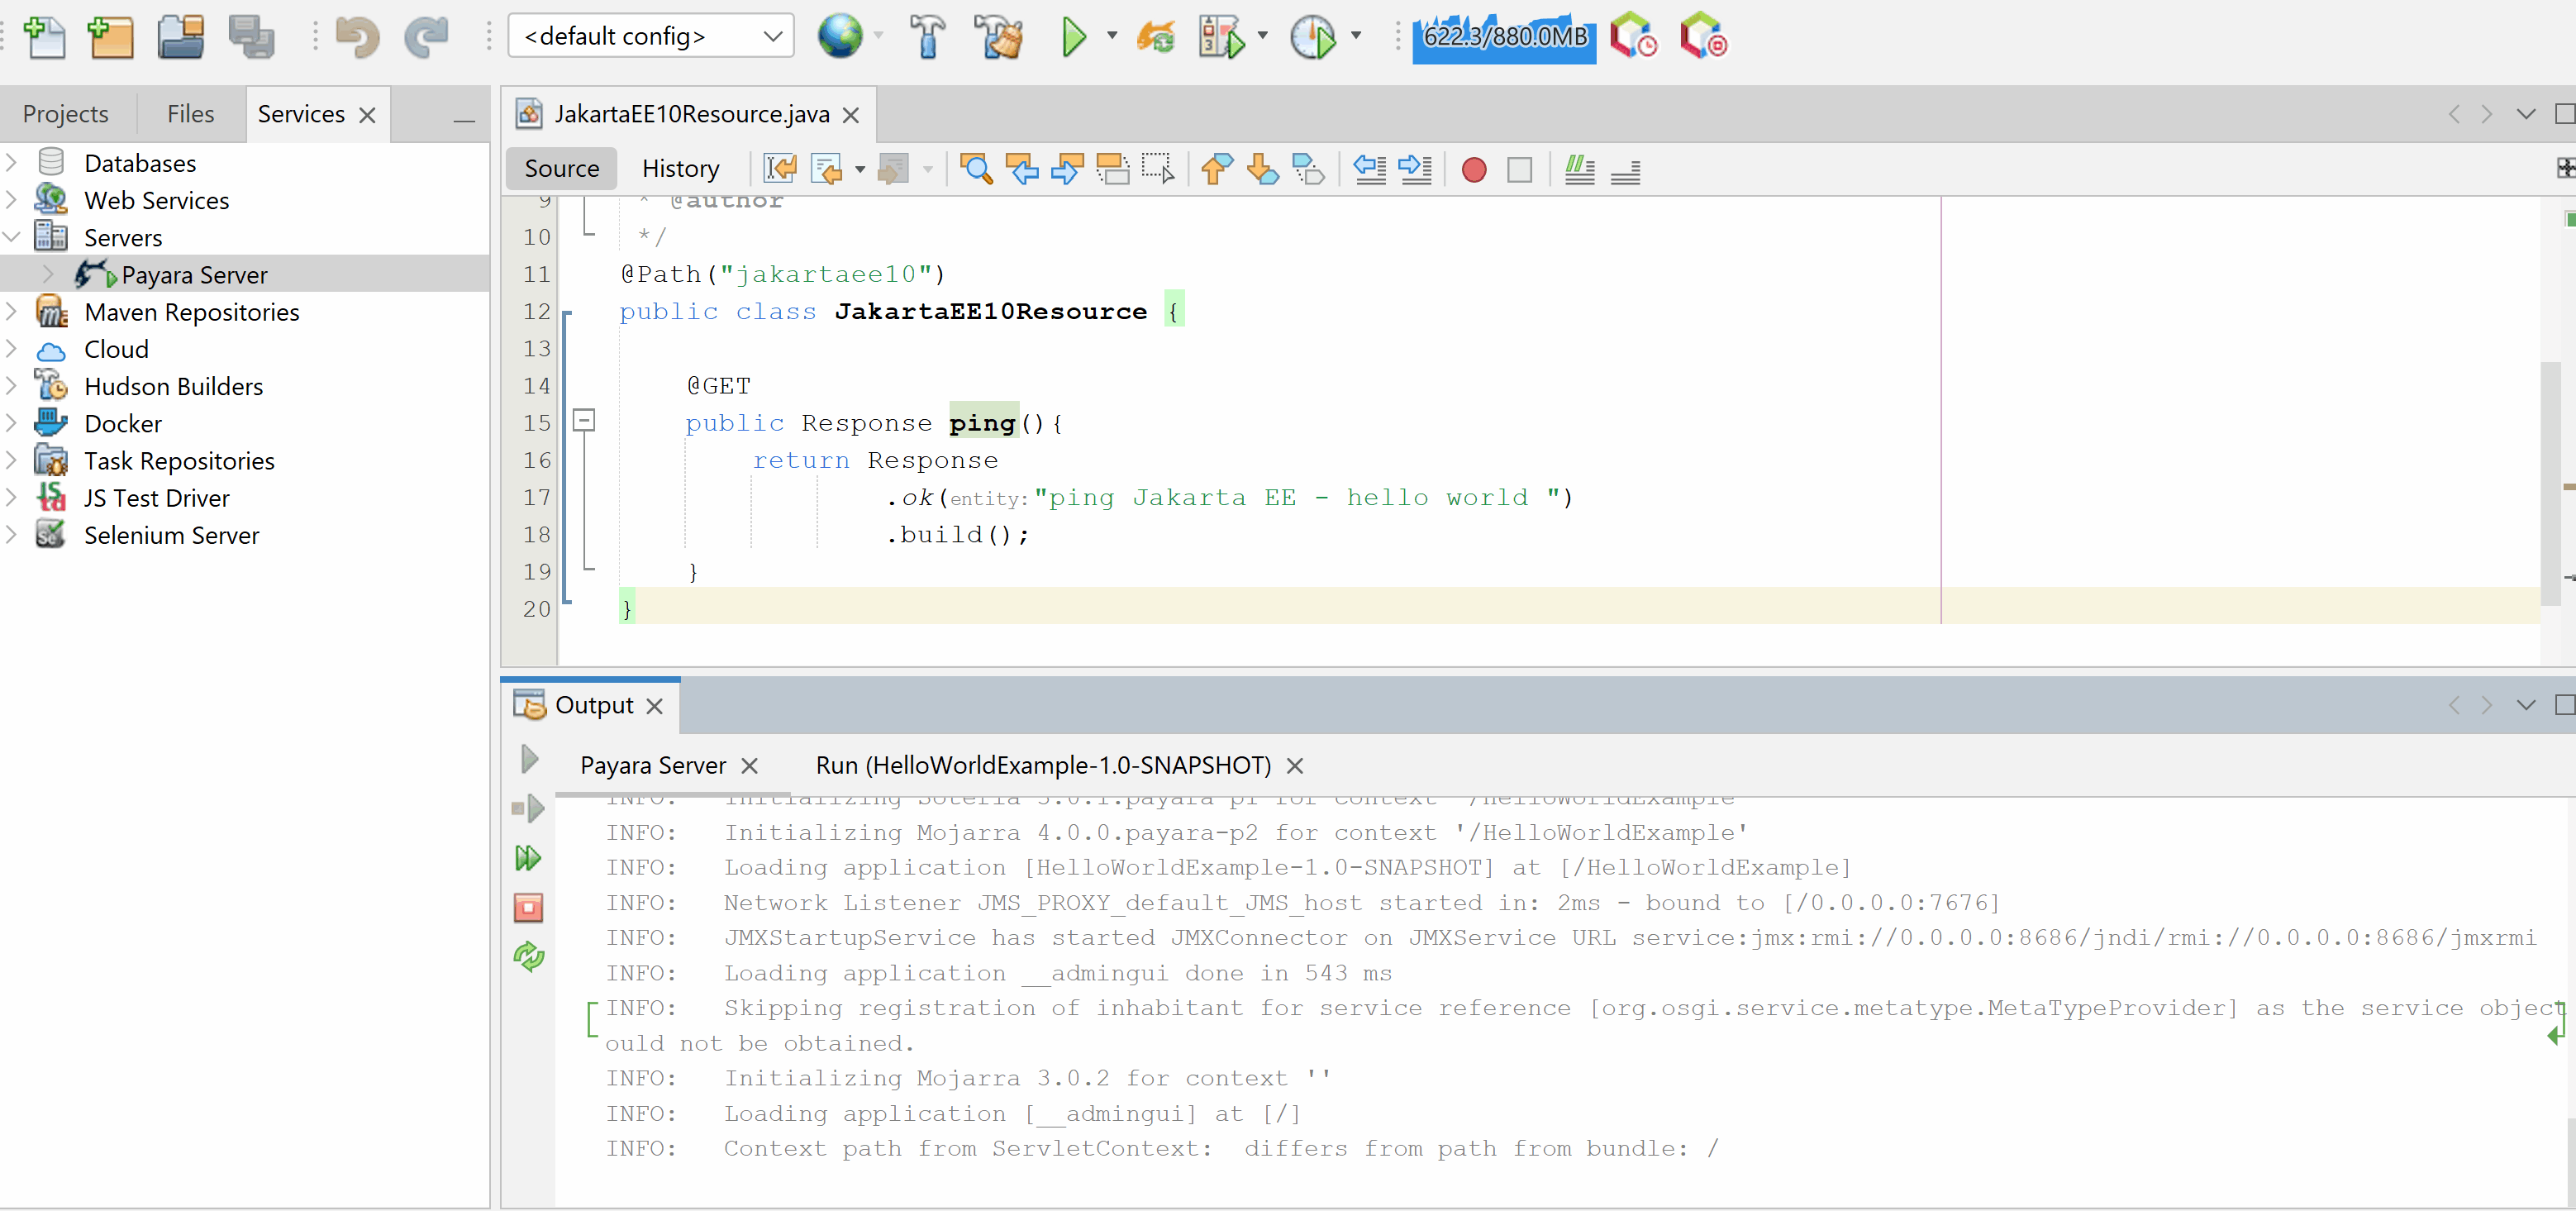
After closing this window, right-click on your project, and then select 'Run' (or simply click the green 'Run' arrow at the top of the window). The server will start up, and after a moment, you should be greeted with a 'Hello World!' message in your browser.
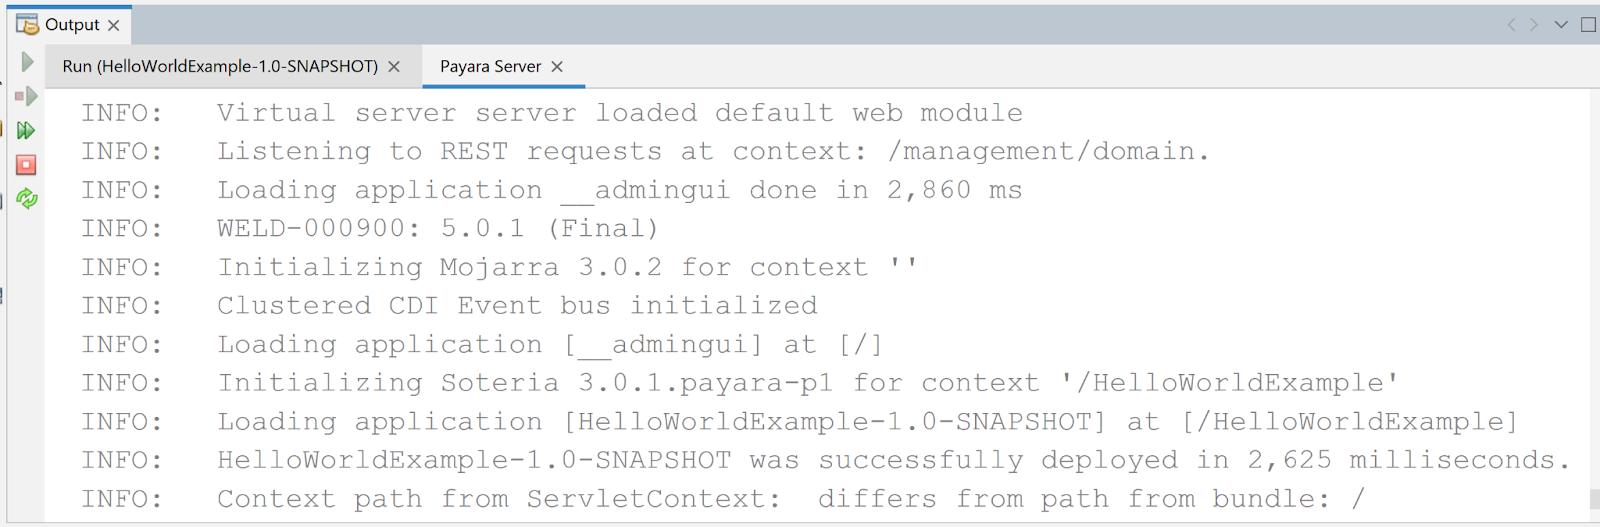

To stop the server, switch to the server log at the bottom of the window under Output → 'server name'. Click the stop sign in this window.
Debugging the Payara Server Application
Rather than selecting 'Run' from the right-click menu or the top of the Apache NetBeans window, you have the option to choose 'Debug' from similar locations. By doing so, the program will automatically run, and the debugger will be attached to Payara Server.
Hot Deploy the Payara Server Application
Payara Server allows IDEs to deploy the application in Hot Deploy mode by reusing the existing application instance and updating its classloader & internal components relative to the modified source. This can lead to significant savings of time when an application is redeployed and boost developer productivity even more.
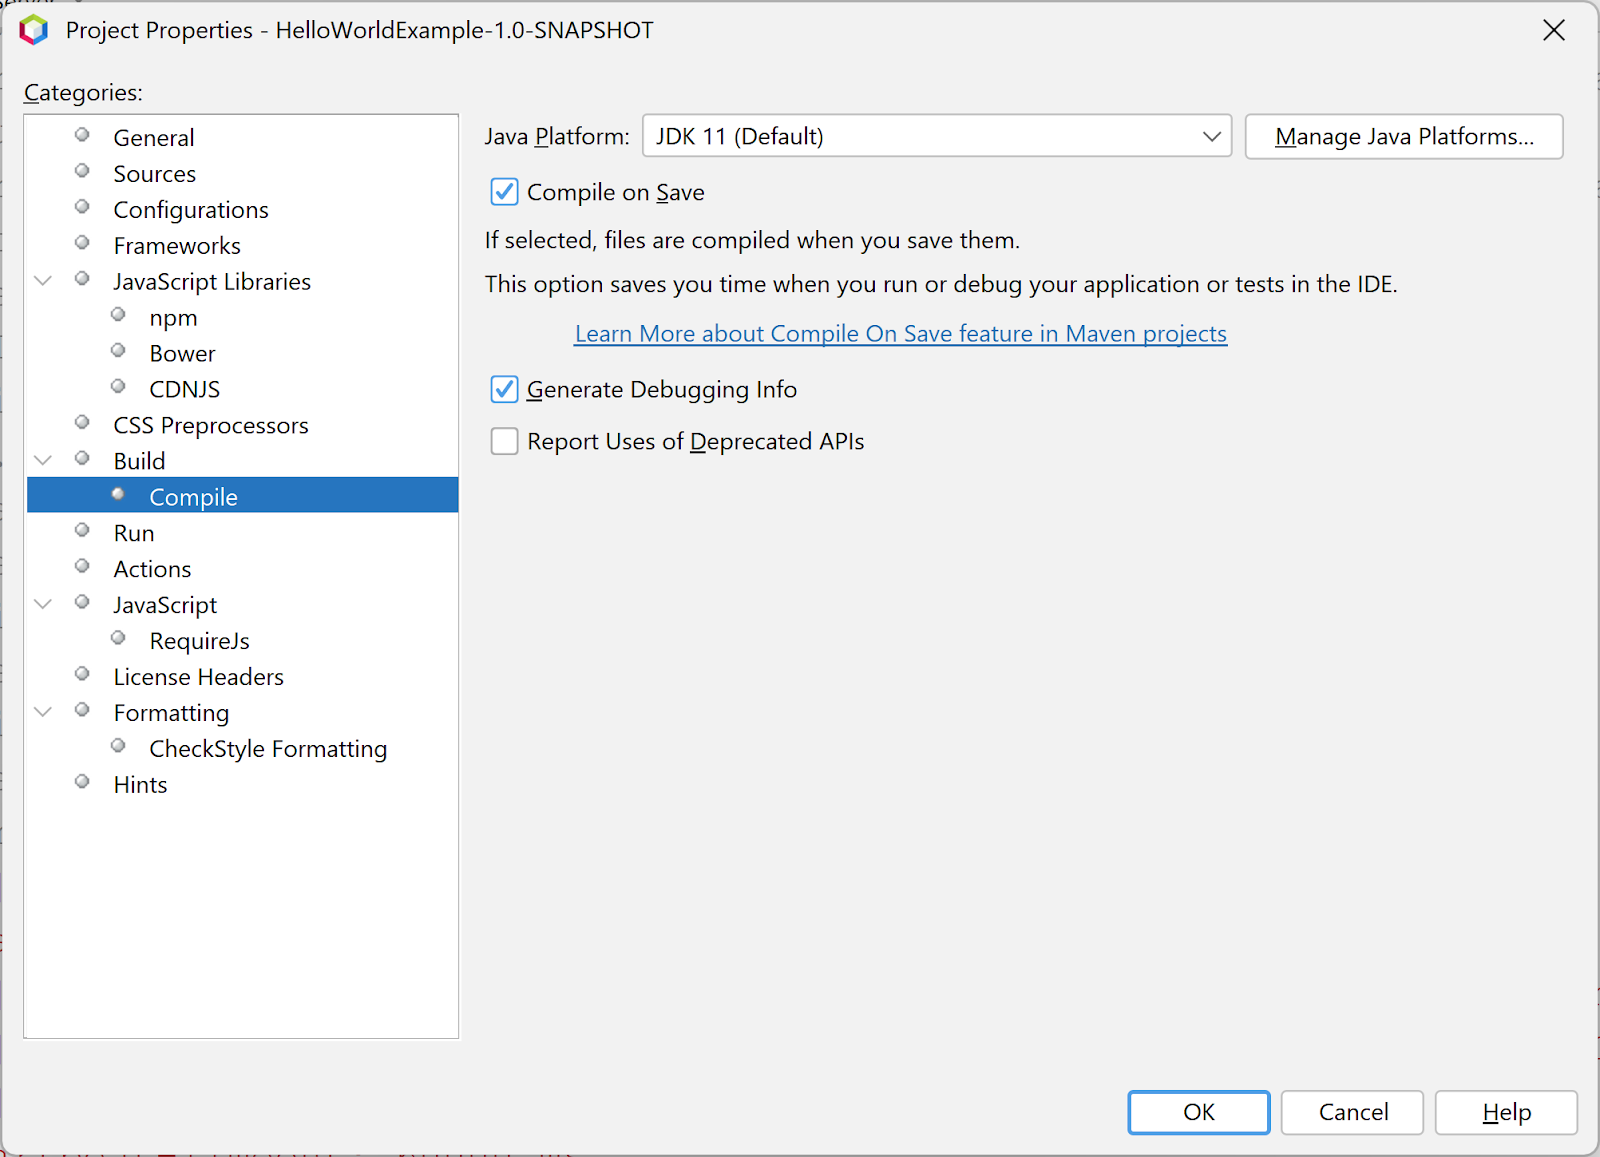
To configure the Hot Deploy feature, Go to Properties on your project and then the Compile section of this window to enable the Compile On Save feature.
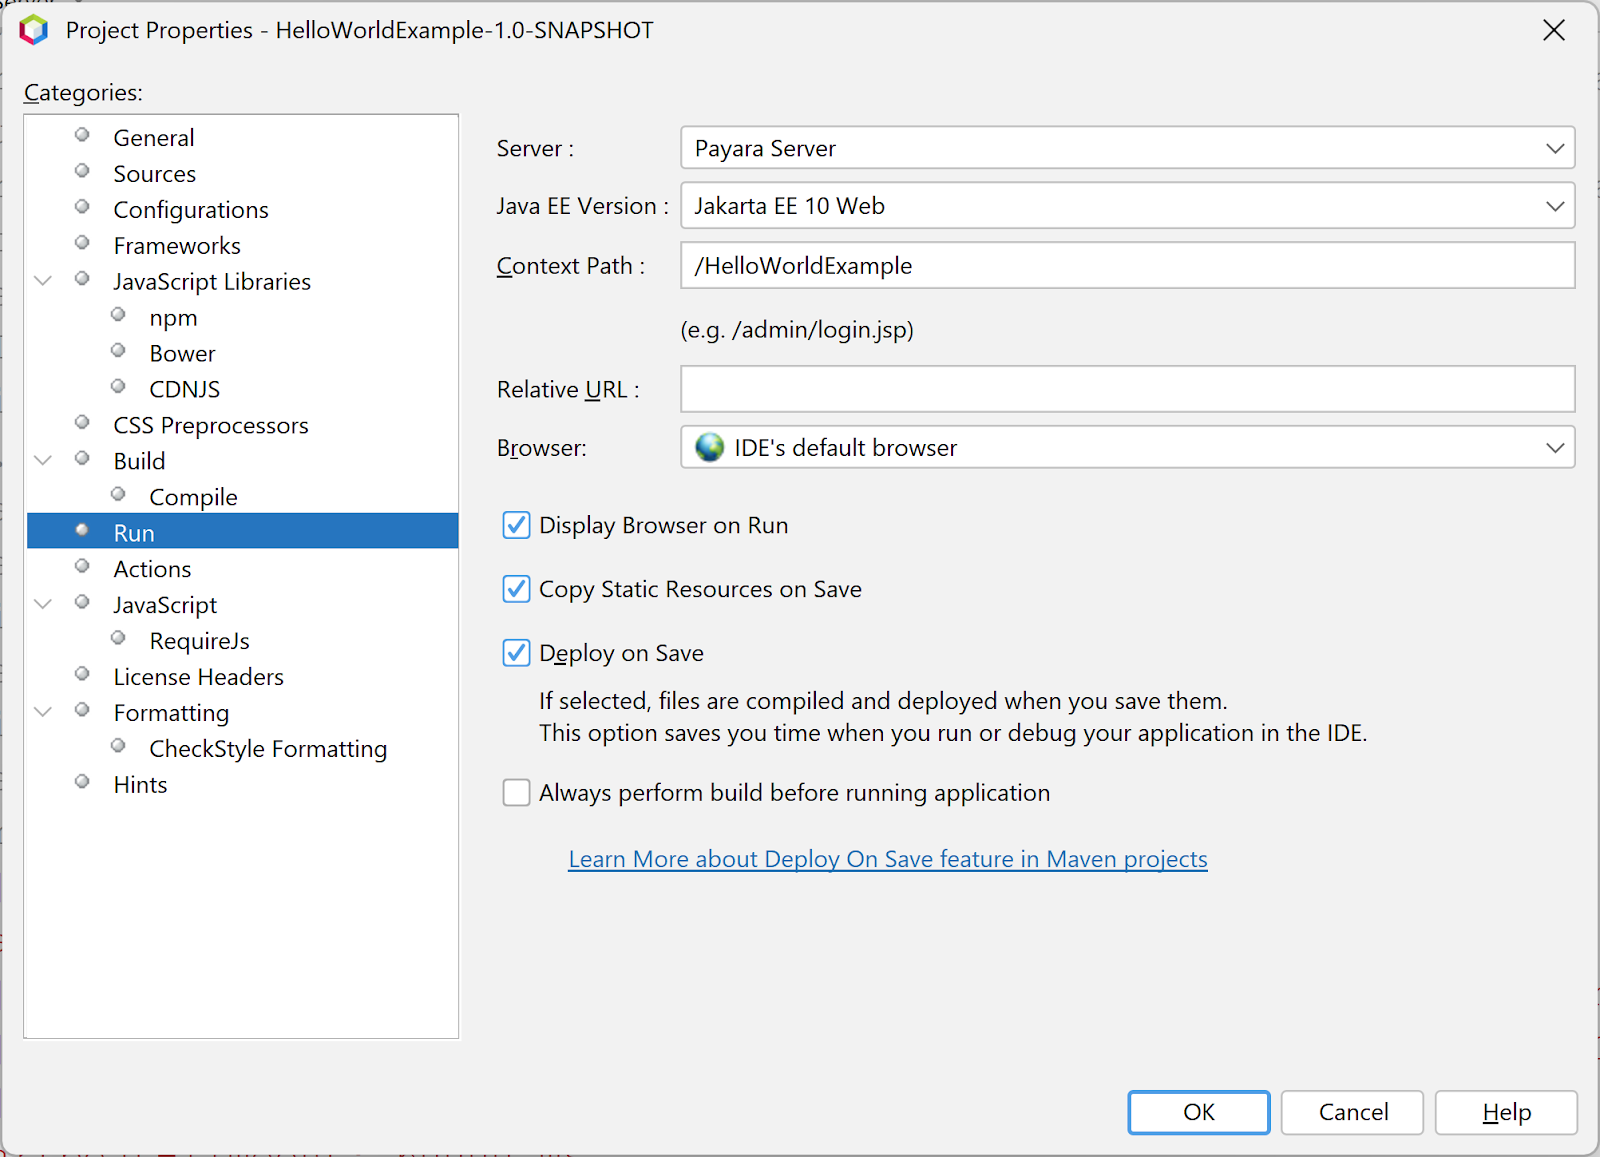
Once Auto Deploy mode is configured in the project, go to Services tab > Servers > Payara Server > Properties > enable the Hot Deploy option.
That's it! Now the Hot Deploy mode is enabled, and you don't have to restart or redeploy manually after each and every change.
Hot Deploy in Action
See the following screencast to compare the application redeployment time in the both Vanilla and Hot deploy mode:
After enabling the Hot Deploy mode, the redeployment process is optimized except for the first redeploy task which saves the application state.
Conclusion
That's how you can utilize Payara Server integration inApache NetBeans! By setting up your web application in Apache NetBeans, you can easily deploy, undeploy, and debug your application, along with other useful features, all from within the Apache NetBeans IDE.
Payara Enterprise.
Build Fast and Secure. ✅Supported.✅ Best for Jakarta EE and MicroProfile.✅
Related Posts
Boost Developer Productivity with Payara Server Maven Plugin + AI Agent
Published on 12 Sep 2025
by Gaurav Gupta
0 Comments

Managing Payara Server Just Got Smarter
Imagine managing your Jakarta EE applications not just with Maven goals, but by asking natural questions.
With the experimental AI Agent built into the Payara Server Community's Maven Plugin, you can ...
Securing Jakarta EE Application Servers Needs Executive Attention
Published on 10 Sep 2025
by Asif Khan
0 Comments
%20Application%20Servers-An%20Executive%20Guide%20Cover.jpg?width=500&name=Securing%20Jakarta%20EE%20(Java%20EE)%20Application%20Servers-An%20Executive%20Guide%20Cover.jpg)
If your organization runs Jakarta EE applications, securing the application server they rely on is not a one-time project. Risks repeat unless leadership sets clear priorities, funds the right controls, and expects steady progress. This post ...