
Originally published on 08 Dec 2017
Last updated on 08 Dec 2017

Taking our introductory series onwards, this blog will look at how you set up a simple Payara Server cluster on Windows using the native remote control protocol, DCOM. We will set up two instances on Windows 10, controlled by a third Domain Administration Server (DAS) instance on Windows 7 via DCOM, and cluster them together using Hazelcast. Finally, we will deploy our trusty clusterjsp application to demonstrate how the data is being shared across our instances.
Without getting into the debate on Windows versus Linux, Windows offers an easily navigable interface, solid backwards compatibility, and convenient configuration, which makes it as good a choice as Linux for our simple cluster. While we could go for the more straightforward route and install SSH via Cygwin to link our nodes, this blog will instead look at using DCOM. DCOM is natively supported in nearly every Windows release so is fairly backwards compatible - in this blog we will be using a Windows 7 host as our DAS, and two Windows 10 hosts as our nodes. DCOM is fairly fiddly to set up, so you'll need to follow these steps carefully - it's liable to not work at all if anything is out of place!
Please note: the steps within this blog should be used on an internal development environment ONLY; production deployments using DCOM should have the firewall and UAC settings properly configured!
We will first set up our DAS on Windows 7 with a fresh installation of Payara Server before using the DAS to remotely install Payara Server onto the pair of Windows 10 machines. We will then set them up as services and create our cluster before finally deploying our demo clusterjsp application.
Setting up the DAS
For this blog we have set up three new machines - one Windows 7 and two Windows 10. As these are brand new machines, we will need to install a JDK on each of them as well as configure them to receive DCOM before we can add them to our cluster. As in our previous blogs on Ubuntu 16.04, we will be making use of Payara Server's ability to archive its own installation and deploy it to the new nodes, which should save on a bit of setup. Finally, to add some permanence to our cluster we will be installing Payara Server as a service, to ensure that it can survive a reboot without manual intervention.
There are a few steps which will differ if you are on a 32-bit system. If you're not sure, it's worth double checking to avoid investing in future pain!
Installing the JDK
For a comprehensive guide on installing the Oracle JDK, see our blog on correctly setting up the Oracle JDK on Windows.
Installing Payara Server as a service on Windows 7
We are now able to download and install Payara Server as a service; head to our downloads page and download "Payara Server Full".
Once you have downloaded Payara Server, unzip its archive wherever you want the Server to be installed.
We will use a built in command to install Payara Server as a service on our hosts; open the Command Prompt, navigate to your unzipped file, and run the command below:
bin\asadmin.bat create-service --name "<Sensible Service Name>" --displayName "<Sensible Display Name>" <Domain Name>
This command defaults to "domain1", which is the default domain which we will be using, and which you don't need to specify by default. If you're using a different domain, add it at the end.

Possible Errors
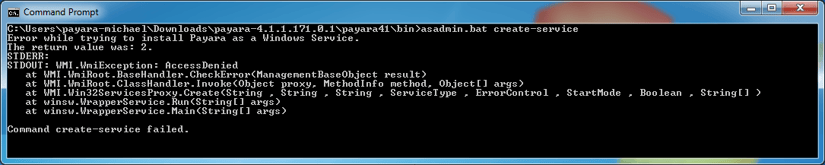
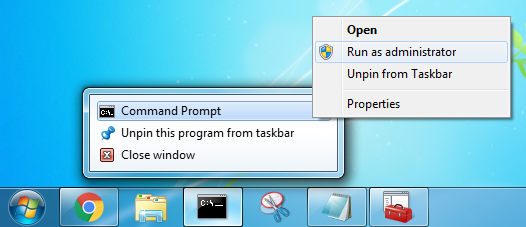
The command will result in a WMI error if you are running it in a command prompt which doesn't have administrator permissions. To open a command prompt window as an Administrator, right click the icon and select "Run as administrator". This will give you administrator permissions for anything you run in command prompt, so be careful.
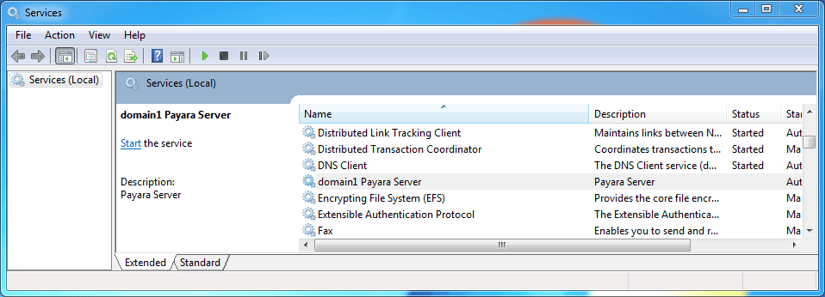
Payara Server will then handle all of the setup, as you can see from the weighty console output, creating but not starting a new Windows service. To start our new service, open "services.msc", find the service "domain1 Payara Server", and right-click > "Start" to get our domain started. Alternatively you can use the terminal to run the command below:
C:\<Your Payara Installation>\payara41\glassfish\domains\<Domain Name>\bin\<Sensible Service Name>.exe start
The service was created with a full Windows Service Wrapper, so Windows will automatically start your Payara Server on boot. This also means that you will need to use the Windows commands to start, stop, and restart the service (among other things); check your Command Prompt log for your specific control commands, or view the saved log at <Payara Server Installation>\payara41\glassfish\domains\<Domain Name>\PlatformServices.log.
Check that the service has started by going to the admin console (by default http://localhost:4848/).
Next, we need to set up our DCOM nodes on our Windows 10 machines.
Setting up Windows Nodes
Installing the JDK
Again, for a comprehensive guide on installing the Oracle JDK, see our blog on correctly setting up the Oracle JDK on Windows.
Configuring DCOM: Firewalls
To make our lives easier in this simple cluster we will disable the firewall completely. In a production environment, this isn't a great idea if your servers face directly onto the internet, but for our example it simplifies the configuration.
Otherwise, you need to configure your firewall to allow java.exe access, as well as ports 135, 139, and 455 for DCOM, NetBIOS, and Samba traffic respectively.
Open the Windows Firewall (wf.msc) with Windows Key + R:
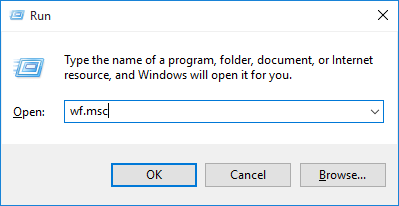
Once there, open Windows Firewall Properties, and for Domain Profile, Private Profile, and Public Profile set the Firewall state to "Off":
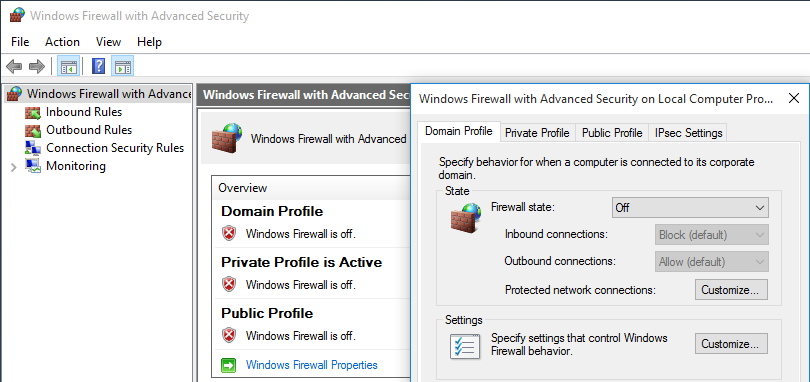
Please note that this is not secure, and should only be used within a safe environment!
Configuring DCOM: Services
To ensure that Payara Server can access and modify the node on the Windows 10 machine, we need to ensure that the "Remote Registry" and "Server" services are online and listening.
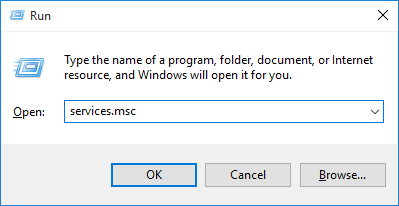
Open "Services" using Windows Key + R:
Scroll down to "Remote Registry", and check its status. If it's not running, right-click it to open its "Properties" dialog. Change its startup type to "Automatic", apply the changes, and then start it:
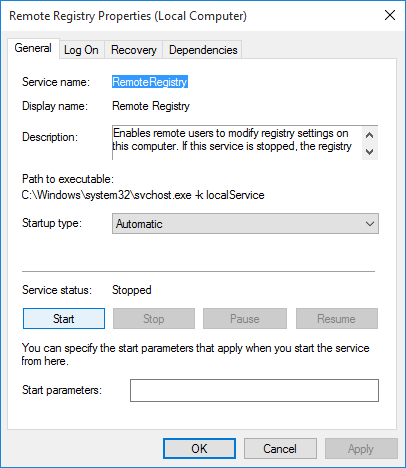
By default "Server" should already be running; scroll down to double check. If it isn't, go through the same process to get it running.
Configuring DCOM: File Access
We will also need to finish allowing the DAS access to modify the files on the Windows 10 machine. To do this we will need to disable User Access Control, open up two keys to the user (whose credentials will be used by the DAS), and create a new key in the registry ("LocalTokenFilterPolicy") (set to true: "1") to allow the user to remotely run commands as admin.
Disabling User Account Control
On Windows, User Account Control is what creates the "Do you want to allow this application..." popup:
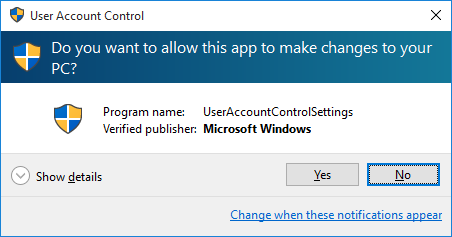
This is intended to stop programs from giving themselves permissions to install software and change your computer. However this also stops us from being able to remotely manage our server, and so it must be removed. You can open the user account control settings by simply typing "User Account Control" into the Start menu, which will bring up this dialog:
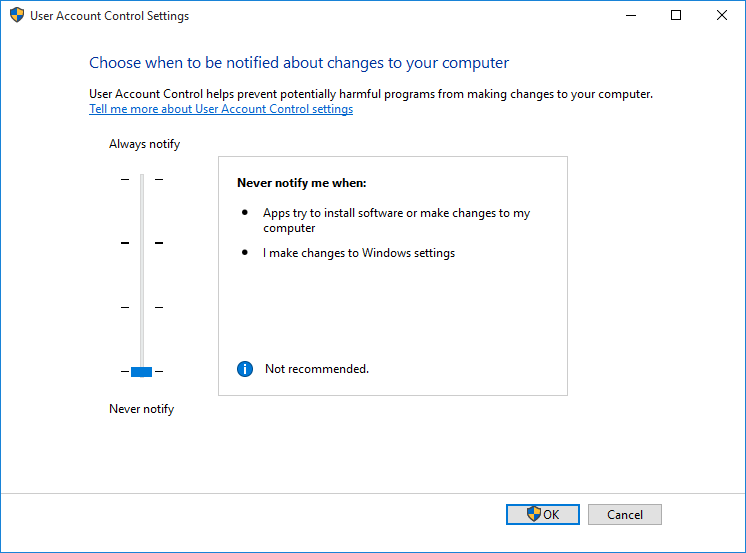
Disable User Account Control by dragging the bar to the bottom.
Setting the Key Permissions
To allow access to DCOM and WMI, we need to grant ownership and full control of two keys within the registry.
This is potentially risky, so back up the registry before you make any changes once you open the registry with File > Export, remembering to select "Export Range: All".
Open "regedit" using Windows key + R:
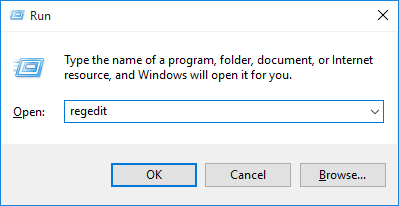
Open "HKEY_LOCAL_MACHINE", "SOFTWARE", "Classes", "CLSID" (this may take some scrolling).
There are two keys here which we care about:
- {72C24DD5-D70A-438B-8A42-98424B88AFB8}
- {76A64158-CB41-11D1-8B02-00600806D9B6} (64 bit only)
If you are on a 32-bit machine, you will instead need to edit HKEY_LOCAL_ MACHINE\SOFTWARE\Classes\Wow6432Node\CLSID\{76A64158-CB41-1 1D1-8B02-00600806D9B6}
As an aside (in case the keys seem arbitrarily ordered) these keys are written and sorted in Hexadecimal: so A is 10, B is 11, and so on.
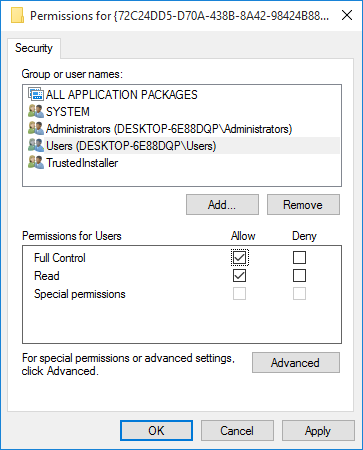
We need to allow the user (in our case, payara-michael) full control over both of these keys in order to access DCOM.
Right click the key, and select "Permissions":
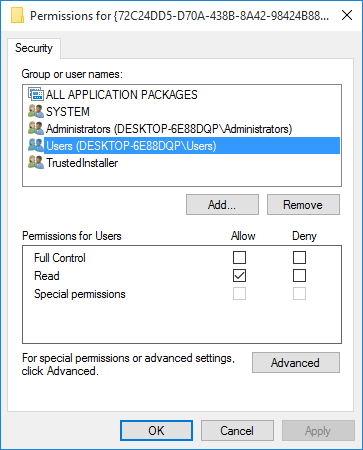
As you can see, the "Users" group does not have full control over the key and we can't change that as "TrustedInstaller" still owns the key.
To change the owner of the key, click on "Advanced" to open up yet another dialog. Here we can change the owner:
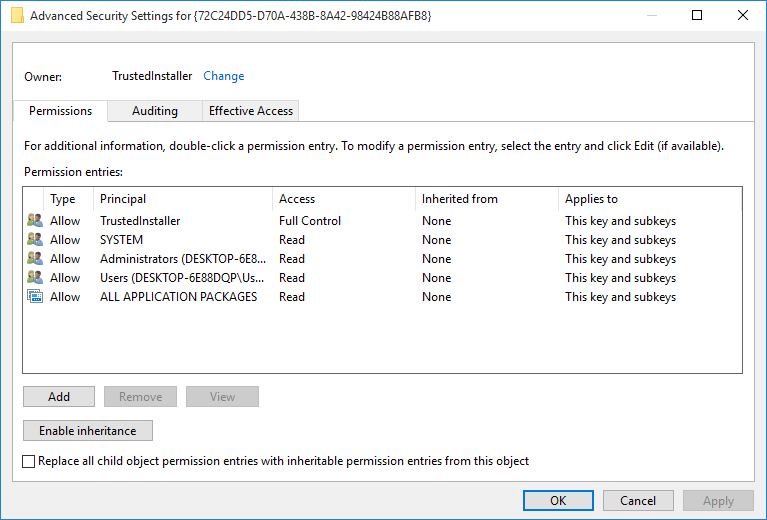
Click change to get our final dialog open and type in either the user name (which must be the same as the one intended for the DAS) or the group (i.e. "Administrators"):

"OK" that and then, before you apply the changes, make sure that you select "Replace owner on subcontainers and objects".

We are now free to allow Users Full Control over the Key and its sub-keys:
Repeat this process for the second key.
Granting DCOM full access
Finally we need to add the new token to fully allow access through UAC. Please be aware, this will completely disable UAC globally and allow local programs to be run remotely with administrator rights. Unfortunately, that's exactly what we need to have to run Payara Server, which is all the more reason to use a password alias and a secure connection.
Going back through regedit, we need to open "HKEY_LOCAL_MACHINE\SOFTWARE\Microsoft\Windows\CurrentVersion\Policies\System", which will entail a lot of scrolling.
Select "System", then right-click the right pane to add a "32-bit word" as our key:
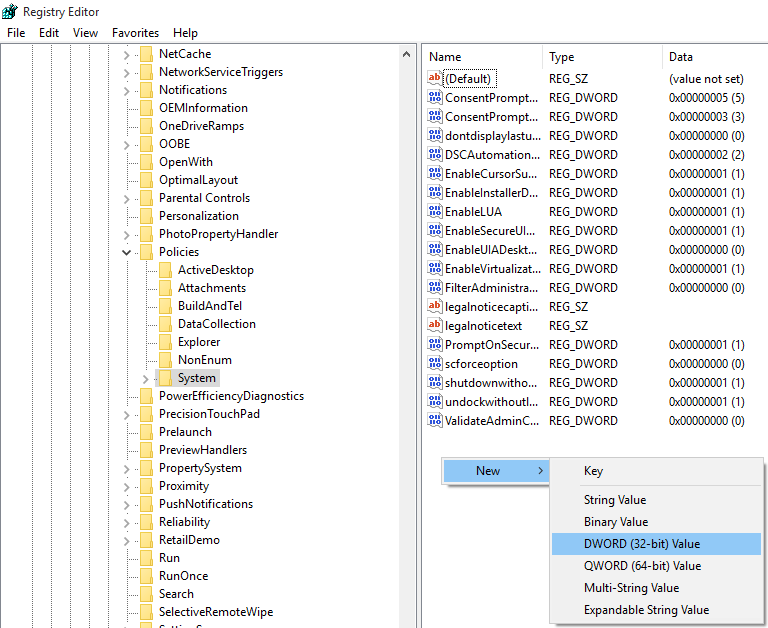
Name the new key "LocalAccountTokenFilterPolicy":
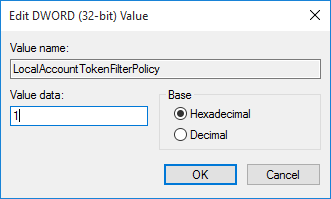
Right-click the new key, select "Modify" and give it a value of "1" to enable it:
Payara Server is now able to get through the firewall, access the administrative file share, and create the node without being interrupted by Windows security. That wasn't really a joke, please only do this on a secure network!
Setting Static IPs
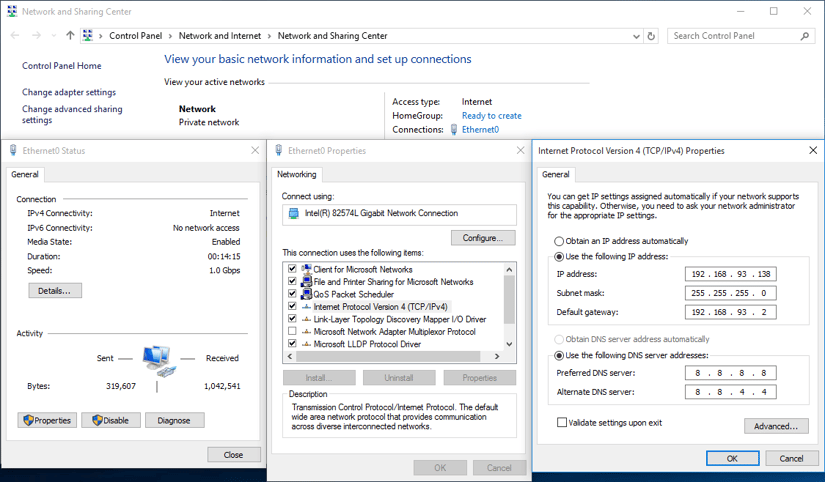
In order to make our lives easier, we will also disable DHCP and give all our machines static IP addresses. This will make it easier to identify where everything is on the network. While this may become unwieldy with larger clusters, with our two nodes this will suit our purposes just fine.
Open the Network and Sharing Center, select your connection ("Ethernet0" in our case) and select "Properties" on the window that pops up. Highlight "Internet Protocol Version 4 (TCP/IPv4)" and click "Properties" again, and on this final window you can enter your new connection details.
That's all the DCOM configuration we will need to do on the Windows 10 hosts - set up the second Windows 10 host in the same way (but with a different IP address!) and then we will go back to the DAS on our Windows 7 host to install Payara Server.
Now that we have gone to the trouble of setting this all manually, there is a command "setup-local-dcom" which can do a large part of this setup for you. However we found it easier to go through manually, which will come in handy should you run into any errors later in the blog, as the large majority of potential issues stemmed from what we set up here.
Installing Payara Server on Windows 10
Just as with Windows 7, installing our Payara Server instances couldn't be more painless. As our instances on Windows 10 will be linked to the DAS, and we have already installed Java on both machines, we can install Payara Server remotely. However, unlike our Ubuntu cluster we have a little more we have to do locally on the nodes, so don't abandon them yet!
Again, if you have been following our previous blogs, remotely installing Payara Server should now be a familiar process. First we need to create a node on each of the remote machines and simply tick the "Install Payara Server" box, and then we can add our instances. As before, we will use a single configuration for both instances to make our lives easier in the future by centralising the configuration. However, before we get into all that we need to the last of our wrestling with DCOM out of the way.
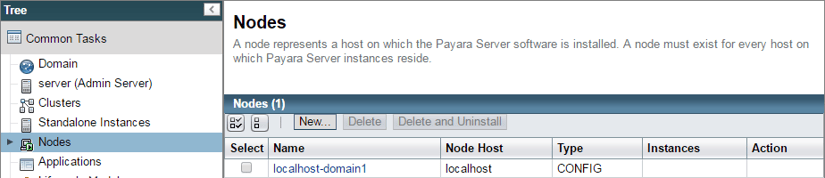
Configuring the Nodes
On the DAS on our Windows 7 machine, go to the Admin console and select the "Nodes" page from the page tree. Click "New..." to go the the node creation screen.
To configure the DCOM settings for the node, select "DCOM" from the dropdown. As this is a simple three host cluster we will use the static IPs we configured earlier to locate our hosts, which we enter into the "Node Host:" field. As in the previous Ubuntu blog, we will select "Install Payara Server" to save us the trouble of doing it ourselves. This option will create a Zip archive of the local Payara Server installation and send it to the remote node, ensuring that all of our instances will be running the same version of Payara Server, including any local modifications.
For the DCOM specific section, DCOM uses the same authentication as the remote Windows host - enter your remote username and password. In a production environment, DCOM supports the use of aliases to passwords stored in an encrypted file, which is more secure than a plaintext password which may appear in the config within the domain.xml. For more details, run the command "create-password-alias help" in asadmin.
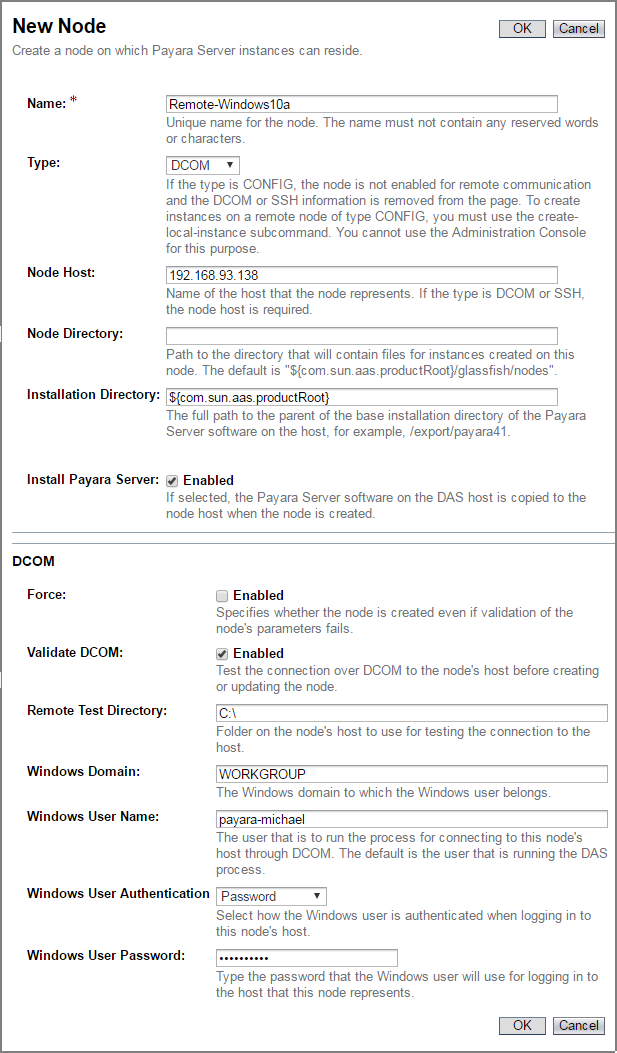
Do this again for our second host.
Possible Errors
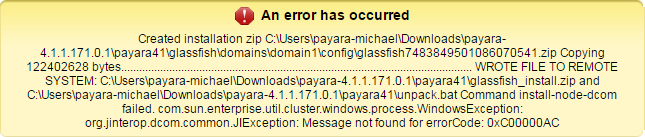
This error (0xC00000AC), where the Payara Server zip was successfully sent to the Windows node but not unpacked, was due to User Account Control still being active. Adding the key alone is not enough; User Account Control must be disabled.
Alternatively, this error can sometimes occur when changes to User Account Control and other values have not yet been applied; the tried and tested turn it off and back on again should fix that.

This error (where the DCOM validator was able to write files but not delete them) appeared when the "Remote Registry" service was disabled after a restart. Re-enabling the service from "services.msc" fixed the issue.
There are a few variants on this issue, such as failing to connect to the DCOM port, NetBIOS session, or Windows Shares. In order, this is caused by the firewall blocking 135, 139, and 445. The simplest and least secure way to remedy this is to turn off your firewall or to specifically allow java.exe access - otherwise you will need to create a specific rule. For this guide, I only used the default windows firewall; if you have another product in its place you will need to make allowances for that as well!

This lengthier error was displayed after a connectivity issue; retrying was enough to resolve it. The installation of Payara Server was successful, but for whatever reason it was unable to access the local rest endpoint. Thankfully all of the data remains on the node page, so pressing "OK" again was enough for it to work.

If you see this, double check the URL and other fields. If they are correct, the "–force" option will force the values to update, even if they fail validation, with evident issues if they remain incorrect.
Setting up the Instances
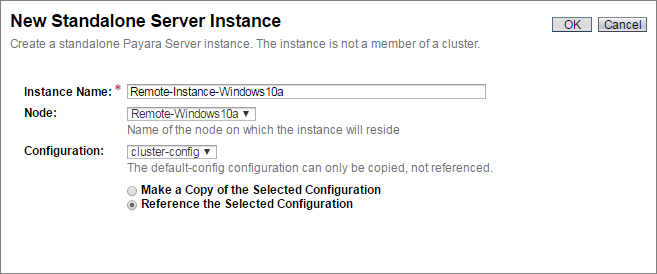
Now that we have both nodes configured, we just need to create the instances which will host our application. As with our previous blog, we have created a cluster config which both instances will reference, to make the cluster easier to administrate.
Go to the "Standalone Instances" page on the page tree, and select "New..." We will be using the same config for both of our nodes - the systems are the same, and it would add a lot of overhead to any change we make if we have to replicate it across two configurations, so we will choose to "Reference" our configuration.
With the first created, create another standalone instance for the second node.
Before you start the instances, you will need to go back to each of the Windows 10 nodes. Open your Payara Server installation and go to the nodes folder. There you will need to create a folder called "agent".

Within this folder, you will need to create another called "config".

Finally, within "config", you will need to create a das.properties file. Create a new file, ensuring that the extension is not ".txt", which Windows helpfully adds and hides. You can tell if there is a hidden extension if the type is listed as a "Text Document":

To display the full file path on Windows 7, press ALT on your keyboard to bring up the menu, select "Tools", go to the "View" tab, then uncheck "Hide extensions for known file types". On Windows 10 go to the "View" tab on the ribbon and check the "File Name Extensions" option.

Inside this file we need to have the details for the DAS server: its IP address, accepted protocol, port, and security setting. For our local cluster, this will be done simply and insecurely over http to the DAS on 4848.
#Domain Administration Server Connection Properties
#<Date for reference>
agent.das.protocol=http
agent.das.port=4848
agent.das.host=<IP address or translatable host name>
agent.das.isSecure=false
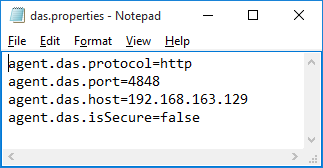
Save that, and our instances are ready to respond to the DAS.
Starting the instances
Now that the das.properties file has been added, the server will be able to synchronise the instances and get them started. Select both instances and start them.

Possible Errors

If you receive "Timed out" errors when starting your instances, in our case we found an incorrect das.properties file was the most frequent problem, especially if static IPs were unset. Otherwise, check your firewall and UAC settings just in case something has changed, as well as checking that Windows is using the JDK and not the JRE.
Installing the instances as services
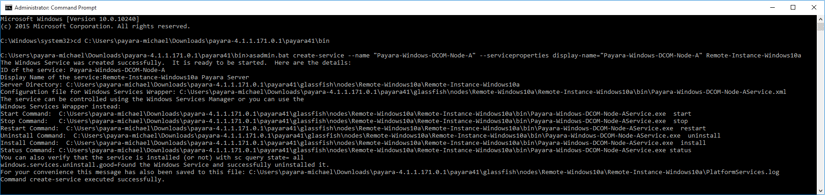
Now that the instances have been synchronised and started, we can install them as services. Stop the running instances from the console, and then switch back to the nodes. Setting an instance to run as a service uses exactly the same command as we used for our domain earlier, so open an administrator command prompt and use the following command:
bin\asadmin.bat create-service --name "<Sensible Service Name>" --serviceproperties display-name="<Sensible Display Name>" <Instance Name>
You'll now again be able to see the service in the Services window:
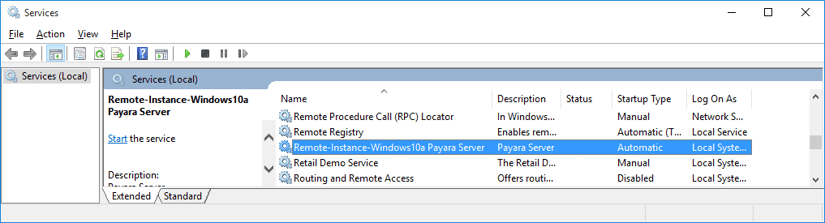
Once you're done, start them back up (or, to be safe, restart them and then start them back up).
Setting up Hazelcast
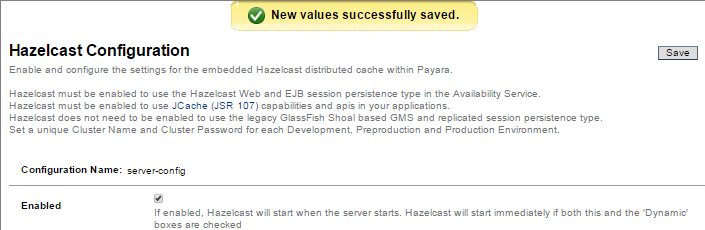
Now we have them set up, as services, with hopefully no errors, we shall set up our Hazelcast cluster. Go to our central config, "cluster-config" and select the Hazelcast link from the page tree. Once there, check the enabled box and save the configuration to dynamically activate Hazelcast on both our instances. The rest of the default values will be fine for now.
Proof
Deploying Clusterjsp
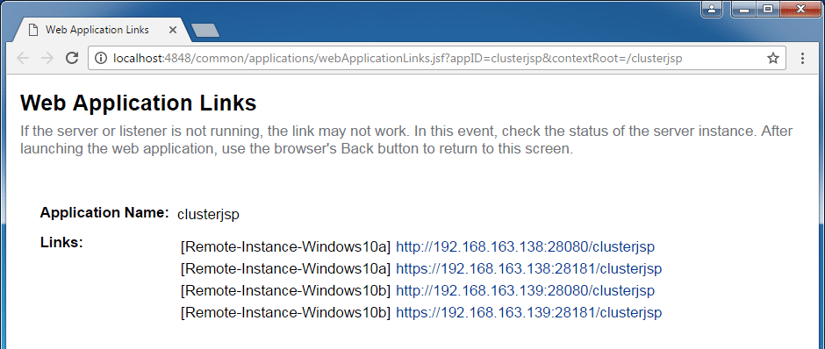
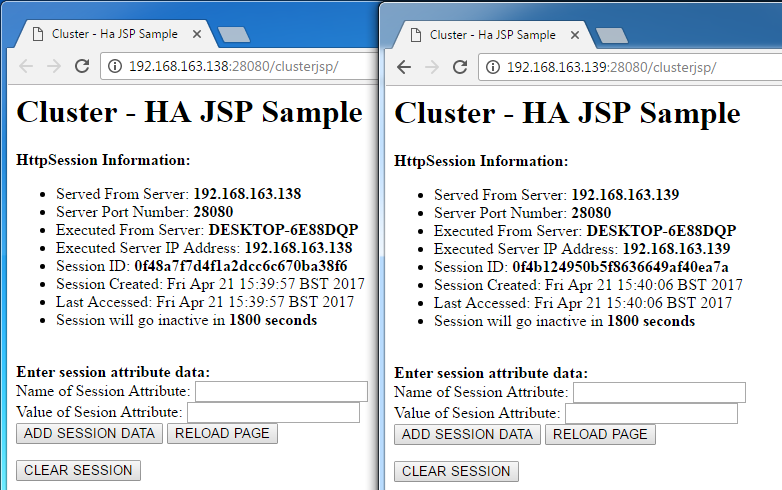
To demonstrate that we now have clustering configured, we shall again use the clusterjsp application from our previous blogs. Deploy clusterjsp to both of our nodes by going to the applications page, and select "Deploy...". Here we will be installing it on both of our Hazelcast instances, so at the bottom of the page select both instances as targets. Once you have this set, we are ready to go! Select "Launch" on the table of applications, and you shall be able to see both URLs to our application.
As you can tell from the URLs, they aren't the prettiest of things. See our other blogs for details on how you can make this more accessible by using Apache to act as a frontend (so in production your users would visit www.example.com rather than www.example.com:8080/clusterjsp), as well as automatically forwarding traffic to one of the available instances. For a nicely written example of doing this on Ubuntu, check out our previous blog on load balancing with Apache.
Possible Errors
"org.apache.jasper.JasperException: PWC6345: There is an error in invoking javac. A full JDK (not just JRE) is required"
If you get this Java error (just before you've finished!), double check that you've set the Windows Path to the jdk\bin, and restart the host.
And with that we have a brand new, mostly working DCOM cluster, with our instances installed as services, stable and ready to stand the test of time. There's a lot you can do to improve this basic cluster, from adding a more substantial frontend to balance traffic and have some friendlier URLs to further securing the DCOM connection, but this is a good foundation for developing on Windows. Remember, this blog looked at DCOM from within a development environment: if you are following this blog in order to deploy a production DCOM cluster, ensure that your firewall and UAC settings are correct, and that you have secure access to your server.
If you have any comments, feel free to post them below!

Related Posts
How to Kickstart Your Jakarta EE 11 Projects with Payara Starter
Published on 22 Aug 2025
by Gaurav Gupta
0 Comments

With Jakarta EE 11 now officially released, you are likely eager to explore its new capabilities but setting up your first application may take longer than you want. That’s where the latest version of Payara Starter steps in, giving you a fast, ...
How to Make Multi-Cloud Work
Published on 19 Jun 2025
by Patrik Duditš
0 Comments

Multi-cloud developments can offer real operational advantages. However, careful and strategic planning is key to maximize the gains. In fact, without clear operating models or setups, teams can experience costly missteps and cloud spent ...