Add Payara Server 5 to the Visual Studio Code Tutorial
Published on 03 Apr 2020
 by Gaurav Gupta
In this tutorial, I will explain how to add the Payara Server in the Visual Studio Code and deploy the maven web application to the Payara Server.
Prerequisite VSCode Extensions
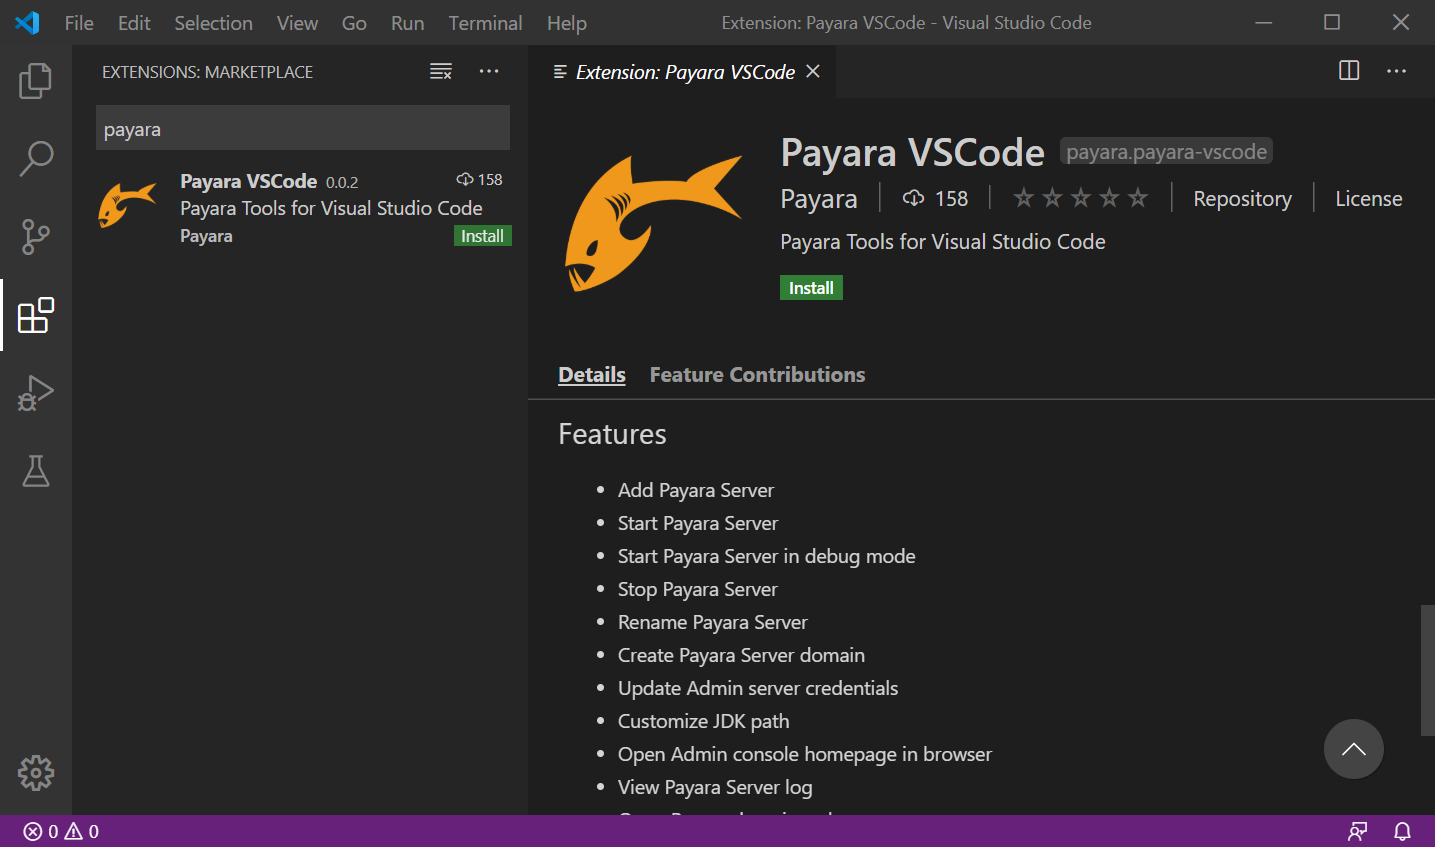
Before going through this tutorial, you must install the following extensions from the Visual Studio Code marketplace:
You can install extensions from Extensions view (Ctrl + Shift + X) in the activity bar of VS Code:
Creating a Web Application
Maven is the most widely used project build and dependency management tool in the Java ecosystem. So in this tutorial we will generate a Maven Web Application through the Maven archetypes and deploy the application to the Payara Server. You may also follow the same deployment procedure for the Gradle projects.
Let’s start:
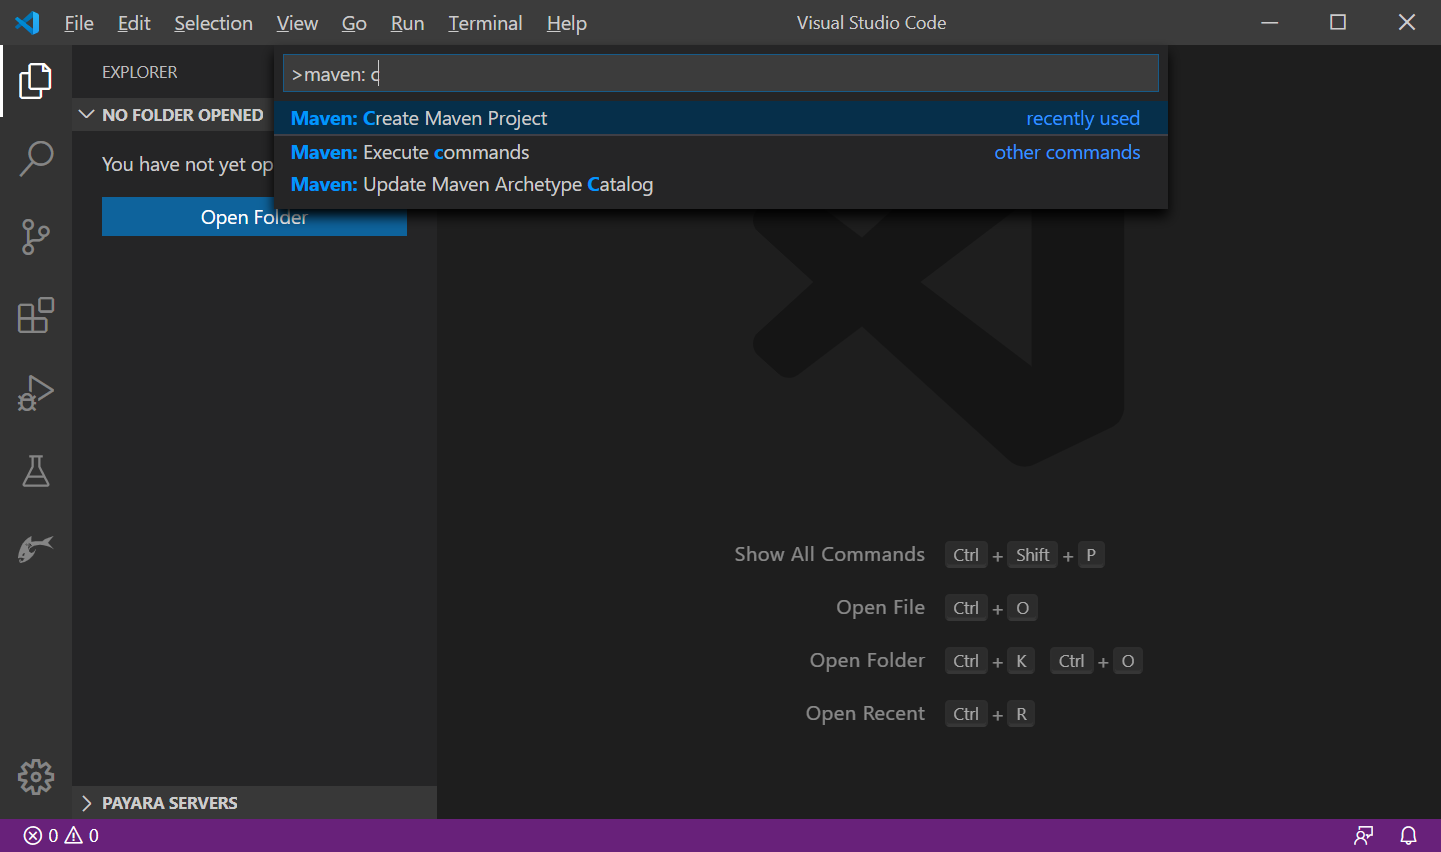
- Open the command pallet using
Ctrl + Shift + P, type Maven and select the Create Maven Project option:
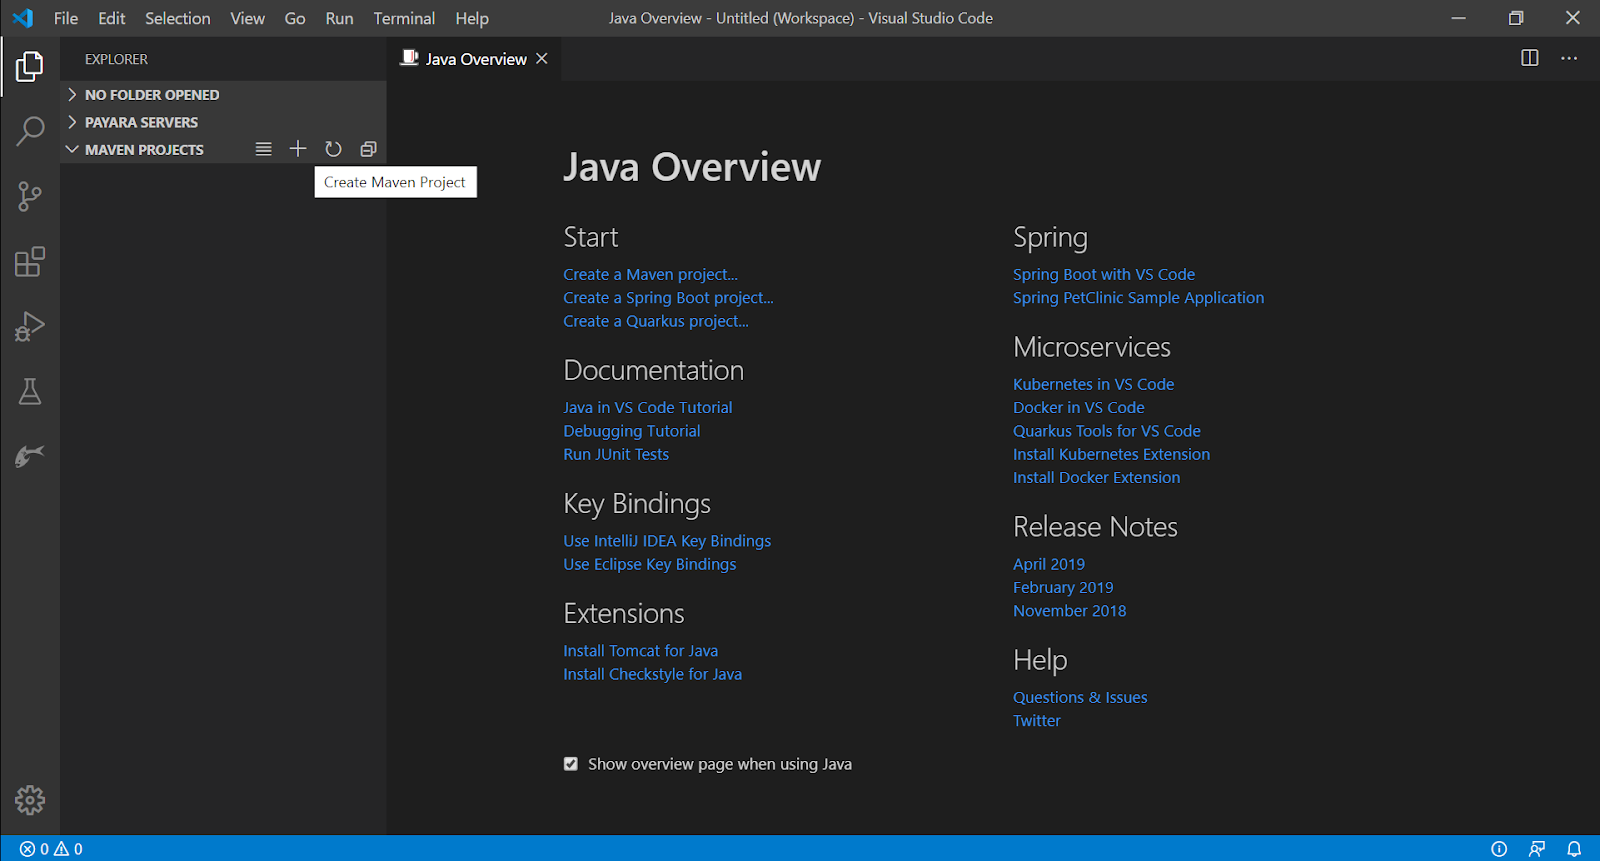
- Or in the explorer sidebar expand Maven Projects, Select the + sign to create a Maven Project:
- Select More… option to find archetype available in remote catalog:
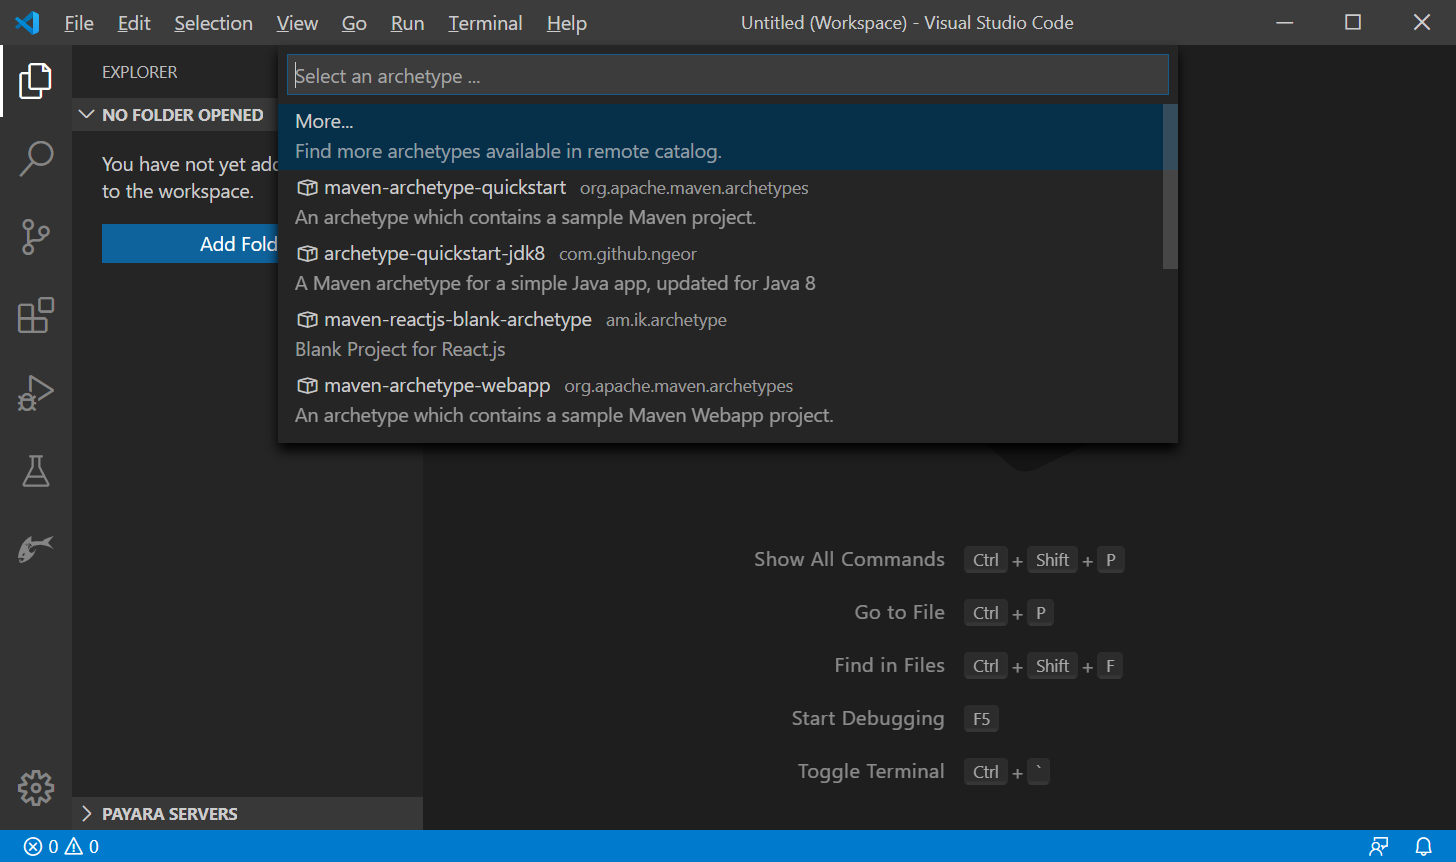
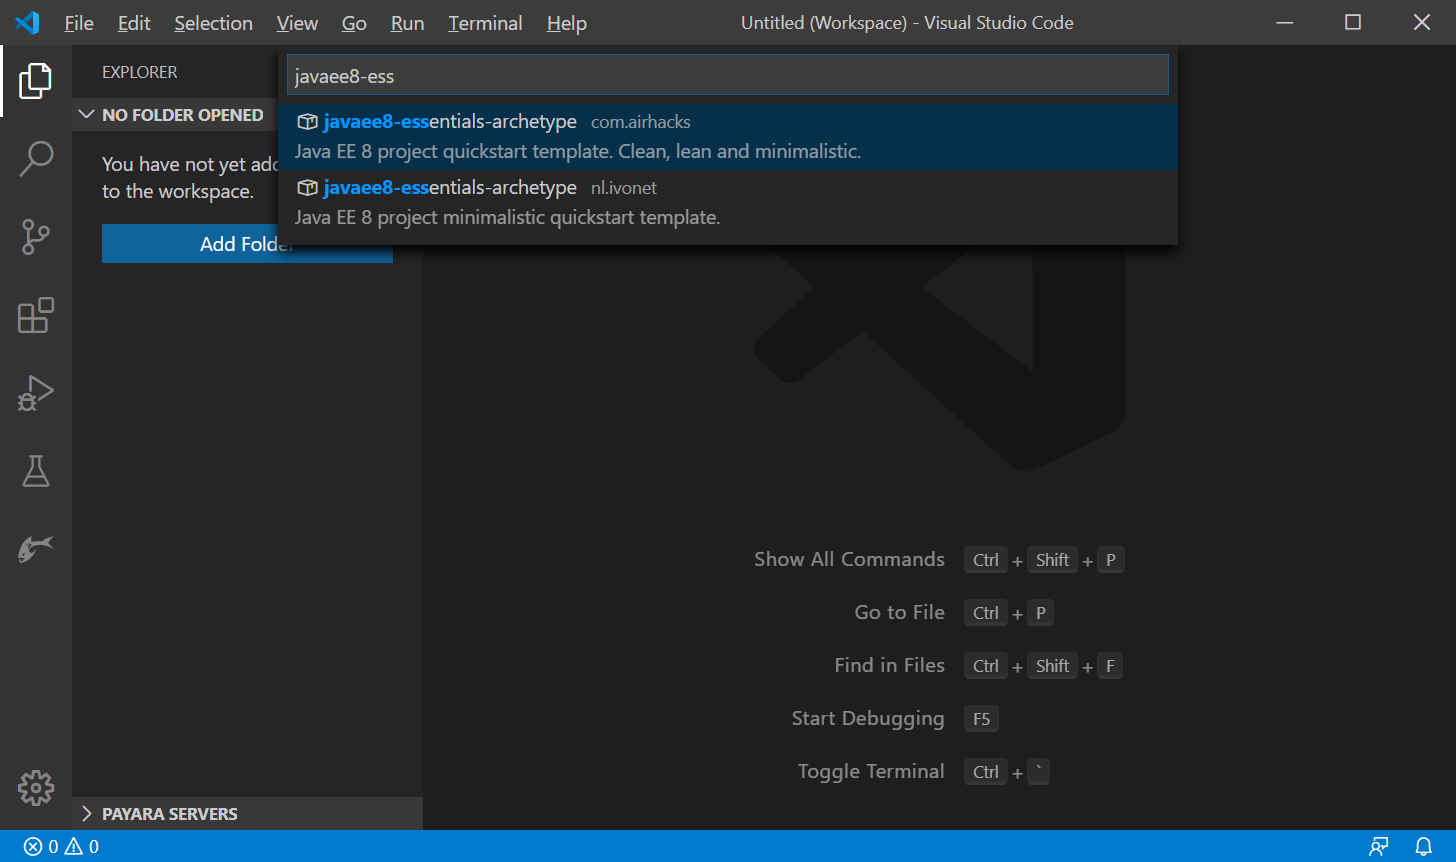
- Search for the javaee8-essentials-archetype or you may select any other archetype:
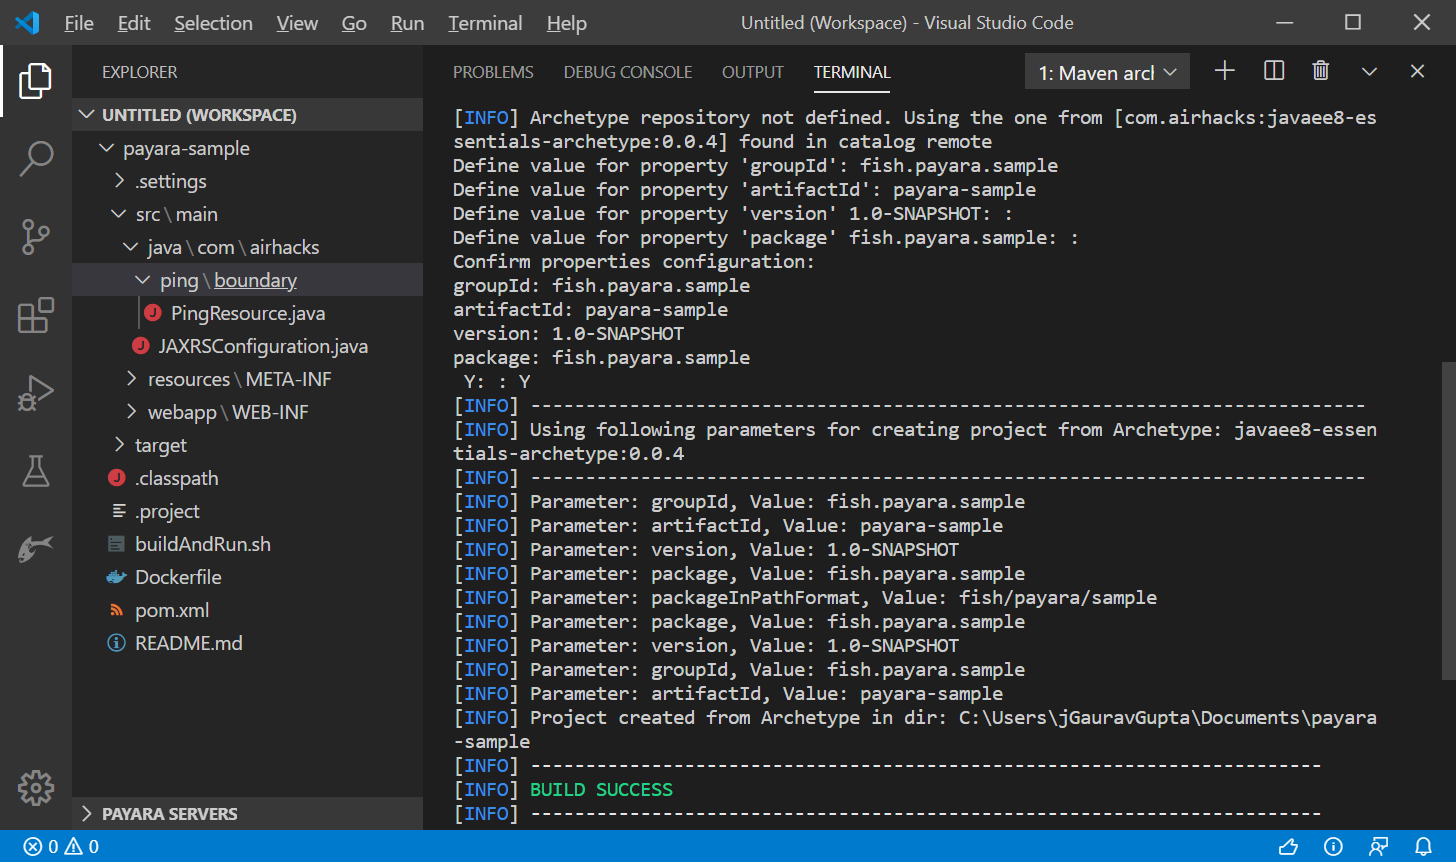
- Select the destination folder, where the project folder will be generated and answer the prompts (groupId, artifactId, version etc) in the focused TERMINAL window to setup the maven project.
- Open the Maven project folder in VS Code via File menu -> Open Folder… and select the payara-sample project folder:
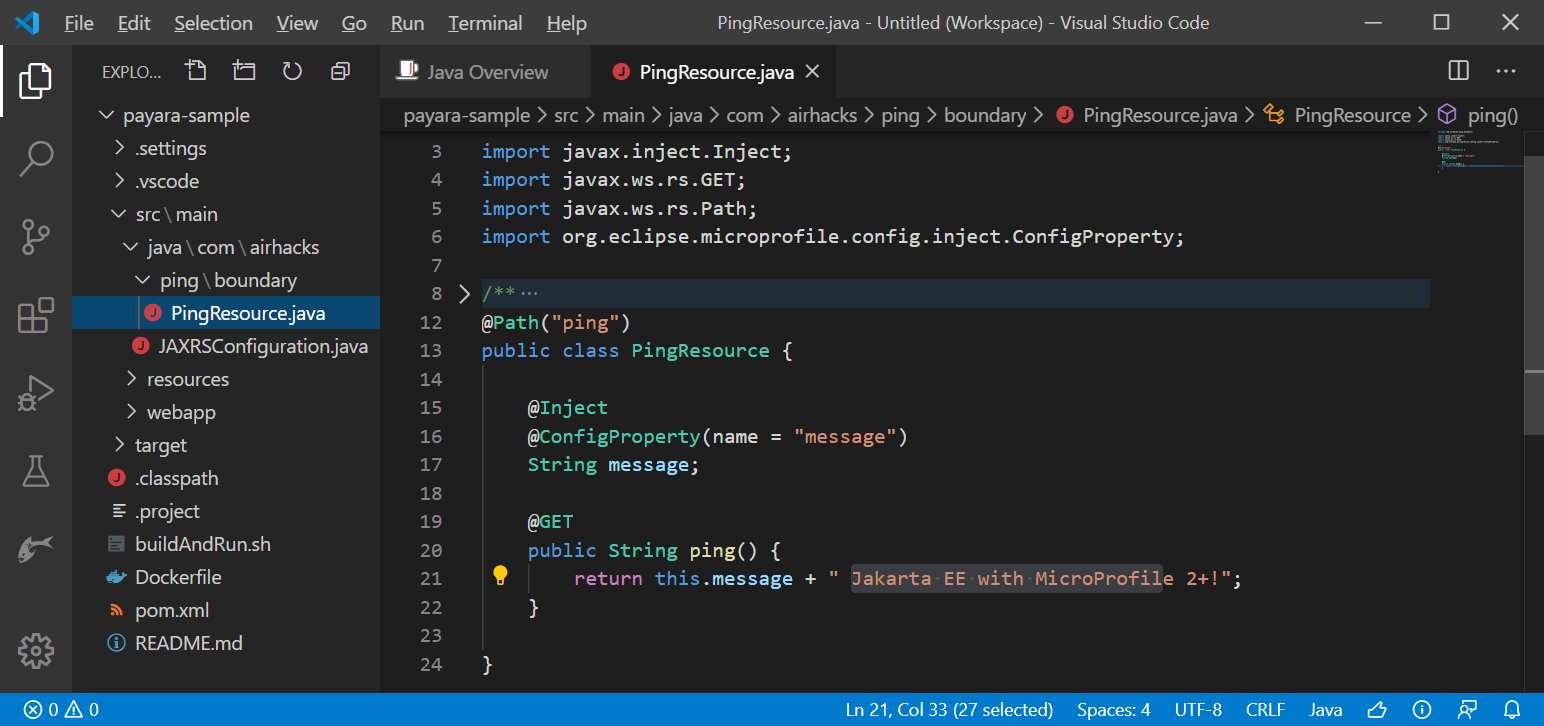
- As you can see, the project has a basic structure with src\main\java and src\main\webapp folders where you will find a PingResource.java REST endpoint class to get started:
Adding Payara Server
- Open the command pallet using
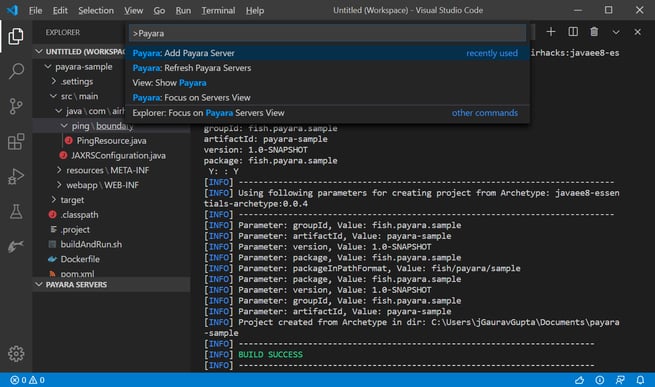
Ctrl + Shift + P, type Payara and select the Add Payara Server option:
- Or In the explorer sidebar (or Payara activity bar), expand Payara Servers, Select the + sign to add Payara Server:
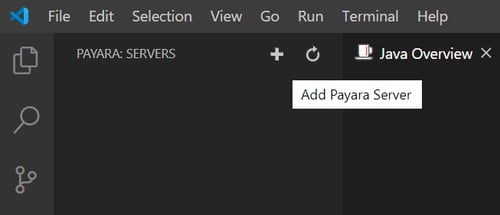
- Select the location of your 'payara5' directory within the Payara Server installation:

- Now name the server whatever you want. For this example I've named it 'Payara-Server-5.201'. Press Enter:

- Finally, select a domain from the list or press the + sign to create the new domain:

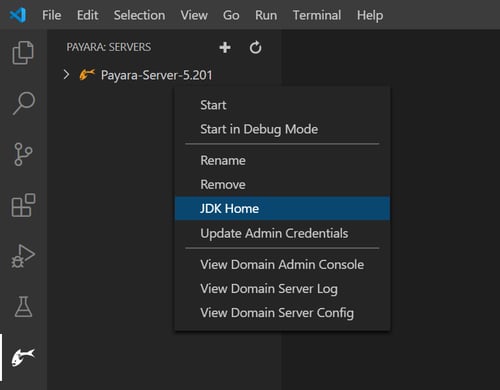
- The server is now created! You may also customize the JDK path or update the Admin Credentials by right click on the added server:
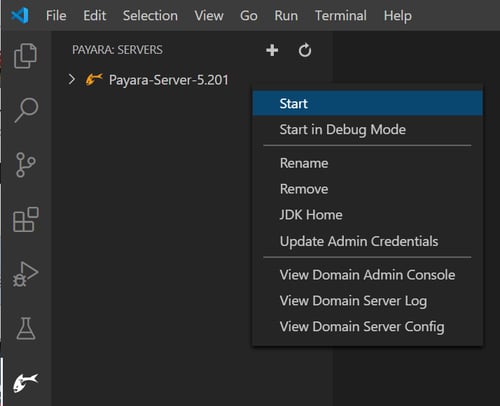
- To start the Payara Server right click on the server in Payara Server explorer and select Start:
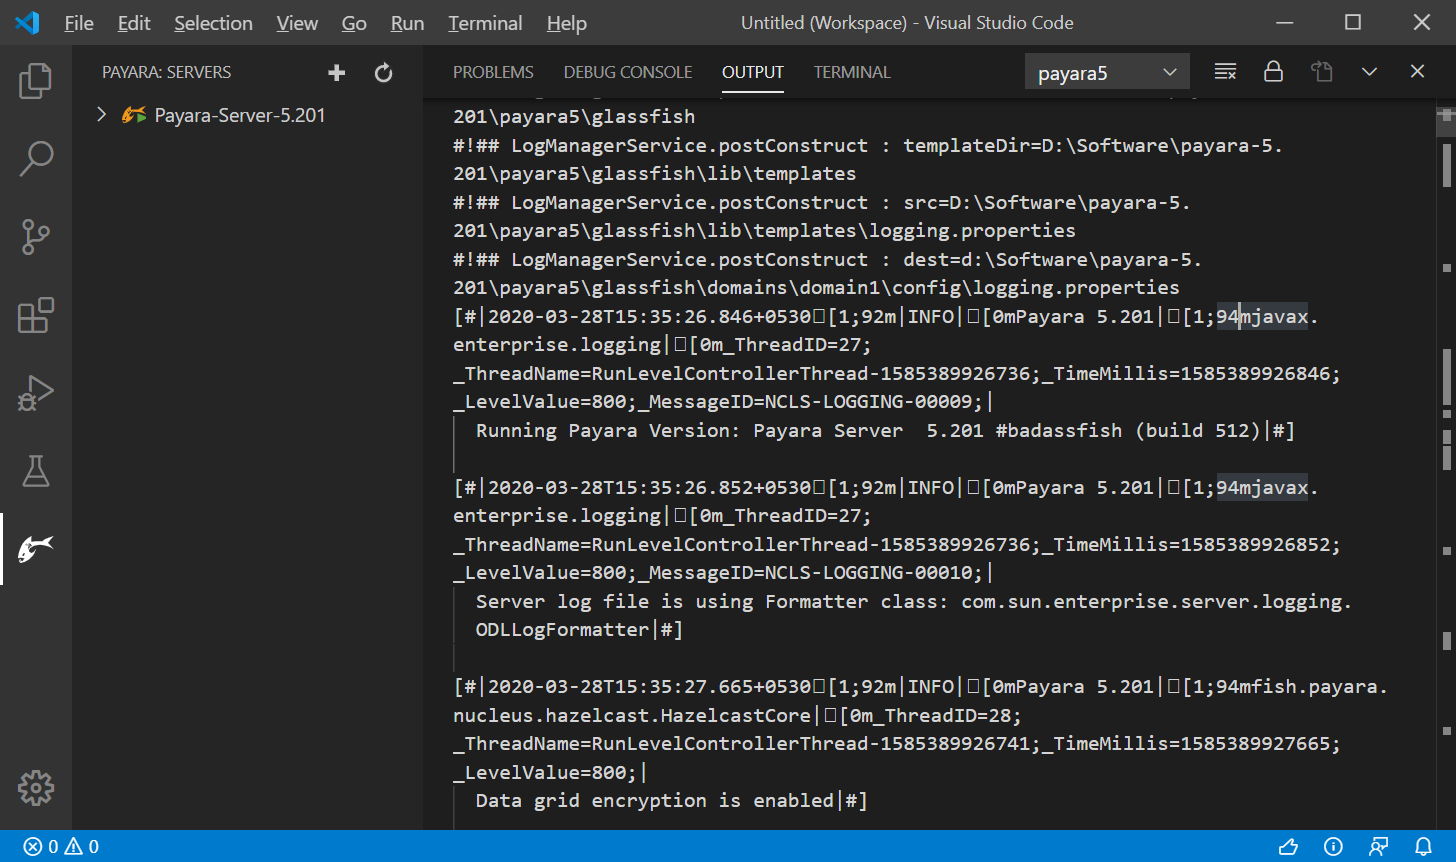
- After starting the server, you may see the server log in the OUTPUT window:
Running the Payara Server Application
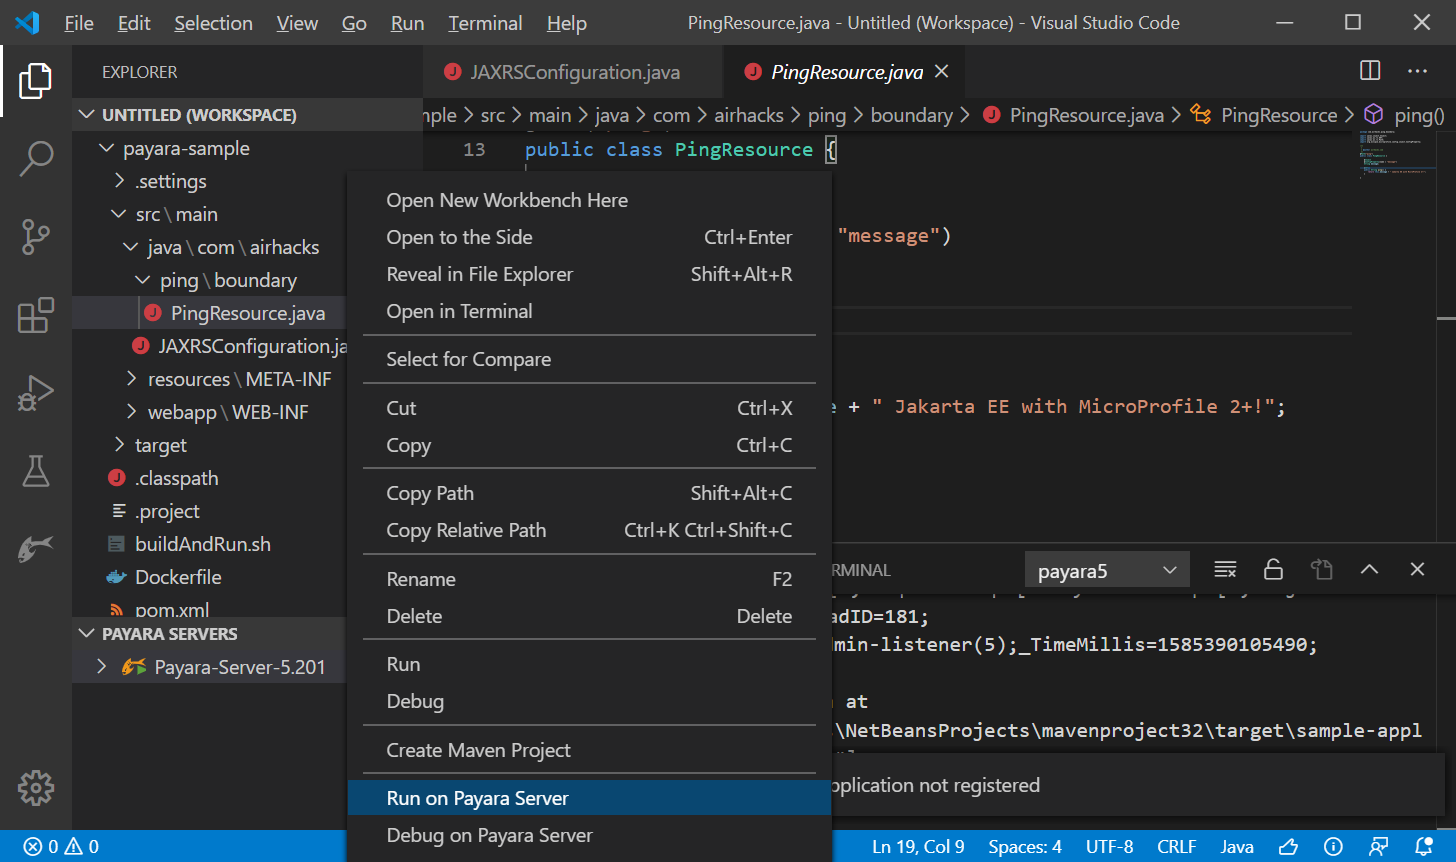
- Now go to your project or rest endpoint file, right click on it and select the Run on Payara Server option. The project build will start and application will be deployed to Payara Server (Payara Server instance will be started if not running already):
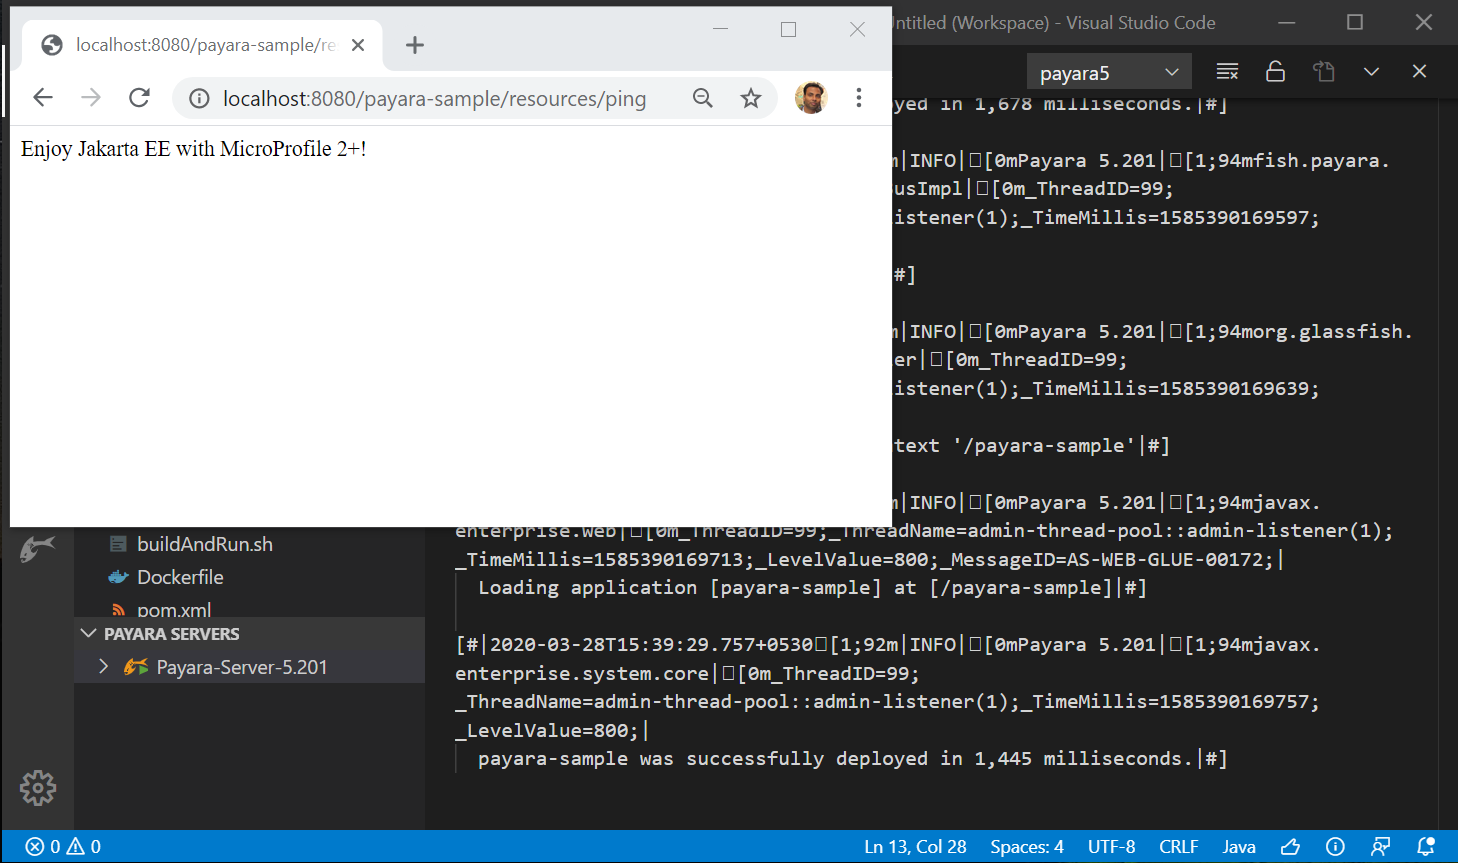
- Now you should see a page (http://localhost:8080/payara-sample), eventually opened in your default browser. Enter the rest endpoint path to test the application.
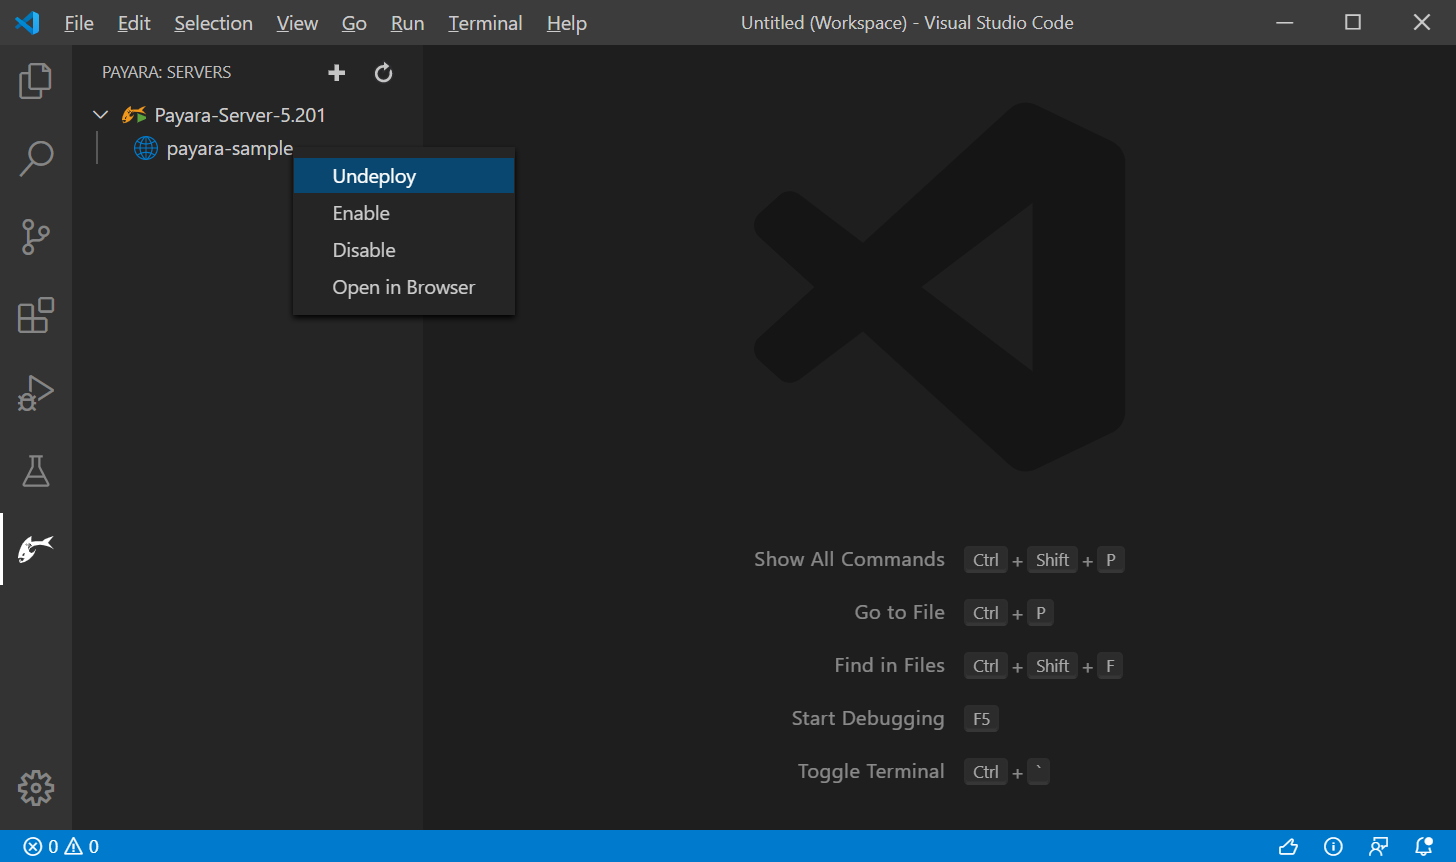
- You may also manage (undeploy/enable/disable) the deployed application by expanding the running Payara Server instance in the explorer sidebar and right click on the application:
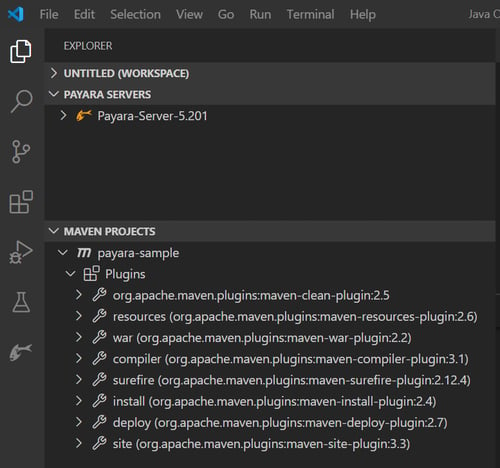
- If you want to run custom goals, such as those inherited from Maven plugins, you can use the Maven Projects view in the explorer sidebar:
This is it! You now have a Visual Studio Code setup that is complete enough to handle any sort of real-world development.
Give it a try, download Payara Server
New to Payara Server? Follow the Getting Started Guides
Related Posts
The Payara Monthly Catch - August 2025
Published on 02 Sep 2025
by Dominika Tasarz
0 Comments
The Payara Monthly Catch - July 2025
Published on 31 Jul 2025
by Chiara Civardi
0 Comments


