
Originally published on 14 Jun 2019
Last updated on 13 Aug 2025

Kubernetes is most commonly used with Docker managed containers, although it doesn't strictly depend on it. Kubernetes defines a Container Runtime Interface (CRI) that container platforms must implement in order to be compatible. These implementations are colloquially known as "shims". This makes Kubernetes platform agnostic so that instead of Docker you're free to use other platforms with corresponding shims, such as CRI-O or KataContainers.

Automatic scaling and failover are just two of the benefits provided by modern cloud platforms such as Amazon AWS, Microsoft Azure and Google Cloud Platform (GCP). There are still problems with this architecture though, for example:
- Stopping and starting instances is slow.
- Communicating between nodes in this architecture can be quite complex.
If you're using a monolithic architecture over microservices, you may not need to deal with communication between nodes and so won't experience these issues. You will still need to worry about instance startup time whenever introducing rolling upgrades or performing a failover. This can incur in extra costs since the risk of losing requests becomes higher the longer a restart takes, so you're likely to want to have another instance to minimise that risk.
This is where Kubernetes comes in. Kubernetes is a platform for managing containerised services. This means that it's a tool made to abstract away details such as separation of nodes, while automating things like rolling upgrades, failover, and scaling of services. The idea is that you should be able to deploy in a very similar way whether running locally or in the cloud.
This blog will walk through some of the basics of Kubernetes, and will setup a simple microservice application locally to demonstrate its use. This blog will assume you have the following tools installed and configured already:
- Maven (v3+)
- JDK 8
- Docker
What Do I Need to Install Kubernetes?
Kubernetes is intended to be used with a cloud provider. Despite this, there are several options for running a Kubernetes cluster locally. Each implementation will essentially end up providing the same interface through kubectl. If you're running Windows, Docker-For-Windows has support for Kubernetes. If you're using Linux, two forerunners are MicroK8s and minikube, the latter of which works on Windows, MacOS and Linux. Whereas minikube runs a Kubernetes cluster inside a single VM, MicroK8s is installed using Snap and runs locally with minimal overhead. For the ease of install and use, this blog will be using MicroK8s.
Since MicroK8s was developed by the Kubernetes team at Canonical, it must be installed using the Canonical Linux package manager - a package manager that can be across many Linux operating system and will make sure applications are installed the same way, as well as automatically update them. On Ubuntu, Snap can be installed like so:
sudo apt update
sudo apt install snapd
You may need to either logout/in or restart your system to ensure that the system path is updated correctly.
Once Snap is installed, you can install MicroK8s like so:
snap install microk8s --classic
This will install MicroK8s like a normal system application. All of the MicroK8s utilities are named microk8s.something, including the main Kubernetes utility as microk8s.kubectl. As this is annoying to type each time, if you don't already have another source of kubectl installed you can alias the main Kubernetes utility with the following command:
snap alias microk8s.kubectl kubectl
This will allow you to use kubectl instead of microk8s.kubectl every time. This can be reverted with:
snap unalias kubectl
Some key commands that are only provided by MicroK8s are listed below. You'll need to make sure that MicroK8s is started before trying to use kubectl to start services (it needs to be running also for the kubectl get all command mentioned above).
# Starts MicroK8s and allows provisioning nodes.
microk8s.start

# Stops MicroK8s
microk8s.stop

# Clear all resources and revert kubernetes to a 'clean' state
microk8s.reset
To check that MicroK8s is installed correctly, list all resources:
kubectl get all
Our Microservices Example Application
In order to demonstrate a microservices application in action, we will first need an application to work with. The application we will be using will randomly generate Payara Micro instance names. It can be found in the Payara Examples repository . I recommend cloning this repository to follow along with the steps to run the application.
The application contains 3 components:
- Frontend - A Vue.js application that uses the backend API to produce a message
- Backend - A backend API that handles requests from the frontend
- Name Generator - A name generation service that produces random instance names
The first thing we'll be doing is running the application locally without Kubernetes to see what it looks like.
Starting the Frontend
The frontend code can be found in the frontend/ folder. If you already have NodeJS (v9+) and NPM installed, you can start the project like so:
# Install dependency packages to node_modules/
npm install

# Start the server
npm run serve
If you instead only have Maven, you can run the project with:
# Download a local NodeJS installation and use it to start the server
mvn test -Pserve
Any changes made to the code will appear immediately using the hot reloading feature of vue-loader.
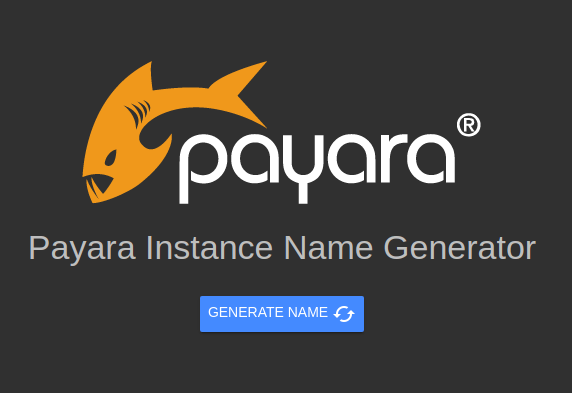
You can now navigate to the link in the terminal (by default it's http://localhost:8080/). You'll see the following page:
When you click on the GENERATE NAME button you'll see an error message. From the developer console you'll see the full error that explains what went wrong. In Google Chrome this can be found by pressing the F12 key and navigating to the Console tab.
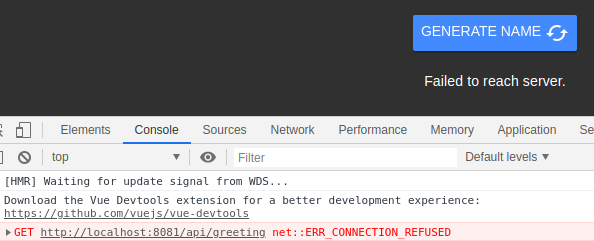
The button is calling the backend API on port 8081 but can't reach it! That's because we haven't started the backend server to serve these requests.
Starting the Backend
From another terminal, visit the backend/ folder and run the following command:
# Build the application, bundle it with Payara Micro and then run it
mvn verify -Pserve
This will start the server on port 8081 to begin serving requests. If you now click the button on the website you'll receive a different error in the console:
GET http://localhost:8081/api/greeting 500 (Internal Server Error)
This means that the backend has been reached, but it is returning a 500. The reason for this is explained in the main bulk of the code for that service:
@Path("/greeting")
@RequestScoped
public class BackendService {

    private NameService nameService;

    @Inject
    public void initNameService(@ConfigProperty(name = "name.service.url") URI nameServiceUrl) {
        nameService = RestClientBuilder
                .newBuilder()
                .baseUri(nameServiceUrl)
                .build(NameService.class);
    }

    @GET
    public String getGreeting() {
        return "Hello " + nameService.getRandomName();
    }

}
This code uses the MicroProfile Config and REST Client APIs to fetch the random name from the name service, and returns the "Hello" string with the random name appended. Since the third service isn't available, an HTTP 500 error will be propagated to the frontend. See our blogs to read more about MP Rest Client and MP Config API, or our documentation for more information on both.
The server URL for the name service is fetched from the name.service.url Config property, which defaults to http://localhost:8082 as specified in src/main/resources/META-INF/microprofile-config.properties. The MicroProfile Config specification allows overwriting this by configuring the NAME_SERVICE_URL environment variable before running the application.
Starting the Name Generator Service
The final part of the application is the name service. Visit the name-generator folder and run the following command:
# Build the application, bundle it with Payara Micro and then run it
mvn verify -Pserve
This will start the server on port 8082 to begin serving requests. If you click the button on the website you'll see random names being printed out!
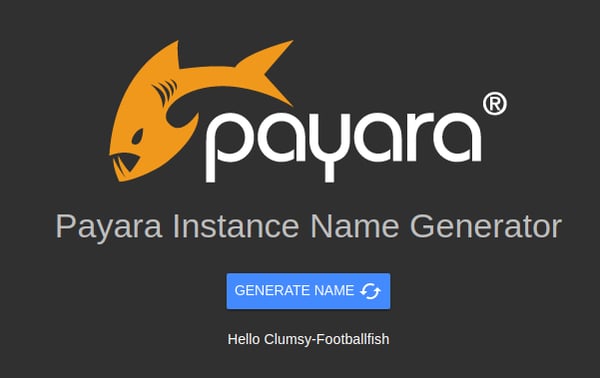
This means that all 3 services are functioning correctly! Now that we've seen what the application looks like, we can begin to port this application across to containers, which can then be used with Kubernetes.
Porting the Services to Containers
Each of the services has a Dockerfile in their respective folders. To build them, run the following command from the root of the kubernetes example folder:
mvn install -Pdocker
Assuming you have Docker installed locally and can run Docker without sudo, this command will produce three docker containers, one for each of the services. These are named:
- payara/kubernetes-frontend
- payara/kubernetes-backend
- payara/kubernetes-name-generator
You can alternatively build the images manually using the Dockerfiles in each subfolder.
Creating a Docker Network
Linking containers by name used to be possible using the --link parameter. This is now deprecated in favour of creating user defined bridges. This basically allows containers to reference each other by their container name (the one assigned with --name).
To create a Docker network, run the following command:
docker network create kubernetes-network
You can add containers to this network with the --network parameter when creating containers. When you're done with the network, you can remove it with:
docker network rm kubernetes-network

Running the Name Service Container
The first container to start will be the name generator service. The Dockerfile simply starts the Payara Micro instance as we did before, but without modifying the port (meaning it will run on the default port 8080). This is because Docker separates out each container as it's own virtual host so there is no need to pick a different port for each container.
You can run the container like so:
docker run -d --rm --name name-generator --network kubernetes-network payara/kubernetes-name-generator
This will start the container in the background. This command makes sure that the container has an appropriate name with --name, and connects it to the new network with --network. This is required since the container will be referenced later by the backend container. You can verify that the container has been started by checking the container logs with:
docker container logs name-generator
Alternatively, you can get the container IP by running:
docker inspect name-generator
You can then test the endpoint by fetching a random instance name like so:
curl <container-ip>/name/random
Running the Backend Container
The second container is exactly the same as the previous container, but for the backend service JAR. You can run the container like so:
docker run -d --rm --name backend -p 8081:8080 --network kubernetes-network --env NAME_SERVICE_URL=http://name-generator:8080 payara/kubernetes-backend
There are two additional arguments here that you'll notice.
The first new bit is '-p 8081:8080'. This is the Docker argument to map a container port to a localhost port. In this case, it's mapping port 8080 of the container (the one used by Payara Micro) to port 8081 on the host machine. The reason for this is that JS on the web page will need to be able to access the backend service, and the easiest way to do this is to host the backend on localhost. This will also be solved when we start using Kubernetes.
The second new bit is '--env NAME_SERVICE_URL=http://name-generator:8080'. You'll recall from before that this service allows the name service URL to be overriden by this environment variable. This is the final bit that allows the backend to find the name service and communicate with it.
Running the Frontend Container
The last container is the frontend container. This one runs slightly differently to the other containers in that it serves compiled JS code to the client via Nginx, so must be compiled beforehand. As part of the Maven build, the command npm run build will be run which will generate the static files to be served to the user. Amongst other things this will disable the dynamic reloading, disable the verbose logging and generally make the code ready for production. It's at this time that all environment variables should be inserted into the compiled code. Because of this, where the Payara Micro service can override the required environment variables, the JS code requires that it be specified for the maven build. You'll need to edit the variable found in the file 'frontend/.env.production'. This will determine the URL of the backend service to be called by the user. Usually you'd replace this with the domain name for your website API, but in this case we'll just change it to 'http://localhost:8081', since that's where the Docker container will be hosted.
Once you've done this, you can rebuild the frontend with 'mvn clean install', then start the container like so:
docker run -d --rm --name frontend -p 8080:80 --network kubernetes-network payara/kubernetes-frontend
This will start the container and bind it to port 8080 on the host. Visiting http://localhost:8080/ will show the webpage just as before, except it's now running in a container!
When you're done with the containers, you can stop them with the following Docker command:
docker stop frontend backend name-generator
You can then delete the network as explained previously.
Porting the Services to Kubernetes
Now that we've proven that the Docker containers work, we can begin to port these components to Kubernetes. If we were to deploy now with the current setup, we would run into issues when we wanted to scale containers, since we'd have to either create a load balancing node for each container type, or manually link each container to another one, which would be difficult to manage at scale. We would also run into problems if we wanted to perform a rolling upgrade since the load balancing wouldn't take this into account, so we'd need to first configure the load balancer, then upgrade a container, then reconfigure the load balancer, and so on. Kubernetes makes each of these processes a lot easier with its services.
We'll assume that you installed MicroK8s as per the instructions at the start of this blog. If not, see there to make sure you have it installed correctly before continuing. Before we start running through any Kubernetes steps, it'll be useful to have a quick crash course on Kubernetes concepts:
- Container: An executable image that contains a single piece of software and all it's dependencies. In our case it's a Docker container.
- Node: A virtual or physical machine that is used as a worker for Kubernetes. Kubernetes will abstract its management away in practice. A Kubernetes cluster contains a master node that is used to manage the state of the cluster in real time and allow user interaction.
- Cluster: A set of nodes that run containers managed by Kubernetes. This is analogous to a Domain in Payara Server.
- Pod: The smallest Kubernetes object. A pod runs a set of containers. Usually, pods have one container each, but in some cases they may also include additional container services such as one to add logging capabilities, for example.
- Deployment: An object that manages a set of replicated pods. Scaling a microservice involves adding more pods to a deployment.
- Service: An object that describes how to access deployments or groups of pods via a common endpoint. May create things like load balancers to access the resource.
- Label: Labels are added to Kubernetes objects (pods, deployments, services, etc.) in order to be selected together.
- Selector: A selector references a label in order to allow the interaction with a set of objects, like multiple containers for the purposes of load balancing, for example.
- Kubectl: The command line utility used to interact with the Kubernetes master node.
Kubernetes can use YAML manifests to describe any resources (e.g. services, deployments or pods) deployed to it. Those, who are familiar with the Docker Compose tool, will find the YAML configuration familiar. For example, the pod.yaml file in the frontend gives an example of a pod descriptor:
apiVersion: v1
kind: Pod
metadata:
  name: frontend
  labels:
    app: frontend
spec:
  containers:
    - image: payara/kubernetes-frontend
      name: frontend
      ports:
        - containerPort: 80
This descriptor references a pod to be deployed to Kubernetes. It is given the name 'frontend', and assigned the label 'app: frontend'. This can be used by selectors, and shared between pods. The Docker image is then referenced, and the descriptor dictates the port used by the container. Note that pods should not be worked with directly; this is only shown to give a basic descriptor for the smallest Kubernetes object.
Trying to use this will cause a problem however: Kubernetes will be unable to find the named image, since it has no access to the local Docker registry. If the image were pushed to the Docker Hub container registry, Kubernetes would be able to find it. You can also connect your Kubernetes cluster to private registries. You can find more information on using private registries from the Kubernetes website. But MicroK8s includes a feature that helps us in local development: it's own local registry. This allows you to push from Docker to this registry, and then use the image in MicroK8s.
Using the MicroK8s Local Registry
To initialise the MicroK8s local registry, run the following command:
microk8s.enable registry
This will initialise the local repository so that you can begin to push images to it. You'll remember we have 3 Docker images to be used:
- payara/kubernetes-frontend
- payara/kubernetes-backend
- payara/kubernetes-name-generator
To push these into the local repository, run the following commands:
docker tag payara/kubernetes-frontend 127.0.0.1:32000/kubernetes-frontend
docker tag payara/kubernetes-backend 127.0.0.1:32000/kubernetes-backend
docker tag payara/kubernetes-name-generator 127.0.0.1:32000/kubernetes-name-generator

docker push 127.0.0.1:32000/kubernetes-frontend
docker push 127.0.0.1:32000/kubernetes-backend
docker push 127.0.0.1:32000/kubernetes-name-generator
The first 3 commands will tag the image with the link to the registry. This tells Docker where to push the image to.
The second 3 commands will push the image to the registry.
Since this registry is intended for local development, it is insecure by default. This may mean that Docker will throw an error when pushing to it. In order to fix this, you might need to create a configuration file located at /etc/docker/daemon.json with the following content:
{
    "insecure-registries": ["127.0.0.1:32000"]
}
This configuration will tell the Docker daemon that insecure connections are allowed to the MicroK8s registry. You must restart the Docker daemon for these changes to take effect:
sudo systemctl restart docker
Once you've done this, the images will be pushed correctly to the MicroK8s registry. MicroK8s contains a reference to this registry called 'local.insecure-registry.io'. You must make sure when using any Kubernetes descriptors that instead of the old repository name (payara/<image-name>), the new registry will be used (local.insecure-registry.io/<image-name>).
After editing the pod descriptor, you can instruct Kubernetes to create it with the following command:
kubectl create -f pod.yaml
This will create the pod following the instructions in the manifest. You can see that it's started using the describe command:
kubectl describe pods
You'll notice however, that we have no way of accessing this pod! To do this we'll first create a deployment. As we mentioned before interfacing with pods directly is generally bad, so the deployment will be our base object to work from. The next section will describe what deployments are and how to use them. First you'll need to delete the pod though:
kubectl delete pod/frontend
Creating Our First Kubernetes Deployment
As described in the terminology section, a deployment is an object that will be used to encapsulate our pods and help us scale the microservices. Our first deployment can be found in the frontend folder named deployment.yaml. The contents are shown below:
apiVersion: apps/v1
kind: Deployment
metadata:
  name: frontend
spec:
  replicas: 2
  strategy:
    type: RollingUpdate
    rollingUpdate:
      maxUnavailable: 1
      maxSurge: 1
  selector:
    matchLabels:
      app: frontend
  template:
    metadata:
      labels:
        app: frontend
    spec:
      containers:
        - image: local.insecure-registry.io/kubernetes-frontend
          name: frontend
          ports:
            - containerPort: 80
          readinessProbe:
              httpGet:
                  path: /
                  port: 80
              initialDelaySeconds: 3
              periodSeconds: 3
              failureThreshold: 2
This deployment descriptor supersedes the pod descriptor, and can be used without it. You'll notice that the contents are broadly similar to the pod descriptor, with a few differences:
- The replicas tag dictates how many pods will be created initially for that deployment. In this case, 2 pods are to be created.
- The strategy block. This block states the restrictions for updating or rolling back the deployment. The max unavailable value defines how many pods can be unavailable at a time. The max surge value defines how may pods that can be created over the replica count while updating. In this case that means that the replica count could be a maximum of 3.
- The template block. This defines how pods created under this deployment should be named.
- The selector block. This defines the criteria for a pod to be managed by this deployment. In this case it's the same as the labels specified by the template.
- The readiness probe. This dictates how Kubernetes should check that the instance is considered 'ready'. This will be utilised by the rollback strategy, as well as any services utilising these pods.
- Type: In this case we simply ping the context root and check for a 200. A full list of possible readiness checks is available in the Kubernetes documentation.
- Initial Delay: this means that after starting Kubernetes should wait at least 3 seconds before considering the container 'ready'.
- Period: every 3 seconds a readiness check should be made.
- Failure Threshold: If 2 consecutive readiness checks fail, the container should be considered not ready and restarted.
You can apply this deployment with the following command:
kubectl apply -f deployment.yaml
This utilises the Kubernetes declarative management API. Whereas in the previous section we used the create command, apply can also be used to scale and make most other changes to containers. If you need to make changes to a descriptor, you simply change the file and run the apply command again. For the rest of this guide we'll be using this command for ease.
Wait a few seconds for the containers to start, and you'll see two pods created under the frontend deployment when listing Kubernetes resources.
kubectl get all
NAME                            READY   STATUS    RESTARTS   AGE
pod/frontend-65756df4c8-fkrjd   1/1     Running   0          12s
pod/frontend-65756df4c8-jcq5x   1/1     Running   0          12s

NAME                 TYPE        CLUSTER-IP     EXTERNAL-IP   PORT(S)   AGE
service/kubernetes   ClusterIP   10.152.183.1   <none>        443/TCP   170m

NAME                       READY   UP-TO-DATE   AVAILABLE   AGE
deployment.apps/frontend   2/2     2            2           12s

NAME                                  DESIRED   CURRENT   READY   AGE
replicaset.apps/frontend-65756df4c8   2         2         2       12s
One key thing to notice is that there is no IP address assigned to the deployment. Addresses are assigned to services, and this deployment doesn't have a service exposing it yet. We'll create that now.
Creating Our First Kubernetes Service
The frontend folder contains one final YAML descriptor: service.yaml.
apiVersion: v1
kind: Service
metadata:
  name: frontend-lb
spec:
  type: LoadBalancer
  ports:
  - port: 80
    protocol: TCP
    targetPort: 80
  selector:
    app: frontend
This is our first service. It will be used to access the frontend deployment created before. You'll notice that the deployment itself isn't referenced here at all. Instead a selector is used, allowing us to select all pods matching a label. This is one of the reasons Kubernetes is so flexible.
The only new thing in this descriptor is the port configuration. This service will route TCP connections from port 80 on it's assigned IP to target port 80 on the referenced pods.
You can apply this service with the following command:
kubectl apply -f service.yaml
You'll now see a new addition to the 'kubectl get all' result:
NAME                            READY   STATUS    RESTARTS   AGE
pod/frontend-65756df4c8-fkrjd   1/1     Running   0          86m
pod/frontend-65756df4c8-jcq5x   1/1     Running   0          86m

NAME                  TYPE           CLUSTER-IP       EXTERNAL-IP   PORT(S)        AGE
service/frontend-lb   LoadBalancer   10.152.183.109   <pending>     80:31415/TCP   5s
service/kubernetes    ClusterIP      10.152.183.1     <none>        443/TCP        4h16m

NAME                       READY   UP-TO-DATE   AVAILABLE   AGE
deployment.apps/frontend   2/2     2            2           86m

NAME                                  DESIRED   CURRENT   READY   AGE
replicaset.apps/frontend-65756df4c8   2         2         2       86m
From here you can see the new load balancer service. You'll notice that the external IP is set to "Pending". In a cloud environment, this IP will be assigned automatically by the provider and synchronized with its corresponding DNS. In MicroK8s, we can just visit the cluster IP from our browser to see the endpoint. Visiting the cluster IP of frontend-lb will take you to the frontend of the site through one of the frontend pods.
Creating The Backend Kubernetes Service
The backend folder contains two YAML descriptors: deployment.yaml and service.yaml.
apiVersion: apps/v1
kind: Deployment
metadata:
  name: backend
spec:
  replicas: 2
  strategy:
    type: RollingUpdate
    rollingUpdate:
      maxUnavailable: 1
      maxSurge: 1
  selector:
    matchLabels:
      app: backend
  template:
    metadata:
      labels:
        app: backend
    spec:
      containers:
        - image: local.insecure-registry.io/kubernetes-backend
          name: backend
          ports:
            - containerPort: 8080
          env:
            - name: NAME_SERVICE_URL
              value: "http://name-generator"
          readinessProbe:
              httpGet:
                  path: /health
                  port: 8080
              initialDelaySeconds: 20
              periodSeconds: 3
              failureThreshold: 3
The deployment descriptor is formatted in a similar way to the frontend service with a few changes.
Firstly each image is started with the environment variable required for the docker image. Since Kubernetes services can be accessed by name, the name-generator server name is passed as the corresponding value. The other change is that the initial delay for the readiness probe is increased. The reason for this is that Payara Micro takes longer to startup than the nginx server used in the frontend, so Kubernetes needs to wait longer before polling to see if it's ready.
apiVersion: v1
kind: Service
metadata:
  name: backend
spec:
  type: LoadBalancer
  ports:
    - port: 80
      protocol: TCP
      targetPort: 8080
  selector:
    app: backend
The service.yaml manifest is very similar to the one for the frontend. The only difference is that the target port for the container is 8080. Despite this, the service for the deployment still uses port 80. This adds some consistency between services.
You can apply both of these configuration files, and you'll see the Kubernetes cluster looks like this:
NAME                            READY   STATUS    RESTARTS   AGE
pod/backend-5b5bcf5dcd-gn4kk    1/1     Running   0          27s
pod/backend-5b5bcf5dcd-vdmxt    1/1     Running   0          27s
pod/frontend-65756df4c8-fkrjd   1/1     Running   0          115m
pod/frontend-65756df4c8-jcq5x   1/1     Running   0          115m

NAME                  TYPE           CLUSTER-IP       EXTERNAL-IP   PORT(S)        AGE
service/backend-lb    LoadBalancer   10.152.183.141   <pending>     80:31931/TCP   24s
service/frontend-lb   LoadBalancer   10.152.183.109   <pending>     80:31415/TCP   29m
service/kubernetes    ClusterIP      10.152.183.1     <none>        443/TCP        4h45m

NAME                       READY   UP-TO-DATE   AVAILABLE   AGE
deployment.apps/backend    2/2     2            2           28s
deployment.apps/frontend   2/2     2            2           115m

NAME                                  DESIRED   CURRENT   READY   AGE
replicaset.apps/backend-5b5bcf5dcd    2         2         2       28s
replicaset.apps/frontend-65756df4c8   2         2         2       115m
You can see that the backend pods have been created and they're being load balanced by the backend-lb service. All we need to do now is create the name generator service.
Creating The Name Generation Kubernetes Service
The name generation service deployment.yaml is exactly the same as the one for the backend service, but with the name and image names changes. You can apply the deployment in exactly the same way. The only difference between these descriptors and those of the backend service is in the service.yaml:
apiVersion: v1
kind: Service
metadata:
  name: name-generator
spec:
  ports:
    - port: 80
      protocol: TCP
      targetPort: 8080
  selector:
    app: name-generator
While this is mostly similar to the previous service descriptor, it has one line missing:
type: LoadBalancer
This line assigns the service an IP to be used as an external load balancer. When this descriptor is applied without that line, the service is still accessible by name by other pods, but won't be assigned an external IP. Since this is an internal IP, it has no need to be externally accessible (and in fact would be a security weakness if it were).
Once you've applied the deployment.yaml and service.yaml from this folder, you'll be almost done!
The Result
Once you've deployed all 3 deployments and all 3 services, you should see the following Kubernetes cluster:
NAME                                  READY   STATUS    RESTARTS   AGE
pod/backend-5b5bcf5dcd-gn4kk          1/1     Running   0          131m
pod/backend-5b5bcf5dcd-vdmxt          1/1     Running   0          131m
pod/frontend-65756df4c8-fkrjd         1/1     Running   0          4h6m
pod/frontend-65756df4c8-jcq5x         1/1     Running   0          4h6m
pod/name-generator-855f8f9c59-dckd4   1/1     Running   0          30s
pod/name-generator-855f8f9c59-vllns   1/1     Running   0          30s

NAME                     TYPE           CLUSTER-IP       EXTERNAL-IP   PORT(S)        AGE
service/backend-lb       LoadBalancer   10.152.183.141   <pending>     80:31931/TCP   130m
service/frontend-lb      LoadBalancer   10.152.183.109   <pending>     80:31415/TCP   160m
service/kubernetes       ClusterIP      10.152.183.1     <none>        443/TCP        6h57m
service/name-generator   ClusterIP      10.152.183.115   <none>        80/TCP         26s

NAME                             READY   UP-TO-DATE   AVAILABLE   AGE
deployment.apps/backend          2/2     2            2           131m
deployment.apps/frontend         2/2     2            2           4h6m
deployment.apps/name-generator   2/2     2            2           30s

NAME                                        DESIRED   CURRENT   READY   AGE
replicaset.apps/backend-5b5bcf5dcd          2         2         2       131m
replicaset.apps/frontend-65756df4c8         2         2         2       4h6m
replicaset.apps/name-generator-855f8f9c59   2         2         2       30s
Visiting the IP of the frontend load balancer (purple) will take you to the website. There are still a couple of problems though. Remember when we recreated this with Docker and we had to change the frontend code to point to the backend? This would be solved in production with a domain name, but since it's local we've got to workaround it! Luckily, we set the backend URL to localhost:8081 and Kubernetes provides a useful utility to help:
kubectl port-forward service/backend-lb 8081:80
This temporarily binds port 8081 on the host to the backend load balancer service port 80. This will allow the AJAX calls to correctly be directed to the backend service.
If you don't want to keep a terminal window open, you can instead change the frontend image environment variable we changed earlier back from 'http://localhost:8081' to 'http://backend' and add the following line to your /etc/hosts:
<backend-url> backend
The backend URL can be found in green above the purple frontend URL. This will have the same effect, but without a terminal window!
The final problem is that by default MicroK8s doesn't have a DNS service running (the service that allows other services to be referenced by name rather than IP). You can enable this with the following command:
microk8s.enable dns
Once this is enabled you can visit the frontend URL again and the app should work! You can see from the cluster configuration that we have 6 instances in this configuration, and this setup can be easily scaled up to meet large application demand.
Some Kubernetes Coolness
Suppose your backend developers decide to release a new version. They're not happy that the app keeps saying 'Hello', and think it would be greatly improved if it said 'Hey' instead. They push a new Docker image and ask you to deploy it. Without Kubernetes you'd likely be going to each instance and deploying the new application, which is not a viable solution at all. Kubernetes allows rolling updates to current running containers.
Rolling out an update with Kubernetes is as easy as updating the version of the image of the corresponding containers in the descriptor and running the omnipotent command:
kubectl apply -f deployment.yaml
Then you can just wait as Kubernetes performs the rolling restart. You can also change the number of replicas in each deployment by either editing the value in the descriptor and applying it in this way.
But wait! The backend developers pushed a broken image! No worries, you can simply rollback the deployment. List the previous deployments with the following command:
kubectl rollout history deployment/backend
Select a deployment number from this list. If you don't want to see change information here, you should add the --record flag when applying new deployments. To inspect a single revision run:
kubectl rollout history deployment/backend --revision=2
Once you've selected a deployment, roll back to it with:
kubectl rollout undo deployment/backend --to-revision=2
Omitting the --to-revision will roll back to the previous version of the deployment.
Payara Micro is Well Suited to Deploying in a Cloud Kubernetes Environment
Hopefully this blog has helped shed some light on what Kubernetes is as well as some of the benefits of using it in your production environment. Each cloud provider provides a Kubernetes deployment option, as well as its own method of auto-scaling clusters, each provider have its own benefits but all of them share the same basic concepts and follow the same architecture, so the knowledge you've learned here will be applicable across all of them. With Kubernetes you can make your deployments almost entirely agnostic to the underlying infrastructure, and only concern yourself with selecting the image tags that are running at any time.
Payara Micro is well suited to deploying in a cloud Kubernetes environment. To learn more about scaling in this environment, see our other blog on the topic.

Related Posts
The Payara Monthly Catch - August 2025
Published on 02 Sep 2025
by Dominika Tasarz
0 Comments

Welcome aboard the August 2025 issue of The Payara Monthly Catch! With summer in full swing, things may have felt a little more quiet across the Java world - but certainly not less interesting! We hope you managed to get some rest and recharge, ...
Conquering Kubernetes Complexity: Why Java Developers Need More Than Just Containers
Published on 08 Aug 2025
by Chiara Civardi
0 Comments

Kubernetes, also known as K8s has become the de facto platform for orchestrating modern microservices architectures, promising resilience, scalability and faster deployment pipelines for Java applications. But for many developers, that promise ...