Back to Basics - Installing Payara Server 4 on Ubuntu
Originally published on 17 Aug 2015
Last updated on 21 Jan 2020
 by Ahmed Qureshi
This is Part 1 of our 'Payara Server- Back to Basics' series, where we will show you a step-by-step overview of how to install Payara Server 4 on Ubuntu. See Part 2 - How to Deploy an Application on Payara Server here.
Installing Payara Server 4.1
1. Make sure the appropriate JDK is installed:
Java EE 7 requires JDK 7 or above to be installed beforehand as it uses some of the latest features; the current recommended version is the very latest JDK 8. To check what version you have, in a shell/command window simply type:
javac -version

or
java -versionIf the
java command is not recognised then you will have to install the JDK which can be downloaded from here:
http://java.sun.com/javase/downloads/index.jsp
2. Set the JAVA_HOME variable to the JDK location:
An easy tip to determine the location of where your JDK (one or multiple versions) is installed is to enter the following command into your shell box:
sudo update-alternatives --config java

Set your JAVA_HOME variable as follows:
export JAVA_HOME={jdk-installation-directory}(in the example above: /usr/lib/jvm/java-8-oracle)
To persist the variable across sessions, simply add the export to the current user's .bashrc file.
This is a hidden file in the user's home directory; /home/$user/.bashrc.
3. Downloading Payara Server
Payara Server can be downloaded from: http://www.payara.fish/downloads
Download to a directory of your choosing and then unzip.
Running Payara Server 4.1
In the case of Payara to run the server, change directory to install_directory/payara41/bin and enter the following command:
./asadmin start-domain

This will start domain1, which is the default domain included with Payara Server. If you were to create a new domain, that would need to be specified explicitly - like with Payara's payaradomain. To maintain compatibility with GlassFish, though, domain1 is preferred if no domain is specified, rather than throwing an error from version 4.1.153 and up. Accessing the Administration Console
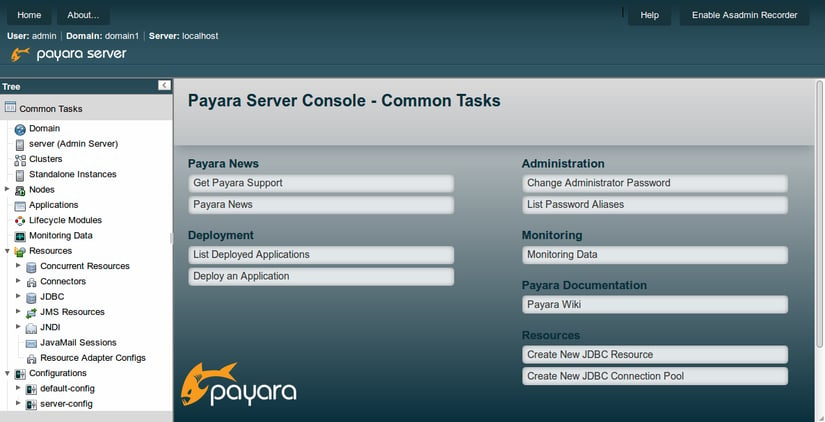
Once the server is up running, navigate to http://localhost:4848 to access the console. Your page should look something like this:

See Part 2 here: How to Deploy an Application on Payara Server / GlassFish 4.1

Note: There is an updated version of this blog available for Installing Payara Server 5 on Ubuntu.
Related Posts
Moving Beyond GlassFish - Here's Why and How
Published on 11 Nov 2024
by Chiara Civardi
0 Comments
If you’re still managing Java applications on GlassFish middleware, you might be hitting some roadblocks, such as difficulties with automation, lack of integrated monitoring and official support and limited abilities with modern tools. However, ...
Can You Futureproof Your Enterprise Java Apps or Are They Doomed to Fall Behind?
Published on 16 Oct 2024
by Chiara Civardi
0 Comments

