
Originally published on 30 Jun 2016
Last updated on 24 Mar 2020

GlassFish has traditionally used Project Shoal to power its clusters. Since Shoal is no longer actively maintained, Payara Server intends to replace Shoal with Hazelcast, which has the added benefit of being JCache compliant.
Note: this blog post is relevant for Payara Server 4. If you're using Payara Server 5, you'll want to learn about the automatic clustering with deployment groups:
- Deployment Groups in Payara Server 5
- Clustering and Deployment Groups in Payara Server 5
- Creating a Simple Deployment Group
What are we building?
The simplest kind of cluster with Payara Server involves a Domain Administration Server (DAS) and two or more standalone instances that share the same configuration. The standalone instances may run on remote machines, but we will make it simple and run them on the same machine, occupying different ports.
Why would I need it?
A cluster is a group of application servers that transparently run applications as if they were a single entity. Therefore, a cluster is able to support much more load than a single server. It allows for the provision of extra capacity by adding more servers when needed, effectively scaling the application on demand.
Additional servers also makes the application highly available, because it allows it to run on multiple independent nodes and thus allowing the take-over of a failed instance by another node.
Payara Server also provides replication among members of the cluster. It is possible to turn on automatic replication of web sessions, stateful session beans as well as cached data. This prevents data loss if any member of a cluster fails. In such a case, the data is automatically available to other instances which can transparently take over.
How do I implement it?
First, we will create 2 standalone instances that share the same configuration. There are two ways to do it, both very simple.
First approach is to create an instance first:
- Create a standalone instance, copying the default configuration
- Create a second standalone instance referencing the configuration of the first instance
We will use admin console to perform the steps, although the same can be achieved by the asadmin utility.
To create a standalone instance, we will go to the section called Standalone instances, and press the New... button.
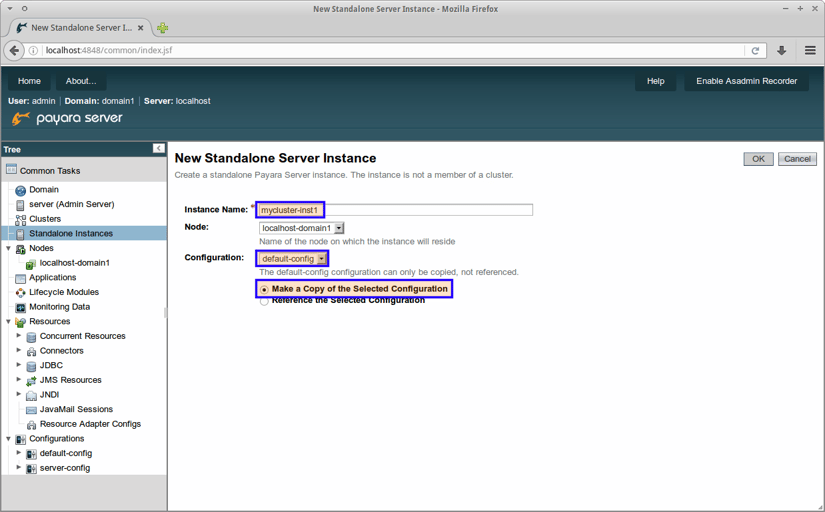
We will give our instance a name and copy the configuration from default-config. The new instance will run on a predefined node at localhost.
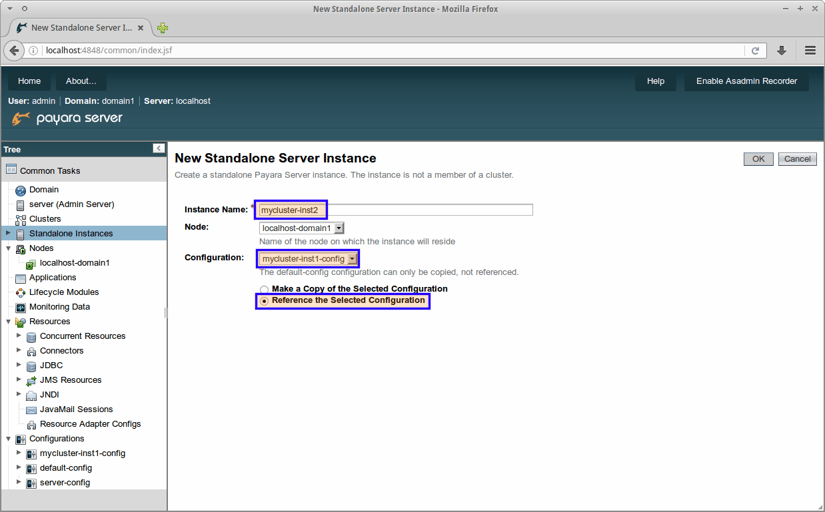
To create a second instance (and any subsequent instances), we will again create a new standalone instance as in the previous step. But now, we will make it reference the configuration of the first instance.
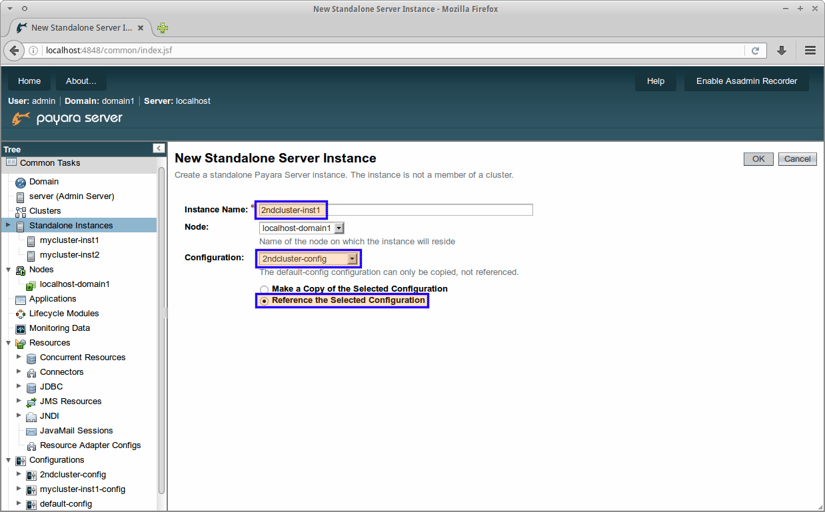
Alternatively, we may copy the configuration first, allowing us to give it a more suitable name:
- Copy the default configuration to a new configuration
- Create 2 standalone instances referencing the new configuration
Once the instances are created, we need to enable Hazelcast replication:
- Enable and configure Hazelcast
- Enable Availability Service and select Hazelcast replication
Hazelcast configuration is available in the Hazelcast tab of a standalone instance:
- Enable Hazelcast in the configuration tab of the first instance
- Note that we haven't changed any of the configuration, so there may be cross-talk between our cluster and other clusters
- Configure Hazelcast to avoid cross-talk
- Use different multicast groups
- Use different cluster groups
- Default group and password are:
- o Development
- o D3v3l0pm3nt
Note, that this configures Hazelcast for every instance which references the same configuration. This is a bit confusing so, in the 162 release, the configuration of Hazelcast has been moved from an instance tab to a section within the configuration.
To configure replication of web sessions and session beans, open the Availability Service section. Then select hazelcast as the Persistence Type in the Web Container Availability tab. Ensure that Availability Service is enabled on this tab.
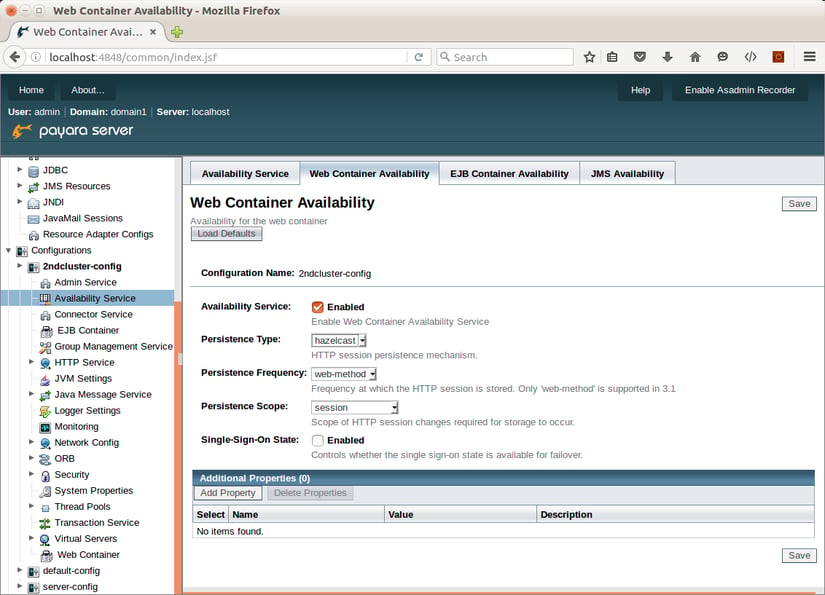
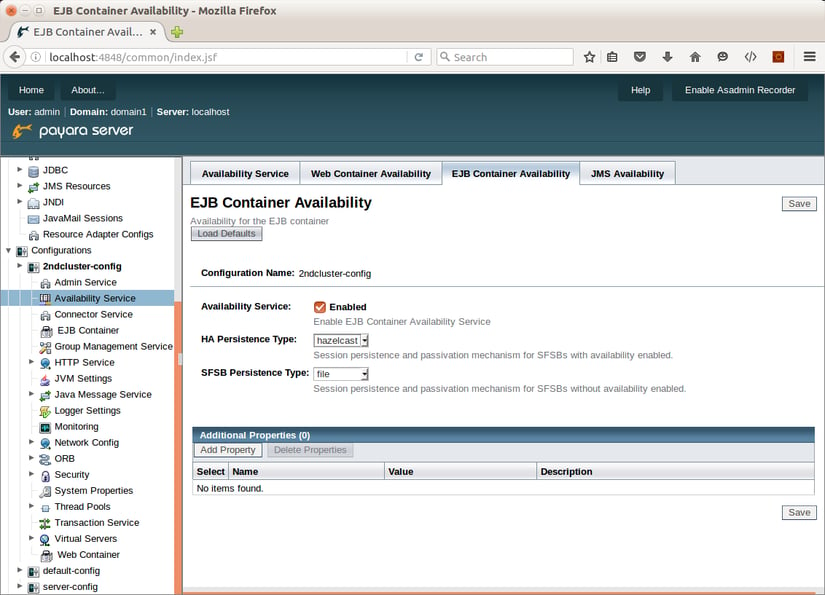
In the EJB Container Availability tab, select hazelcast as HA Persistence Type and ensure that Availability Service is enabled.
What to do next?
We've created a very simple cluster, with only 2 instances, both running on the same machine. In order to make the cluster appear as a single transparent server to the outside world, we still need to add a load balancer to the game, which will act as a gateway to the instances of the cluster.
We may later extend our cluster to remote machines and run instances on additional remote nodes. We may go even further; Payara Server clustering based on Hazelcast opens various options beyond traditional clustering. It allows running heterogeneous instances with different deployed applications and configuring where and how the data is replicated. It is even possible to combine Payara Server and Payara Micro instances in the same cluster, opening a smooth transition path to a microservice architecture.
Find out more about Payara Server's scaling & clustering capabilities.

Related Posts
Payara Server's High Availability Architecture: A Quick Technical Overview
Published on 05 Jun 2024
by Luqman Saeed
2 Comments

Introduction
In today's business world, competition is fierce and relentless. As a result, maximizing uptime while reducing downtime and its expenses is a top priority. In particular, users now expect applications to deliver consistent ...
Continuous Integration and Continuous Deployment for Jakarta EE Applications Made Easy
Published on 25 Mar 2024
by Luqman Saeed
1 Comment
Continuous Integration and Continuous Deployment (CI/CD) activities are designed to convey your Jakarta EE applications to end users. Thanks to the unique flexibility of Jakarta EE, multiple CI/CD options are available to software developers. ...