
Originally published on 18 Mar 2018
Last updated on 27 Feb 2020

MySQL is an open-source relational database you may wish to use with Payara Server, that excels at fast reads and is commonly used as storage for a CMS. This blog will show you how to set up MySQL on Ubuntu and connect to it from Payara Server.
To install MySQL on Debian or Ubuntu based distributions running the following command in the terminal:
apt-get install mysql-server mysql-client
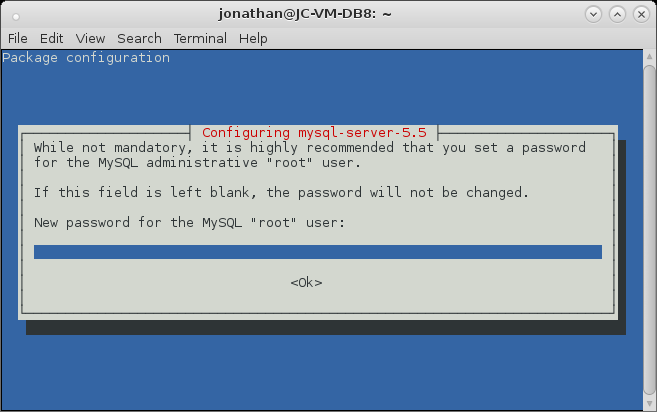
When it has finished downloading you will be asked to enter a root password. For the purposes of the tutorial I will be using password as a placeholder. Remember to use a strong password in a production environment.
MySQL should start automatically.
You can test whether MySQl has started by running the login command
mysql -uroot -ppassword
If you get:
ERROR 2002 (HY000): Can't connect to local MySQL server through socket '/var/run/mysqld/mysqld.sock' (2)
This means that MySQL isn’t running. You can start it with:
sudo service mysql start
Once you have logged in to the database if you run the command
SHOW DATABASES;
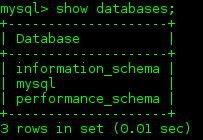
You will see the above default databases. They are required for MySQL to work. For this tutorial I will create an example project and database. To create a new database:
CREATE DATABASE amazon;
To create a user with the username amazonas and the password 'river' on the computer:
CREATE USER ‘amazonas’@’localhost’ IDENTIFIED BY ‘river’;
GRANT ALL PRIVILEGES ON amazon.* TO ‘amazonas’@’localhost’;
Download the MySQL JDBC driver from https://dev.mysql.com/downloads/connector/j/, then add the jar to Payara Server by running the asadmin command:
asadmin add-library /path/to/mysql-connector-java-bin.jar
Remember to download the corresponding JDBC driver for the version of the MySQL database server that you installed.
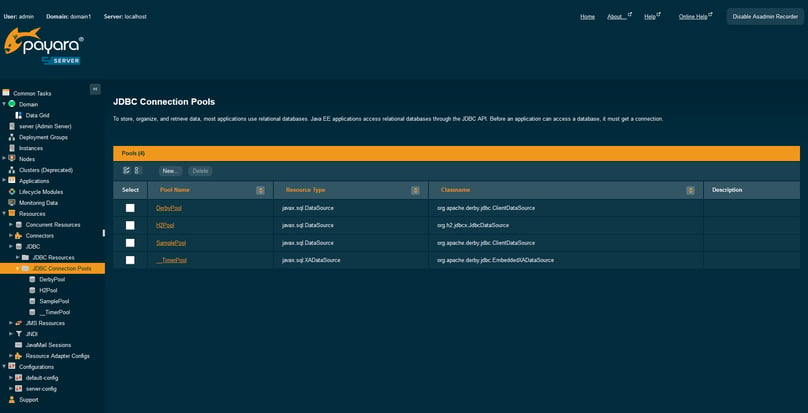
Then go to the administration console at http://localhost:4848. Go to Resources → JDBC → JDBC Connection Pools.
You will notice there are two pools already. These are the default server pools and are not recommended for production usage. Click the New buttton.
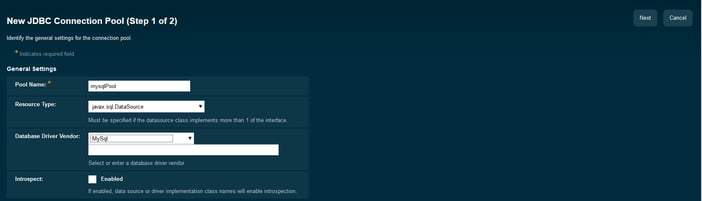
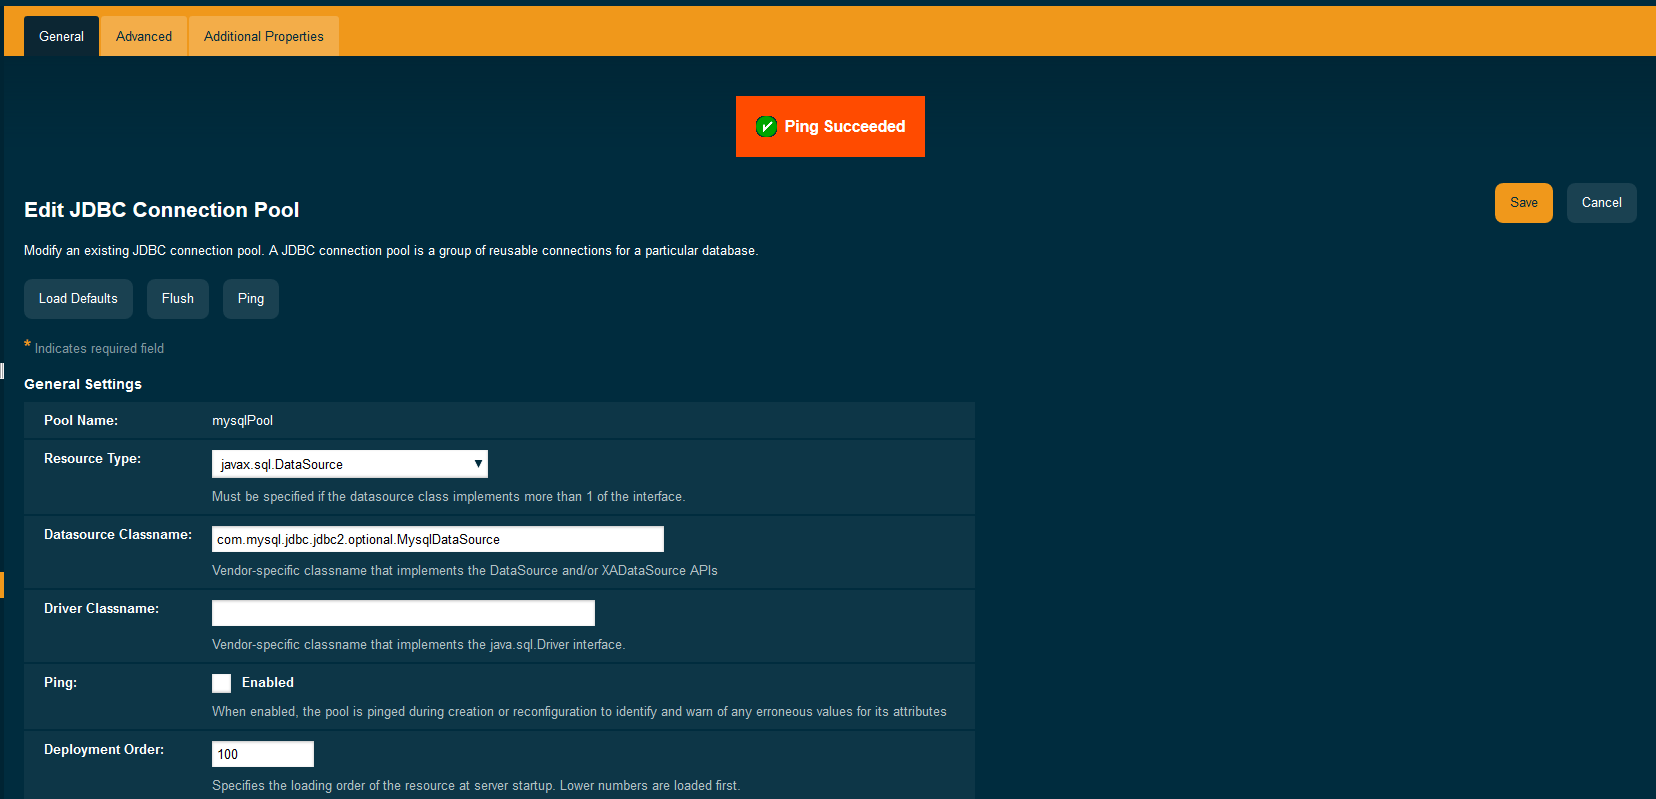
The pool name is how the connection pool is to be referred to when using it as a JNDI resource, which here I will set to mysqlpool. Set the resource type to javax.sql.DataSource and and choose the database driver vendor accordingly: If using a MySQL version equal or higher than 8.0, choose MySql8, otherwise choose MySql. Then click Next.
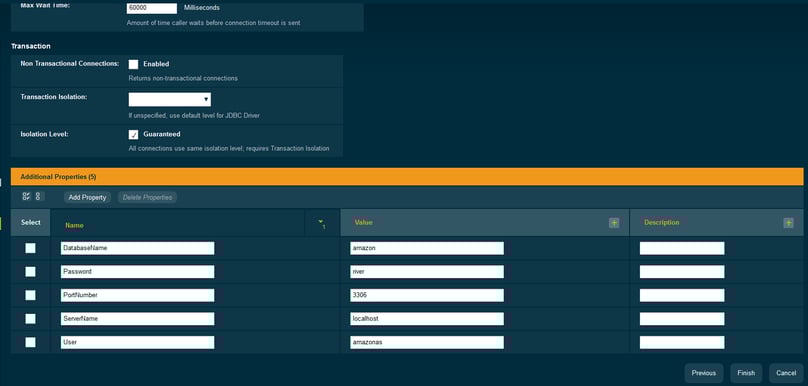
On the next page scroll down to the bottom where there is additional properties. There you must set the following properties:
ServerName– this is the location of the MySQL server. In this case, if the database is located on the same machine then this will be localhost.PortNumber: The port where the MySQL server is listening to new connections. Usually is 3306User– the username for the database.Password– the password for the specified userDatabaseName– The name of the database you want to connect to.
You can test the connection by clicking the ping button once the pool has been created. For more information on connection pools see http://blog.payara.fish/an-introduction-to-connection-pools-in-payara-server
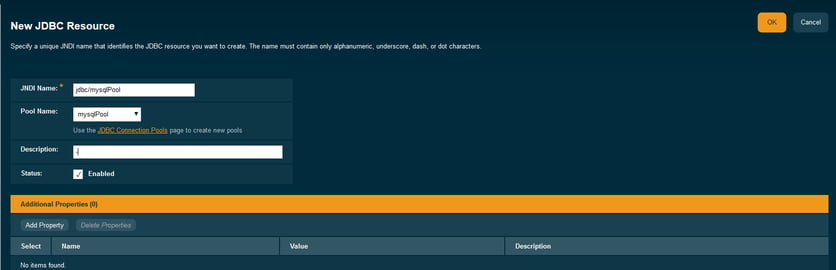
 Then go to Resources → JDBC → JDBC Resources and click on New.
Enter the JNDI name that you wish to use and set the pool name to be mysqlPool, as set up in the previous step.
Now, you can inject a reference to a datasource for the MySQL database inside a managed component like this:
@Resource(lookup = "jdbc/mysqlpool")
DataSource ds;
Note that you can only use resources in a web container or a managed bean (i.e. CDI beans, EJBs etc.).

Related Posts
Boost Developer Productivity with Payara Server Maven Plugin + AI Agent
Published on 12 Sep 2025
by Gaurav Gupta
0 Comments

Managing Payara Server Just Got Smarter
Imagine managing your Jakarta EE applications not just with Maven goals, but by asking natural questions.
With the experimental AI Agent built into the Payara Server Community's Maven Plugin, you can ...
The Payara Monthly Catch - August 2025
Published on 02 Sep 2025
by Dominika Tasarz
0 Comments

Welcome aboard the August 2025 issue of The Payara Monthly Catch! With summer in full swing, things may have felt a little more quiet across the Java world - but certainly not less interesting! We hope you managed to get some rest and recharge, ...