
Originally published on 25 Sep 2018
Last updated on 28 Oct 2019

In the previous guide, we’ve seen how we can configure the Payara Platform to connect to a database and use the datasource from an application. This guide walks you through the process of building an application to store and retrieve data from the database.
Creating the Project
As a first step, we will create a simple maven web application in the Apache NetBeans IDE :
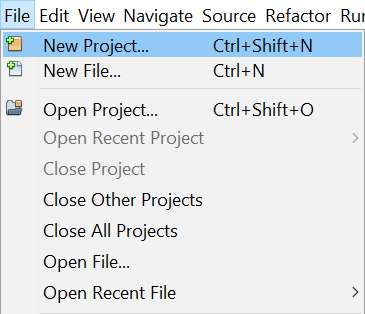
- In the IDE, choose File → New Project(Ctrl-Shift-N) from the main menu, as shown in the figure below :
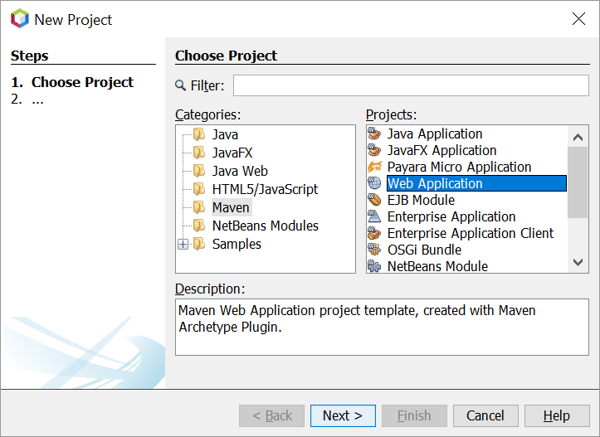
- In the New Project wizard, expand the Maven category and select Web Application as shown in the figure below, then click Next :
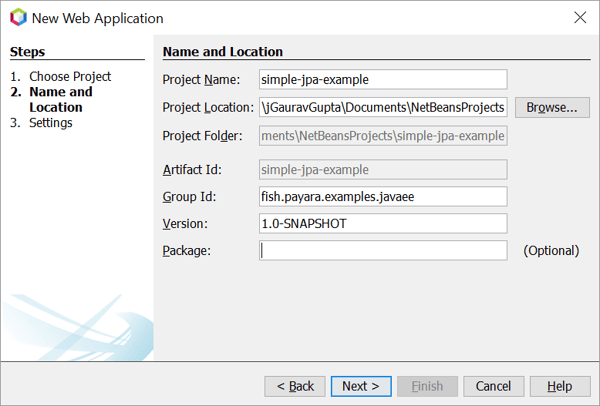
- Enter "simple-jpa-example" in the Project name text box and specify the Project Location to any directory on your system and click Next (as shown in the figure below) :
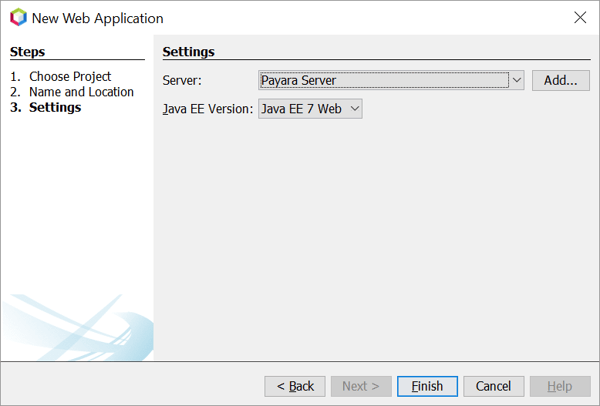
- Select the Payara Server to which you want to deploy the application :
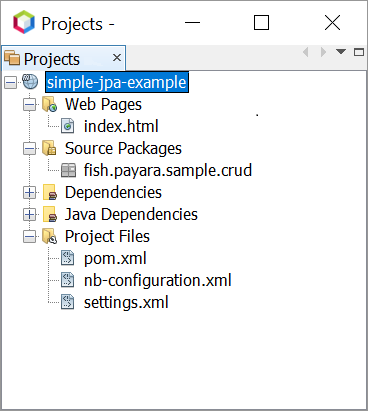
- Apache NetBeans IDE will create the maven web project with the following structure :
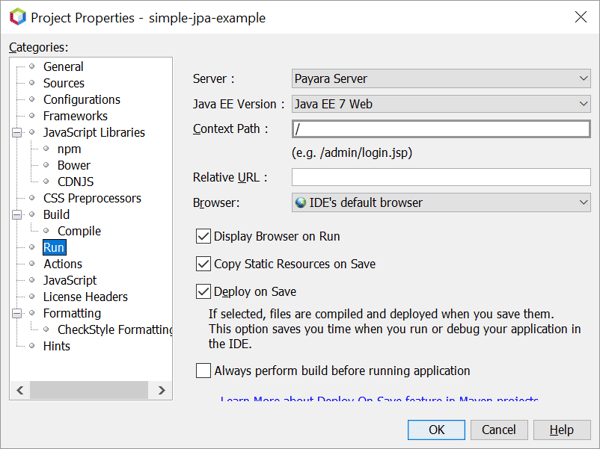
- Now right click on project → Properties → Run → set the Context Path to root ‘/’ :
Creating persistence.xml :
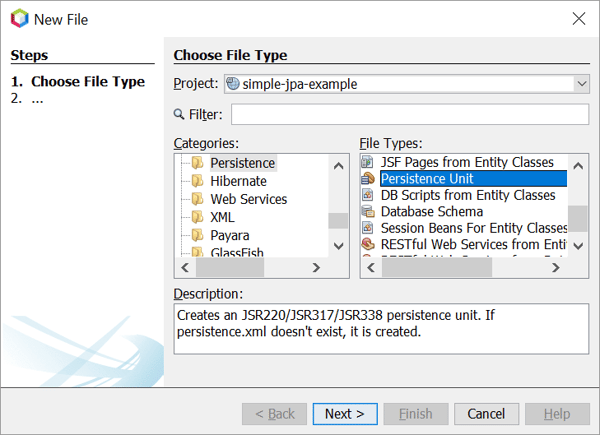
- To create persistence.xml, goto the File menu → New File → Persistence category, select Persistence Unit and click Next :
- Enter POSTGRESQL_PU the in the Persistence Unit name text box and select already configured data-source in the Payara Server and click Next :

Note : If data-source not defined in persistence.xml then a default data source with JNDI name java:comp/DefaultDataSource will wired to JDBC resource that’s default provided by the container.
Creating the Person (@Entity) :
The next thing we’re going to do is create a Person entity with a primary key.
// the package and imports omitted for brevity

@Entity
public class Person {

   @Id
   @GeneratedValue
   private Long id;

   private String name;

   private String address;

    // the typical getters and setters omitted for brevity
}
Note: If you’re missing the imports, press Alt+Shift+I, NetBeans will add the imports and for the getter/setter methods, press Alt+Insert → select Getter and Setter to generate. Other IDEs offer a similar shortcut.
Here you have a Person class with three attributes : id, name, and the address. The Person class is annotated with @Entity, indicating that it is a JPA entity. As @Table annotation is not defined at class-level, Persistence provider assumes that this entity will be mapped to a table named Person. @Table annotation is required if database table name is different from the class name.
The id attribute is annotated with @Id so that persistence provider will recognise it as primary key column. The id attribute is also annotated with @GeneratedValue to indicate that it should be automatically generated by the database. The other two attributes, name and address are left unannotated with @Column. So persistence provider assumes that attributes will be mapped to columns that share the same name as the attributes themselves.
Creating a Repository to Manage the Entity
We’ll now create a repository class that talks to the database and access the Person’s data.
@ApplicationScoped
public class PersonRepository {

   @PersistenceContext(unitName = "POSTGRESQL_PU")
   private EntityManager em;

   @Transactional(REQUIRED)
   public void create(Person person) {
       em.persist(person);
   }

   public List<Person> findAll() {
       return em.createQuery("SELECT p FROM Person p", Person.class)
                      .getResultList();
   }

   public Person find(Long id) {
       return em.find(Person.class, id);
   }

}
Creating a Rest Endpoint Using JAX-RS
To create a rest endpoint, we first need to configure the application using the default implementations of javax.ws.rs.core.Application subclass.
@ApplicationPath("")
public class ApplicationConfig extends Application {

}
Let’s define the REST APIs and expose the endpoints. We'll begin by creating a new class named PersonController :
@Path("/api/person")
@ApplicationScoped
public class PersonController {

   @Inject
   private PersonRepository personRepository;

   @POST
   public Response createPerson(Person person) {
       personRepository.create(person);
       return Response.ok(person).build();
   }

   @GET
   public List<Person> getAllPeople() {
       List<Person> people = personRepository.findAll();
       return people;
   }

   @GET
   @Path("/{id}")
   public Response getPerson(@PathParam("id") Long id) {
       LOG.log(Level.FINE, "REST request to get Person : {0}", id);
       Person person = personRepository.find(id);
       if (person == null) {
           return Response.status(Response.Status.NOT_FOUND).build();
       } else {
           return Response.ok(person).build();
       }
   }

}
The @Path annotation defines that this class will handle calls made to the URL ‘/api/person’.
Deploying the Application
We’ve successfully created all of the APIs. Let’s now deploy the application and test the APIs. Just right click on the project and select deploy option :

The application will start at Payara’s default port 8080.
Testing the APIs
Now, It’s time to test our APIs and REST endpoints using curl commands or postman.
- Execute the following curl command to create the Person :
curl -X POST http://localhost:8080/api/person --header "Content-Type: application/json" -d "{\"name\":\"Gaurav Gupta\", \"address\":\"Lucknow, India\"}"

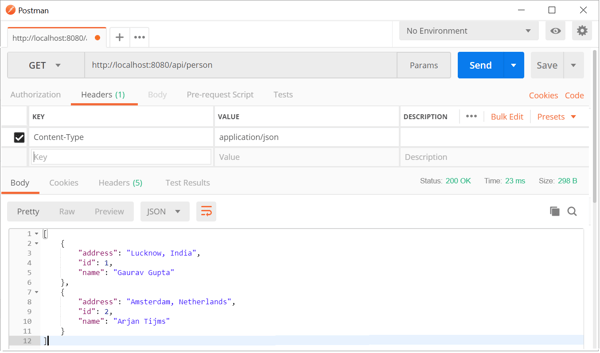
- Retrieving all the People using the following curl command :
curl -X GET http://localhost:8080/api/person
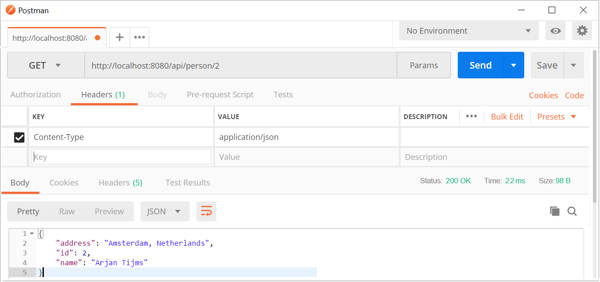
- Retrieving a single Person using the following curl command :
curl -X GET http://localhost:8080/api/person/2
Build Upon the Example Source Code
The application that we created in this guide had only one domain model. Of course, you may extend it by adding more domain model and defining the relationship using JPA annotations.
You can find the source code of the example used in this guide on the github repository. Feel free to clone the repository and build upon it.
Happy learning ! Let me know if you have any questions in the comment section.
Related Posts
Boost Developer Productivity with Payara Server Maven Plugin + AI Agent
Published on 12 Sep 2025
by Gaurav Gupta
0 Comments

Managing Payara Server Just Got Smarter
Imagine managing your Jakarta EE applications not just with Maven goals, but by asking natural questions.
With the experimental AI Agent built into the Payara Server Community's Maven Plugin, you can ...
The Payara Monthly Catch - August 2025
Published on 02 Sep 2025
by Dominika Tasarz
0 Comments

Welcome aboard the August 2025 issue of The Payara Monthly Catch! With summer in full swing, things may have felt a little more quiet across the Java world - but certainly not less interesting! We hope you managed to get some rest and recharge, ...