
Originally published on 30 Jul 2019
Last updated on 13 Dec 2019
In this blog, I will explain how to deploy applications using the Payara Server Admin Console. You can also watch this super short video (under 2 minutes) to see how to deploy applications using NetBeans, the Payara Server Admin Console, or using admin commands.
Here’s how to deploy and undeploy applications with the Payara Server Admin Console:
Use the Deploy Applications or Modules page to deploy an application. Click “Applications” on left side of Admin Console to open the page.
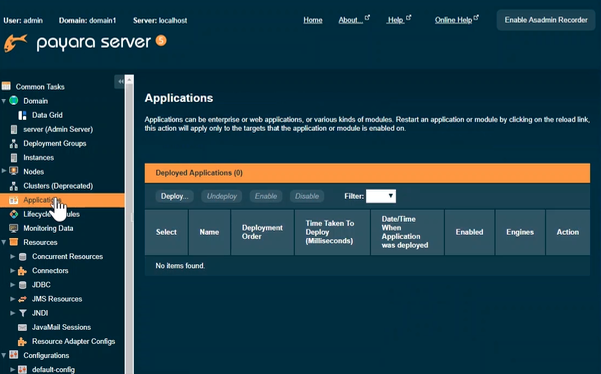
Next, click “Deploy” button to deploy an application.
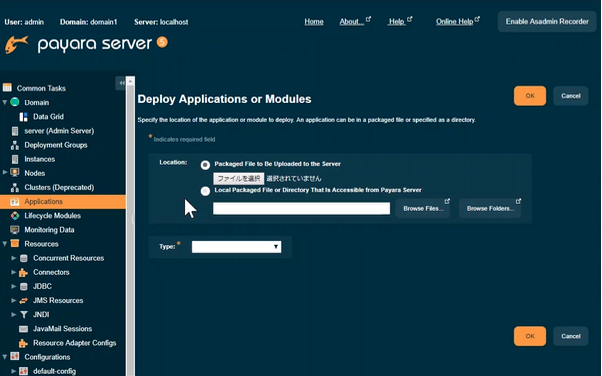
The Deploy Applications or Modules page contains the options for deployed applications. At first, it shows general options – “Location” and “Type”. Additional options appear only after you specify the Location field for the application.
Location
The location of the archive for the application that you are deploying.
The following options specify from where the archive is accessible and whether the archive is a file or a directory:
- “Packaged File to Be Uploaded to the Server” (default)
The archive is in a file that resides on or is accessible from the client machine. The client machine is the host on which you are viewing the Administration Console through a browser. - “Local Packaged File or Directory That is Accessible from the Payara Server”
The archive is a file that resides on the server machine, or is an unpackaged application in an exploded directory. The server machine is the host that is running the Payara Server domain administration server.
Type
The type of the application. Available choices are as follows:
- Web Application
- Enterprise Application
- Application Client
- Connector Module
- EJB JAR
- Other
If you set “Location” by “Packaged File to Be Uploaded to the Server”, the suitable type would be selected.
For the purposes of this blog, I will explain the rest of the steps using “Packaged File to Be Uploaded to the Server” as the example.
Open the Choose File dialog and choose the application archive, e.g. WAR file (clusterjsp-1.1.war)
“Type” is set as “Web Application” automatically.
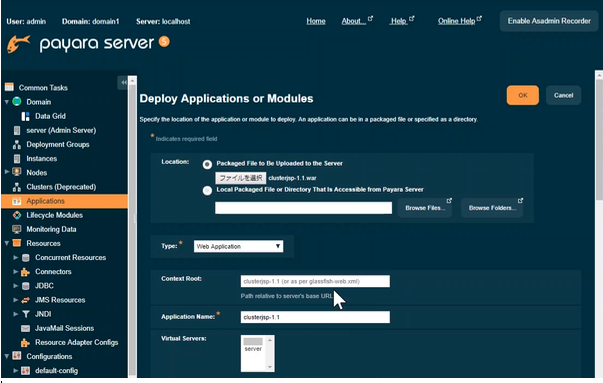
Additional Options for Web Applications
Below are some of the important options from all additional options available for Web application. You may learn more about those options in the Payara Server Documentation or Online Help on Admin Console (Payara Server 5.191 or later) in detail.
Context Root
The path to the application. In default, this value is archive file name or the value setting in glassfish-web.xml deployment descriptor. (e.g. clusterjsp-1.1) In the URL of the web application, the context root immediately follows the port number. (http://host:port/context-root/...)
Application Name
The name of the application. This value is mandatory, but Admin Console set the archive file name as initial value.
After setting additional options, click “OK” button to deploy the application. The application will then be added in the list of Deployed Applications on the Applications page.
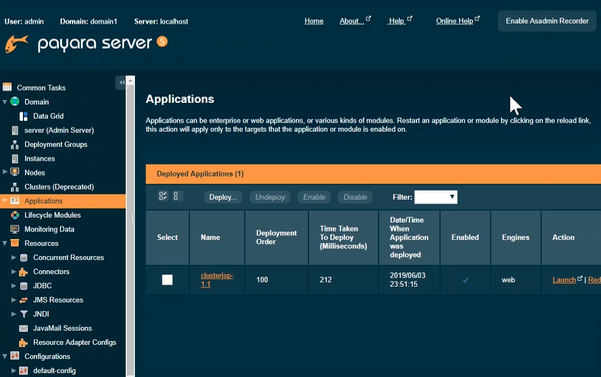
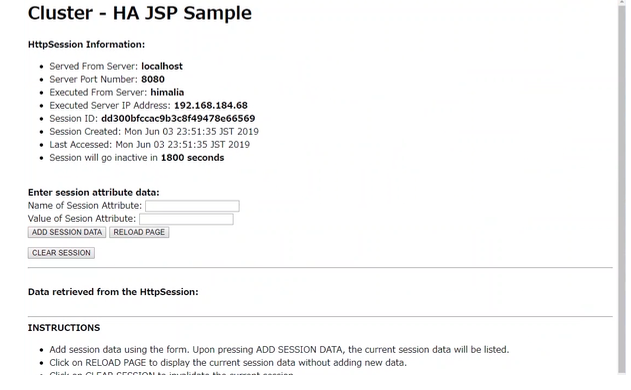
For this example, access http://localhost:4848/clusterjsp-1.1 to confirm running this application.
You may also show this URL to “Launch” in the list of Deployed Applications in case that the application has suitable index page.
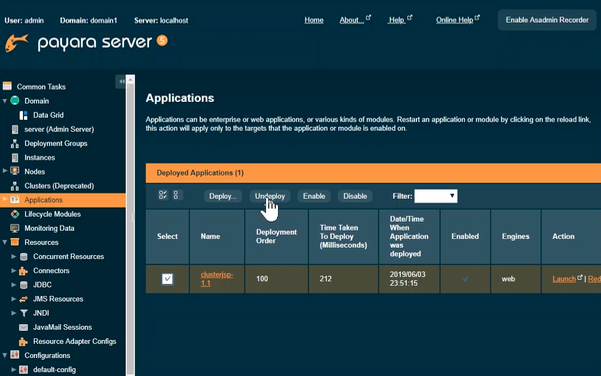
Undeploy Application
We can undeploy unused applications. Choose the application that has been already unused in the list of Deployed Applications and click “Undeploy” button to undeploy.
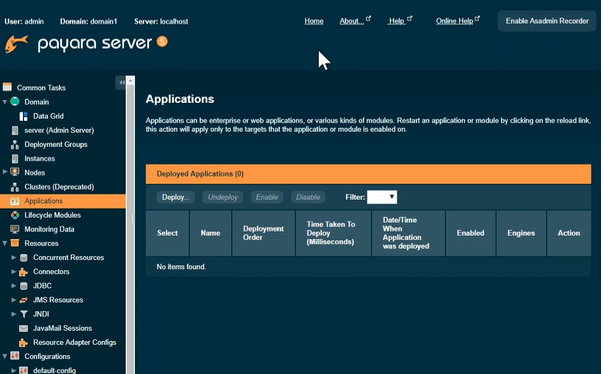
The applications that were undeployed are removed from the list of Deployed Applications.
For more getting started tips for using the Payara Platform, check out our Getting Started Guide:

Related Posts
Boost Developer Productivity with Payara Server Maven Plugin + AI Agent
Published on 12 Sep 2025
by Gaurav Gupta
0 Comments

Managing Payara Server Just Got Smarter
Imagine managing your Jakarta EE applications not just with Maven goals, but by asking natural questions.
With the experimental AI Agent built into the Payara Server Community's Maven Plugin, you can ...
The Payara Monthly Catch - August 2025
Published on 02 Sep 2025
by Dominika Tasarz
0 Comments

Welcome aboard the August 2025 issue of The Payara Monthly Catch! With summer in full swing, things may have felt a little more quiet across the Java world - but certainly not less interesting! We hope you managed to get some rest and recharge, ...