
Originally published on 21 Dec 2015
Last updated on 14 Oct 2020

In a previous blog we described how to disable the OpenMQ message broker in Payara Server. In this blog we'll describe how to use Active MQ and send and receive messages from Payara Server.
Installing ActiveMQ
We'll assume a default installation of ActiveMQ downloaded installed from http://activemq.apache.org/download.html. In this blog we are using the 5.15.11 release. Which we have downloaded and unzipped and run the default installation using;./activemq console
from within the bin directory of ActiveMQ. This will run the default ActiveMQ installation in the foreground so that we can see any log messages.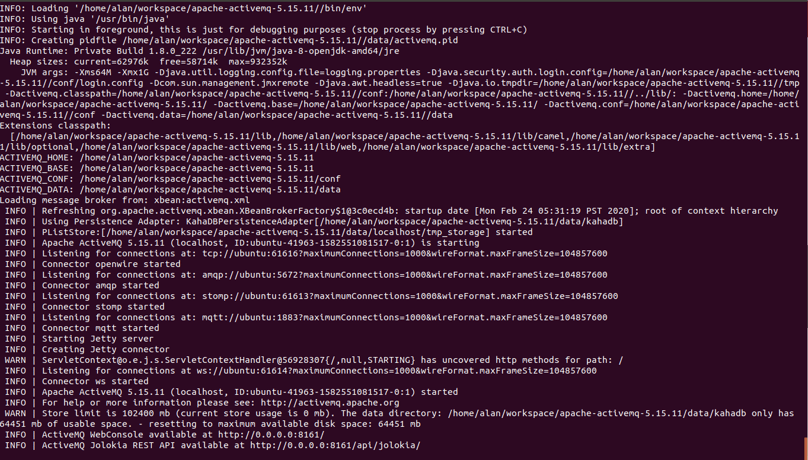
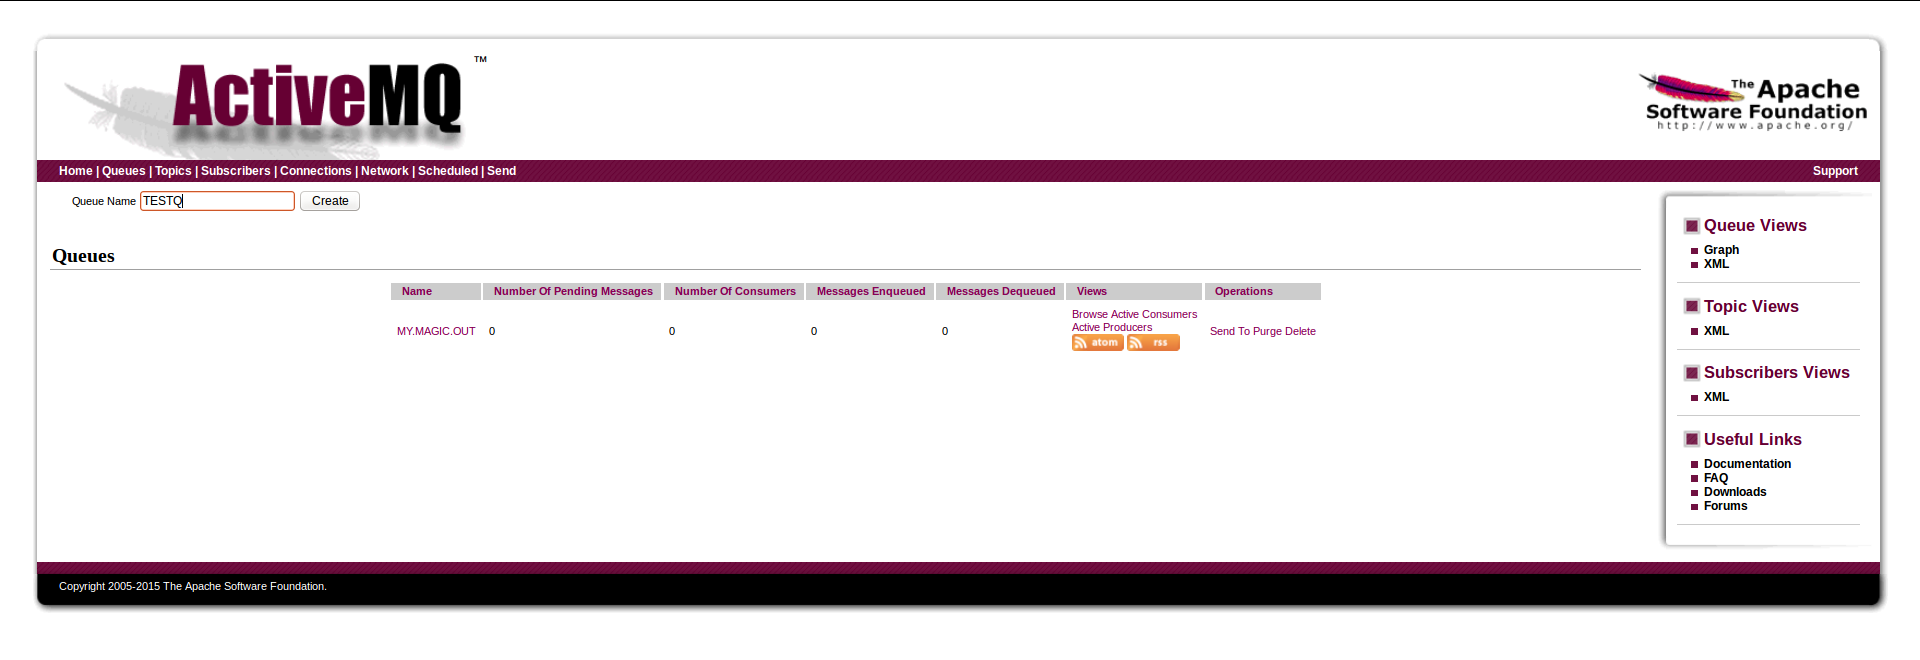
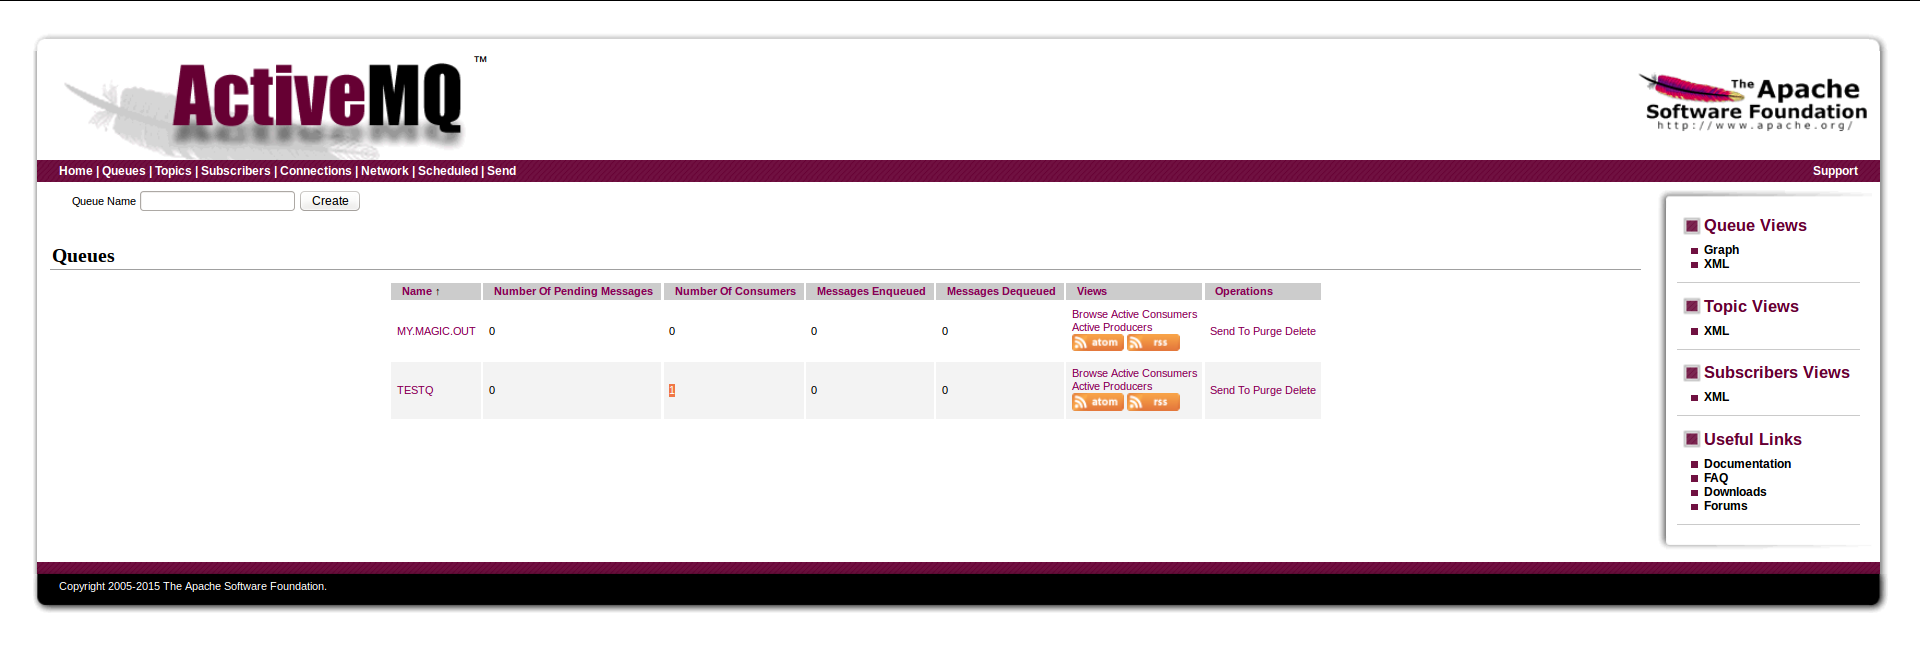
We will also create a test queue within the ActiveMQ broker. The ActiveMQ broker runs a web-console when it boots that is accessible from http://127.0.0.1:8161
Access the web console and login with the default credentials admin admin. The create a queue called TESTQ
 (click to enlarge)
Deploy the ActiveMQ RAR to Payara Server
Now we need to set up the connectivity between Payara Server and ActiveMQ. To do this we use as a standard JavaEE resource adapter. Thankfully the ActiveMQ team provide us one which can be downloaded from Maven Central athttp://search.maven.org/#artifactdetails|org.apache.activemq/activemq-rar/5.15.11/rar

Download with
wget http://search.maven.org/remotecontent?filepath=org/apache/activemq/activemq-rar/5.15.11/activemq-rar-5.15.11.rar -O activemq-rar-5.15.11.rar
The rar then needs to be deployed to Payara Server.
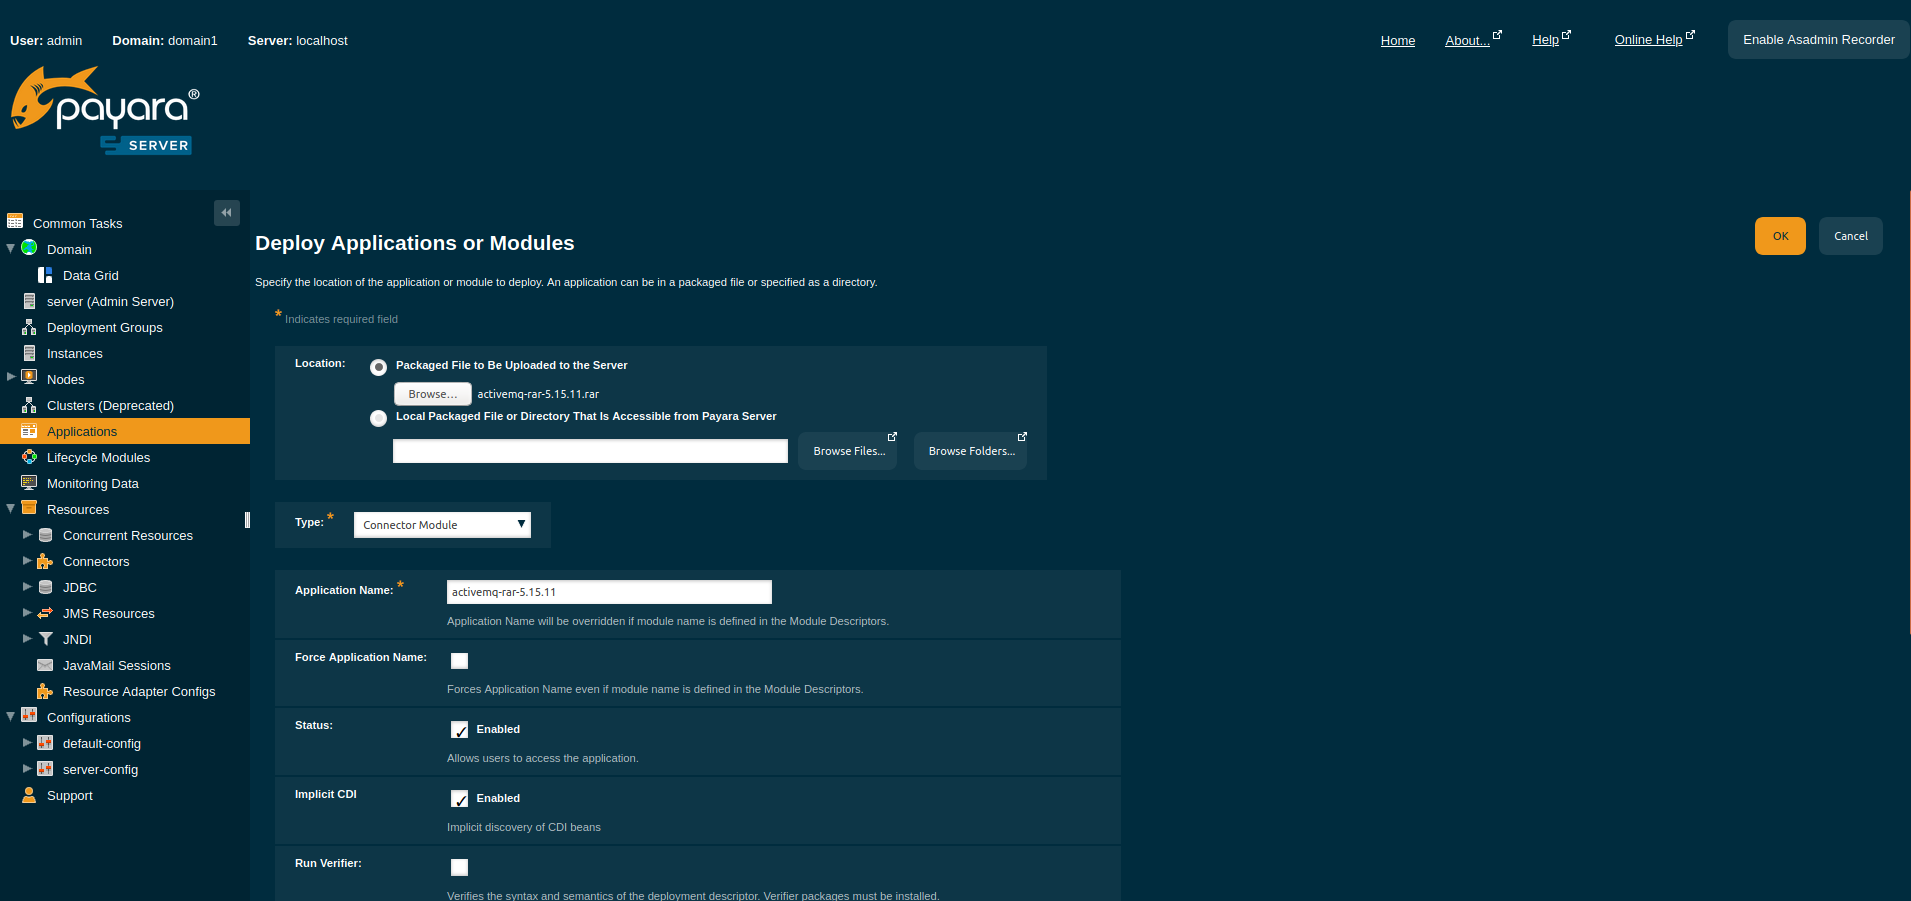
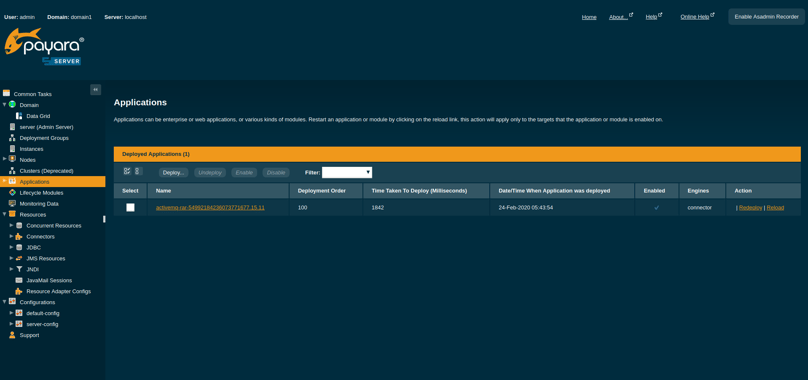
Once it has been deployed as a Java EE connector we need to configure the connector to connect to our default broker. You can also use asadmin to deploy the rar file.asadmin deploy --type rar activemq-rar-5.12.0.rar
Configuring the ActiveMQ Connector
First we need to create a Configuration for the resource adapter to refer to our ActiveMQ broker.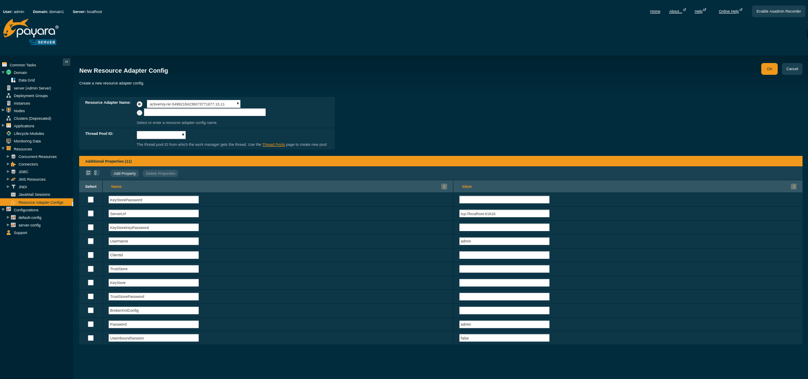
The key settings are ServerURL, UserName and Password. For an out of the box ActiveMQ configuration they should be set to;
| ServerURL | tcp://127.0.0.1:61616 |
| UserName | admin |
| Password | admin |
The resource adapter configuration can also be created using asadmin via;
asadmin create-resource-adapter-config --property ServerUrl=tcp://127.0.0.1:61616:UserName='admin':Password='admin' activemq-rar-5.12.0Now we need to create a JMS connection pool as shown in the screen shots below.
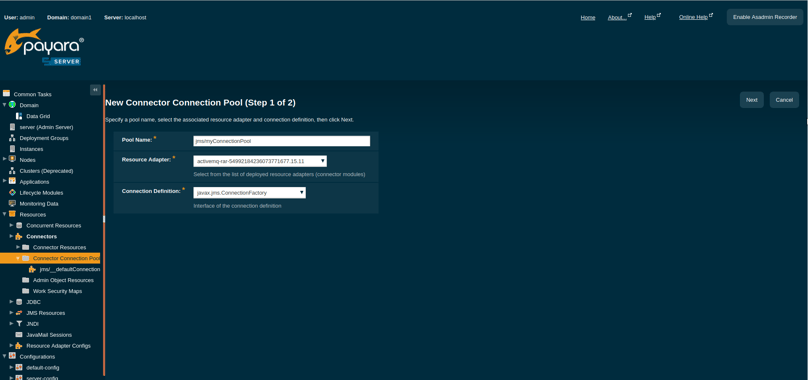
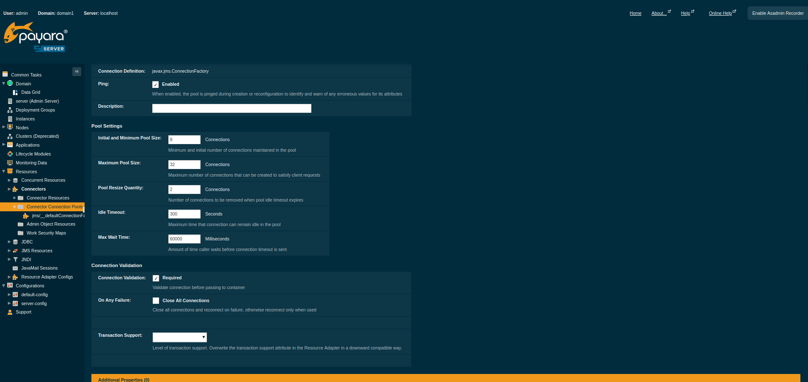
This can also be created using asadmin;asadmin create-connector-connection-pool --raname activemq-rar-5.12.0 --connectiondefinition javax.jms.ConnectionFactory --ping true --isconnectvalidatereq true jms/myConnectionPoolFinally we create a JNDI mapping for our JMS Connection pool by creating a JMS resource.
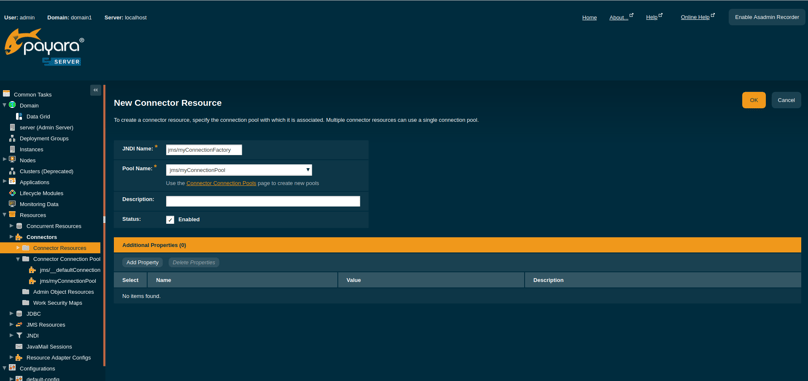
Again we can also create the JNDI mapping via asadmin;
asadmin create-connector-resource --poolname jms/myConnectionPool jms/myConnectionFactory
Now we have the connection factory configured we can also create a JMS mapping to our Queue
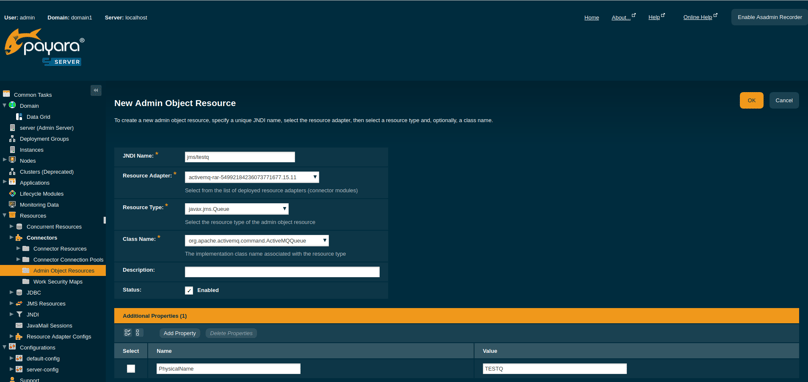
asadmin create-admin-object --raname activemq-rar-5.12.0 --restype javax.jms.Queue --property PhysicalName=TESTQ jms/TESTQ
We are now set to write our MDB.Writing our MDB
Below shows the code for an MDB that listens on the queue configured in this blog within ActiveMQ. You can see that both the resource adapter, the physical name of the queue and the JNDI name are set as Activation Properties of the MDB. Note the Activation Property resourceAdapter is only available from Payara Server 4.1.153.2 onwards. If you have a version of Glassish or Payara Server prior to that you will need to specify the resource adapter in your glassfish-ejb.xml deployment descriptor.
@MessageDriven(name = "testmdb", activationConfig = {
    @ActivationConfigProperty(propertyName = "destinationLookup", propertyValue = "jms/TESTQ"),
    @ActivationConfigProperty(propertyName = "destinationType", propertyValue = "javax.jms.Queue"),
    @ActivationConfigProperty(propertyName = "destination", propertyValue = "TESTQ"),
    @ActivationConfigProperty(propertyName = "resourceAdapter", propertyValue = "activemq-rar-5.12.0")

})
public class NewMessageBean implements MessageListener {

    public NewMessageBean() {
    }

    @Override
    public void onMessage(Message message) {
        System.out.println("Got message " + message);
    }
}
If you build and deploy this MDB you will see in the Active MQ console that we have a single consumer on our queue.
You can test the MDB by sending a message using the ActiveMQ console.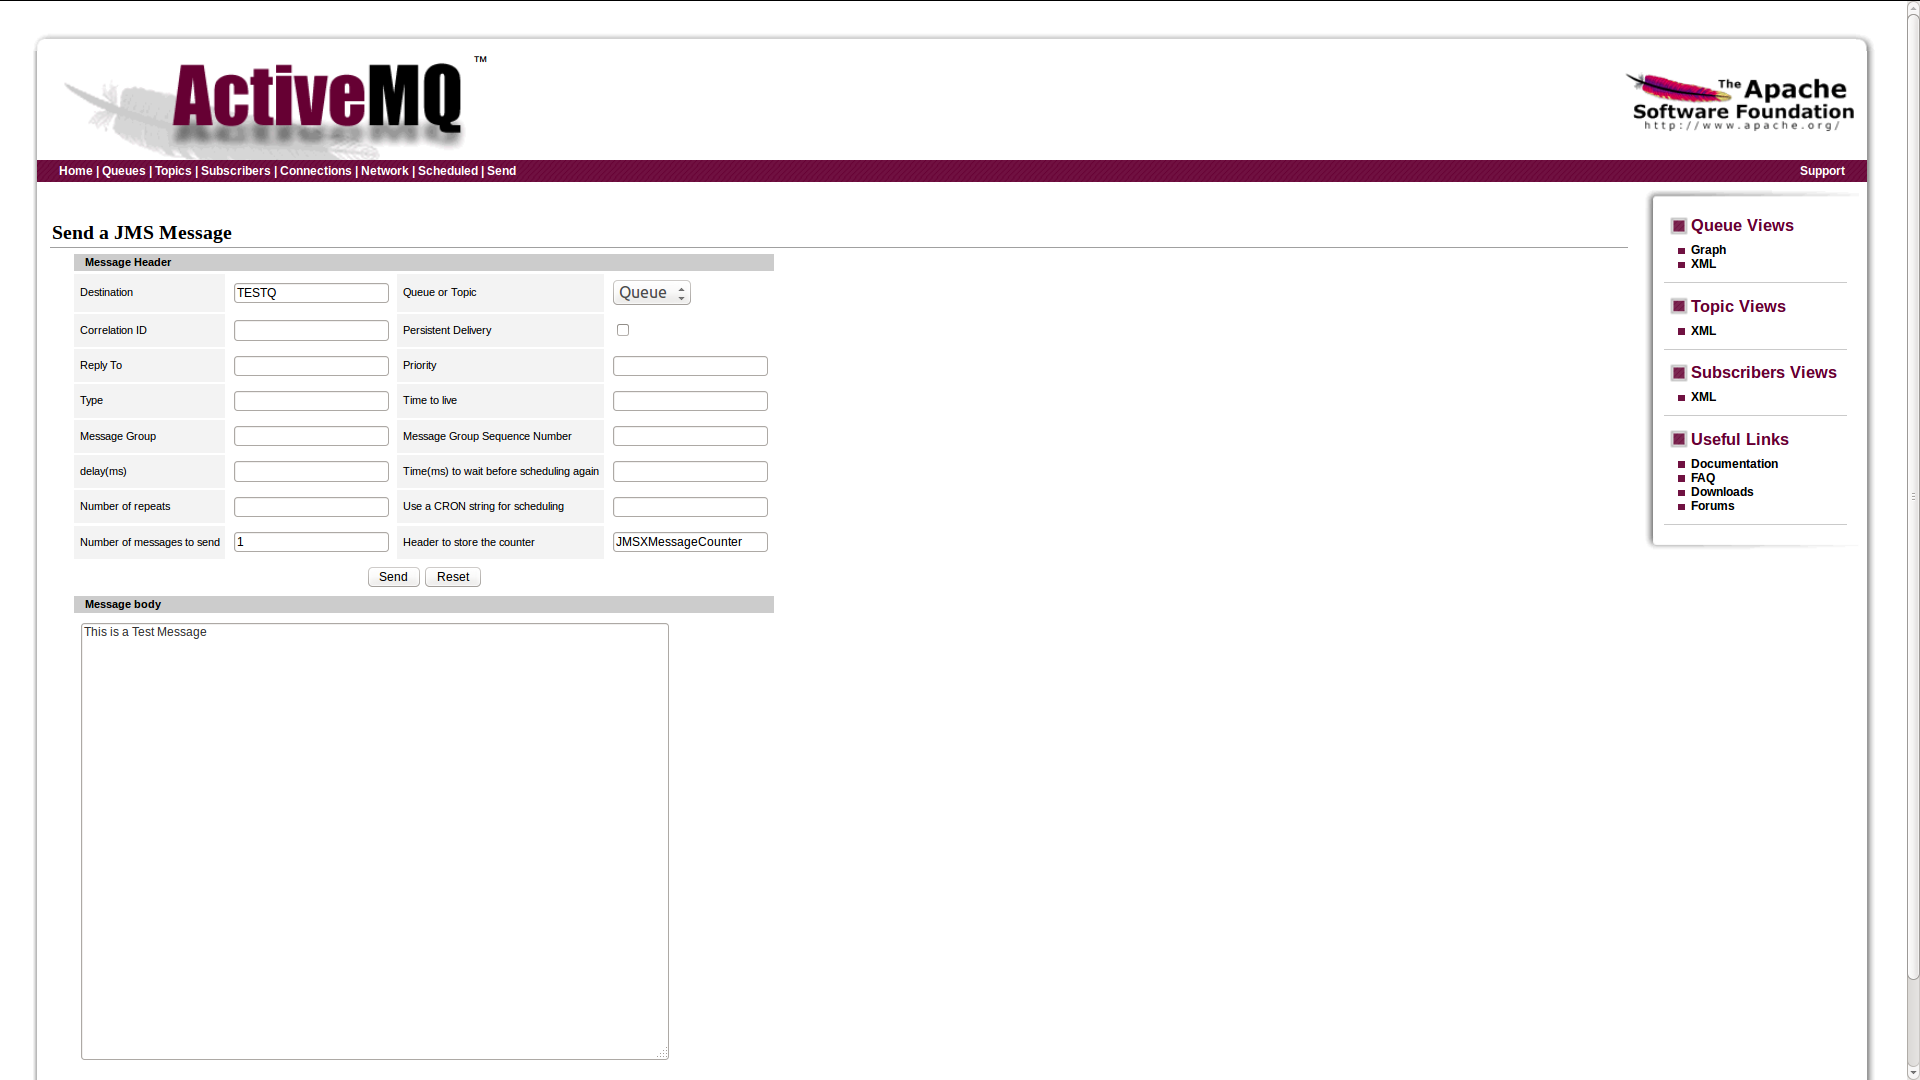
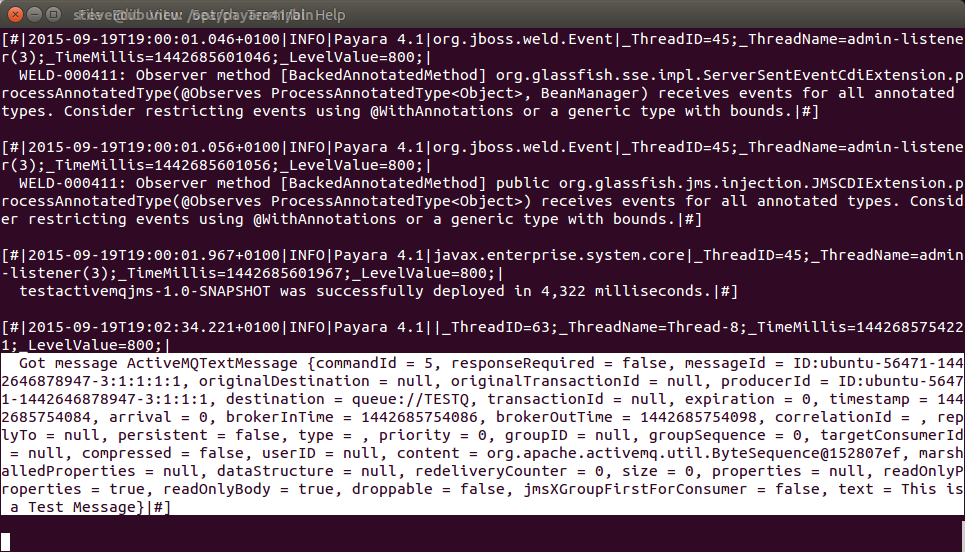
Once you have sent the message you can check the server log as our code just printed out the received message.
That's it. You have successfully connected Active MQ to Payara Server. Give it a try:

Related Posts
Continuous Integration and Continuous Deployment for Jakarta EE Applications Made Easy
Published on 25 Mar 2024
by Luqman Saeed
1 Comment
Continuous Integration and Continuous Deployment (CI/CD) activities are designed to convey your Jakarta EE applications to end users. Thanks to the unique flexibility of Jakarta EE, multiple CI/CD options are available to software developers. ...
Easy Jakarta EE Integration Testing with the Payara Platform and Testcontainers
Published on 24 Mar 2022
by Fabio Turizo
0 Comments

One major issue when developing modern enterprise applications is the "works on my machine" problem: when an application works well on your machine but is not functional in production or even on a colleague's machine. An even more prevalent ...