
Published on 14 Dec 2017

Admitting When You’re Wrong
Just recently, I have had to admit being wrong. Very wrong. Way back at the start of October, I was feeling the familiar sensation of panic and dread that only happens right before I need to give a presentation that includes a demo! In the end, there were major problems with the AV setup in the room I was allocated, so even arriving as early I could to set up didn’t give the techs enough time to hook up my laptop successfully.
One thing that I was very keen to demonstrate – aside from some nice new features in Java EE 8 – was how quick and easy it is to develop and build MicroServices packaged as Uber JARs with our new Payara Micro Maven plugin. Previously, if you wanted a single deployment unit, you would need to use the Maven Exec plugin to launch Payara during the build and output an Uber JAR. I had found this to be so time consuming in the past, that I never bothered during development.
Now, using the Maven plugin made such a difference, I thought this was as good as it gets! Build a project in a couple of seconds and start it in a couple more – how much faster could it possibly get?
Quite a lot faster, it turns out.
The Need For Speed
Even though the use of the new plugin had managed to get rid of a huge amount of time wasted during build, developing my JavaOne demo allowed me to experience some more “real world” pain of rapid minor changes with an application spread over a couple of microservices. Even with very lightweight demo apps, the pain of a couple of seconds to rebuild, followed by another couple of seconds to start is made much worse when several dependent services are involved!
For Payara Micro, there are a few ways this can result in time wasted:
Starting multiple instances on the same machine
My demo had just two microservices, though part of that demo was intended to demonstrate an early implementation of a clustered singleton bean. What this meant for my development process was that I needed to start Microservices A and B – wait for them to initialise, and then start a second instance of Microservice A to show that the singleton bean would only run on one instance.
Clustering instances together
Payara Micro uses Hazelcast for automatic clustering. This comes with an unavoidable startup cost because of the need for discovery of other cluster members. For a single server, there is a --nocluster option to disable this but a major part of my demo is to show off the CDI Event Bus, whereby CDI events can be pushed over the network to be handled by other JVMs in the same cluster.
Enter The Dragon JRebel
To really get an idea of how useful JRebel can be when developing microservices, it really needs to be experienced. If you want to see my example for yourself, I’ve checked in a Java EE 7 version of my demo in to GitHub, with rebel.xml files already generated. Here are the steps to get this set up in your own environment:
1. Set up JRebel
Follow the appropriate JRebel Quickstart steps to get the JRebel agent installed and set up – either standalone or in your IDE.
2. Find the JRebel agentpath
Since the example uses Payara Micro Uber JARs, we need to know the path to librebel64.so (for a 64-bit JVM). This can be found from the “JRebel > Startup” configuration. Selecting “GlassFish 2.x, 3.x and 4.x” will output the path as a convenient JVM option. For me, it looks like this:
-agentpath:/home/mike/.IdeaIC2017.2/config/plugins/jr-ide-idea/lib/jrebel6/lib/libjrebel64.so
3. Get the example
Use a terminal to clone the example repository as follows:
git clone https://github.com/mikecroft/BakingJavaEE7MicroPi.git
4. Build the project
Run the maven “install” goal at the project root:
cd BakingJavaEE7MicroPi
mvn install
It’s important to run “install” because the Payara Micro Maven plugin has been configured to run the bundle goal at the install phase.
5. Run the services with the JRebel agent
The StockTicker service should be started first and the StockWeb service second. Using the --autobindhttp option means that port conflicts won’t be an issue, just keep an eye on the logs after startup to see what URL to use. Open 2 terminal sessions and run the following commands from the project root directory in different sessions:
java -agentpath:/home/mike/.IdeaIC2017.2/config/plugins/jr-ide-idea/lib/jrebel6/lib/libjrebel64.so -jar
StockTicker/target/StockTicker-1.0-SNAPSHOT-microbundle.jar --autobindhttp

java -agentpath:/home/mike/.IdeaIC2017.2/config/plugins/jr-ide-idea/lib/jrebel6/lib/libjrebel64.so -jar
StockWeb/target/StockWeb-1.0-SNAPSHOT-microbundle.jar --autobindhttp
You should see Payara Micro boot and deploy in both terminals. The StockTicker service will start logging the Stock objects it is generating and the StockWeb service will start logging each time it receives a new Stock event:
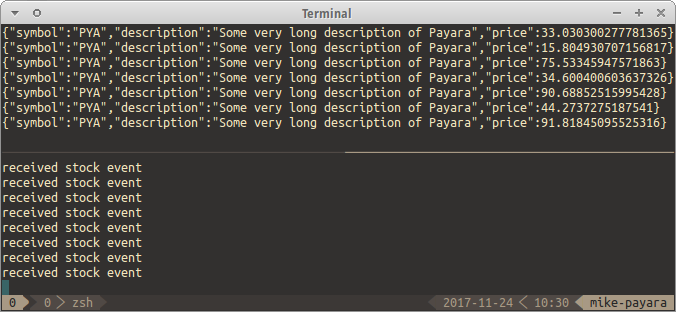
You can also view the output in a browser:

Note that the port here is 8081 because port 8080 was already taken by the StockTicker service and --autobindhttp incremented to find the next free port.
6. Improve the code!
Since I have included the necessary rebel.xml files in the repository, there should be no extra configuration needed. If this wasn’t the case, the configuration files can easily be generated in the IDE by enabling check boxes on the correct modules as shown below:
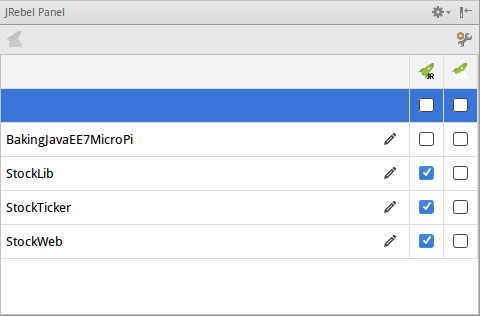
Since we already have everything configured for JRebel to work, we can make changes to the code right away. We will start by first making the “received stock event” message more informative. That way, we can more easily see how quickly the Stock events propagate between JVMs.
In the observer method of StockSessionManager.java in the StockWeb service, we will change the println() statement from:
System.out.println("received stock event");
to:
System.out.println("New stock price: " + stock.getPrice());
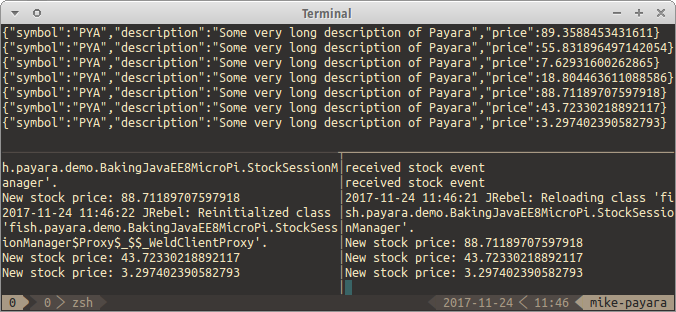
7. Immediately reload the change!
In a separate terminal window, navigate to the project root directory and run
mvn clean install. You should immediately see JRebel update the class in StockWeb (even if you are running multiple instances of StockWeb, as shown below!):
8. Speed things up even more!
In the last step, we were still using the maven goals “clean install”, meaning that Maven first removes all existing compiled files and recompiles everything again. Additionally, since I have configured the Payara Micro Maven plugin to package the uber JAR at the install phase, the uber JAR itself gets rebuilt.
JRebel doesn’t actually require all this ceremony to detect and reload changes, though, so we can avoid some of that extra work by simply running “mvn compile” which will avoid rebuilding things without changes and, crucially, only compile the classes themselves. What this means is that we need to be careful to actually repackage the uber JARs if we wanted to distribute them for testing.
Some further speed enhancements can be found from reading through Rebel Labs’ Maven cheat sheet. The options I used were:
a. -o
Make sure that Maven builds offline and doesn’t check for updates online
b. -T 8
My (aging) desktop has a hyper-threaded quad core CPU, so this tells Maven to use 8 threads (no real effect in this small example, but has more effects in real use)
c. -f StockWeb/pom.xml
Probably the most important option – tell Maven to only compile the classes in the module where we’ve made changes.
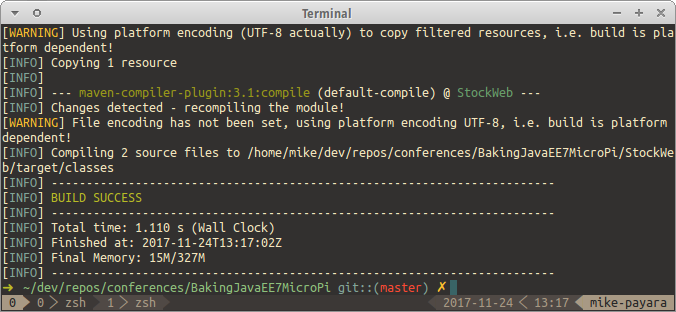
All of these changes takes us from a 5.190 second build time:
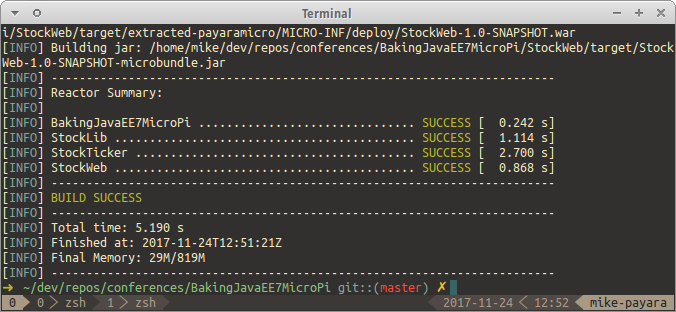
…to a 1.110 second build time:
Why should I care?
JRebel solves an odd sort of problem in that most people don’t realise that they have a problem. As I mentioned above, I thought the development process I had was getting close to as good as you can get! The truth is, I simply hadn’t experienced anything different.
Let me illustrate.
Readers above a certain age will remember the age of dial-up Internet. I can still remember the days of having to disconnect when someone needed to make a phone call. Back then, I would visit websites and open multiple links in new windows (no tabs back then!) so that, after opening 7 or 8 links, I knew the first page would nearly be loaded. Browsing the Web in the 90s was an objectively slow experience, but that’s all anyone knew. Going back to those speeds would be unacceptably painful today, even when considering the smaller sizes of webpages in the 90s.
It’s easy to see the parallels.
Once you have experienced the faster turnaround times of developing with JRebel, it will be very hard to revert to the old way of doing things.
The post was originally published on RebelLabs (by ZeroTurnaround)
Related Posts
Conquering Kubernetes Complexity: Why Java Developers Need More Than Just Containers
Published on 08 Aug 2025
by Chiara Civardi
0 Comments

Kubernetes, also known as K8s has become the de facto platform for orchestrating modern microservices architectures, promising resilience, scalability and faster deployment pipelines for Java applications. But for many developers, that promise ...
The Payara Monthly Catch - July 2025
Published on 31 Jul 2025
by Chiara Civardi
0 Comments

Your Round-Up of the Latest Java & Jakarta EE News.
Welcome aboard the July issue of The Monthly Catch. As always, we’re bringing you the latest updates, product news and expert resources from across the Payara ecosystem.
This month, we’re ...