
Originally published on 14 Jul 2016
Last updated on 09 Oct 2019

Click here to see Part 2 (Access, Deploy & Test)
Introduction
Today, one of the most important concerns for enterprise applications is to implement robust security mechanisms that allow developers and operation staff to easily integrate applications in a stable infrastructure and allow their users to interact with them in a seamless way. While many developers prefer to implement their own security mechanisms or use third-party libraries, a good alternative is to use already established products that handle authentication, authorization, confidentiality, identity, and entitlement on behalf of already developed applications.
The ForgeRock Identity Management Platform offers its customers a suite of tools that handle these concerns and allows an organization to configure their security infrastructure in a detailed way: directory services; identity management; personalized access to resources, services and devices and more. The ForgeRock suite has both commercial and open source support, allowing organizations to decide on the best model that suits them.
Currently, the ForgeRock suite of tools is composed of the following elements:
- OpenDJ, a directory services solution that supports both Lightweight Directory Access Protocol (LDAP) and Directory Services Markup Language (DSML), and also works as an identity and resource management configuration data store.
- OpenAM, an access management solution that allows operations staff to regulate access to several resources such as web pages, applications and web services that are available over the network. OpenAM also provides services to manage users, roles and specific rules to grant or deny access to these elements. OpenAM doubles as a Single Sign On (SSO) solution, which allows a user to login or authenticate only once per session and access all specific resources whether they are in different applications, servers, or locations.
- OpenIDM, an identity management solution that allows the synchronization of multiple user identities and simplify the handling of user data across multiple resources. This way, users and roles spread out in multiple data stores (LDAP, databases, etc.) can be reconciled and used homogenously.
- OpenIG, a special reverse proxy service or HTTP gateway that is used to fill the gap between clients that sent incompatible requests for existing application or services that cannot be refactored or changed to handle such requests. It handles access management integration, application and API security, credential replay, network traffic control and many other features.
- OpenICF, a set of connectors that allow provisioning software such as OpenAM or specific cloud providers to manage identities by a specific third party provider. ICF connectors provide a consistent layer between target resources and applications and expose a set of programming functions for the full lifecycle of an identity.

Source: official ForgeRock documentation
Payara Server
So how we Payara integrate with this suite of products? The most common scenario is to use OpenAM to function as an SSO gateway to all applications deployed in a Payara Server and allow it to handle identity administration and resource protection. This way, the administrators of OpenAM concerns themselves with managing users, roles and the access policies, without having developers code these access rules in their applications.

However, it must be taken into account that OpenAM is a Java Web application that can be deployed into any Java Web Container (Tomcat or Jetty for example) or an Enterprise application server (Wildfly, WebLogic, or in this case Payara Server). For a Payara Server domain to be connected with OpenAM, a special policy agent must be installed and configured in the Payara server domain. This agent will be responsible to delegate authentication to OpenAM and negotiate all policy authorization requests done in behalf of the applications and services deployed in the domain:
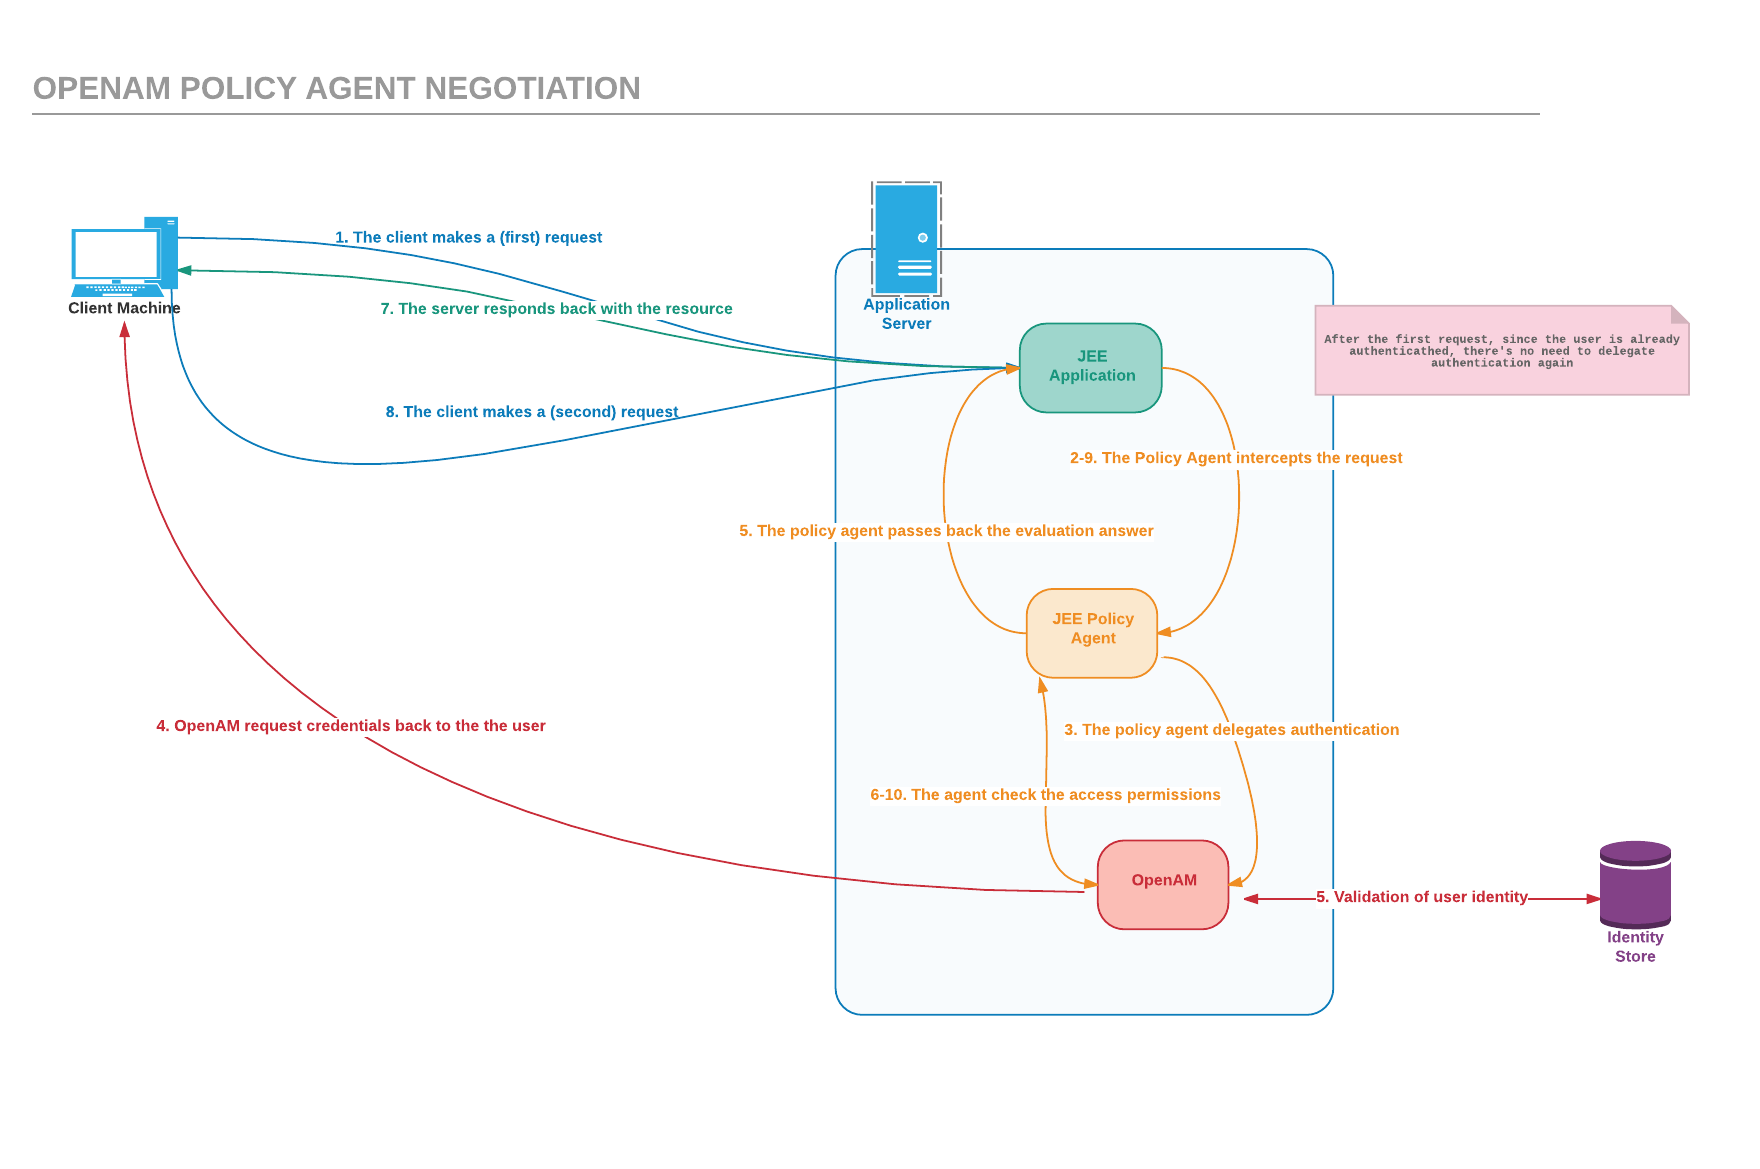
Click image to enlarge
However, there are 2 catches on this scenario:
- OpenAM cannot be deployed on Payara Server at the moment considering Glassfish/Payara Server are not on the compatible list of application servers supported by ForgeRock. If you try it for yourself, when deploying the WAR file to any version of Payara Server (Full, Web, Micro or Embedded) you will probably encounter the following errors:
Exception 0:
org.jboss.weld.exceptions.DeploymentException: WELD-001408: Unsatisfied dependencies for type UmaPolicyApplicationListener with qualifiers @Default at injection point [BackedAnnotatedParameter] Parameter 1 of [BackedAnnotatedConstructor] @Inject public org.forgerock.openam.uma.rest.UmaIdRepoCreationListener(UmaPolicyApplicationListener)
  at org.forgerock.openam.uma.rest.UmaIdRepoCreationListener.<init>(UmaIdRepoCreationListener.java:46)

Exception 0 :
org.jboss.weld.exceptions.DeploymentException: WELD-001408: Unsatisfied dependencies for type RequestHandler with qualifiers @Named at injection point [BackedAnnotatedParameter] Parameter 1 of [BackedAnnotatedConstructor] @Inject public org.forgerock.openam.uma.rest.PolicyResourceDelegate(@Named RequestHandler)
  at org.forgerock.openam.uma.rest.PolicyResourceDelegate.<init>(PolicyResourceDelegate.java:62)
Looking at this error, it seems there are some issues with the CDI bean discovery. We can try to disable Implicit CDI discovery at deployment time, but we still encounter more errors (related with Google Guice this time):
[2016-06-11T03:43:23.088+0000] [Payara 4.1] [SEVERE] [] [] [tid: _ThreadID=42 _ThreadName=admin-listener(4)] [timeMillis: 1465616603088] [levelValue: 1000] [[com.google.inject.CreationException: Guice creation errors:

1) No implementation for com.sun.identity.shared.debug.Debug annotated with @com.google.inject.name.Named(value=amThreadManager) was bound.
  while locating com.sun.identity.shared.debug.Debug annotated with @com.google.inject.name.Named(value=amThreadManager)
    for parameter 2 at org.forgerock.openam.shared.concurrency.ThreadMonitor.<init>(Unknown Source)
  while locating org.forgerock.openam.shared.concurrency.ThreadMonitor
    for parameter 1 at org.forgerock.openam.cts.reaper.CTSReaperInit.<init>(Unknown Source)
  while locating org.forgerock.openam.cts.reaper.CTSReaperInit
    for parameter 3 at org.forgerock.openam.cts.impl.CoreTokenAdapter.<init>(Unknown Source)
  while locating org.forgerock.openam.cts.impl.CoreTokenAdapter
    for parameter 0 at org.forgerock.openam.cts.CTSPersistentStoreImpl.<init>(Unknown Source)
  at org.forgerock.openam.core.guice.CoreGuiceModule.configure(CoreGuiceModule.java:182)

2) No implementation for com.sun.identity.shared.debug.Debug annotated with @com.google.inject.name.Named(value=amThreadManager) was bound.
  while locating com.sun.identity.shared.debug.Debug annotated with @com.google.inject.name.Named(value=amThreadManager)
    for parameter 2 at org.forgerock.openam.shared.concurrency.ThreadMonitor.<init>(Unknown Source)
  while locating org.forgerock.openam.shared.concurrency.ThreadMonitor
    for parameter 2 at org.forgerock.openam.sm.datalayer.impl.SeriesTaskExecutor.<init>(Unknown Source)
  at CTS_ASYNC

….
Regrettably, this means that we cannot use Payara Server to house OpenAM with the web applications we want to protect/secure.
2. There is not an official OpenAM Policy Agent compatible with Glassfish/Payara Server, meaning that there’s no way to handle policy negotiation between OpenAM and the applications deployed on the server.
What can be done in this case then? The OpenAM documentation recommends to use a separate Web Server to deploy the OpenAM application and use OpenIG in order to bridge OpenAM to incompatible application servers like in the case of Payara Server, so instead of using an OpenAM policy agent, an OpenIG route configuration is needed to delegate authentication and authorization to OpenAM when accessing protected applications.
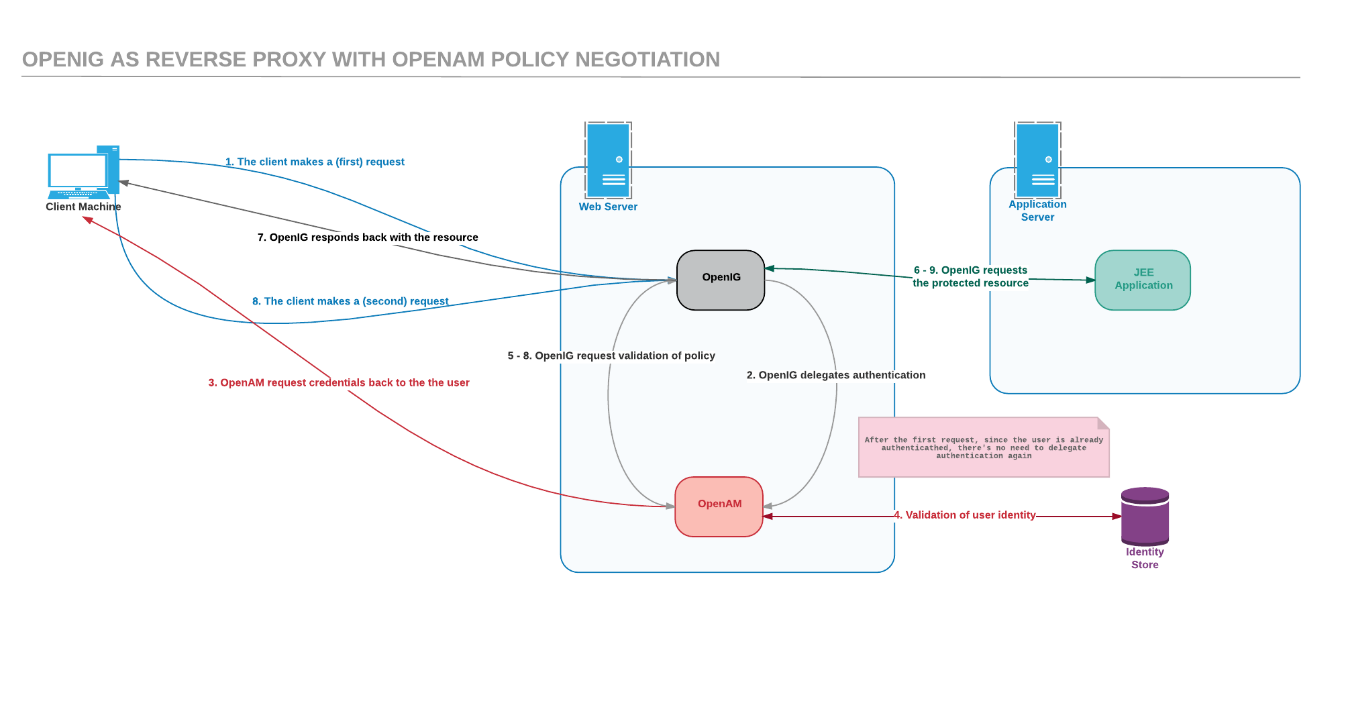
click image to enlarge
With this in mind, we at Payara are not giving up at making Payara Server compatible with OpenAM and for this reason we are working on different mechanisms to make the application be deployed and executed without issues, so there is no need to use an additional web server for this specific arrangement.
We will update with the respective documentation in the future, so we appreciate your patience!
Real World Scenario
To illustrate the integration discussed earlier we will show the installation and configuration steps for a real world scenario of authentication and authorization:
- Use OpenDJ as the identity and data configuration store for OpenAM.
- Deploy OpenAM in a compatible Java Web Server, in this case Apache Tomcat 8.
- Create simple web applications to test the authentication and authorization features.
- Create sample users in order to test access to these applications.
- Install OpenIG in the server and configure it in order to work as a reverse proxy for a Payara Server domain.
OpenAM in particular needs to be configured using a data store for both its identity sources (users, roles, access rules, etc.) and its own configuration. For the scenario to be more practical we are going to use OpenDJ as a data store for both aspects and show the respective installation and configurations steps as well.
Requirements
The following are the requirements needed in order to execute the installation and configuration of this scenario:
- Linux Operative System (Preferably Ubuntu/Debian or CentOS/RedHat)
- Java SDK 8 (JAVA_HOME must be set)
- Apache Tomcat 8
- Payara Server Full or Web Edition (download here)
- A valid FQDN (Fully Qualified Domain Name) assigned to the test machine.
OpenDJ Installation
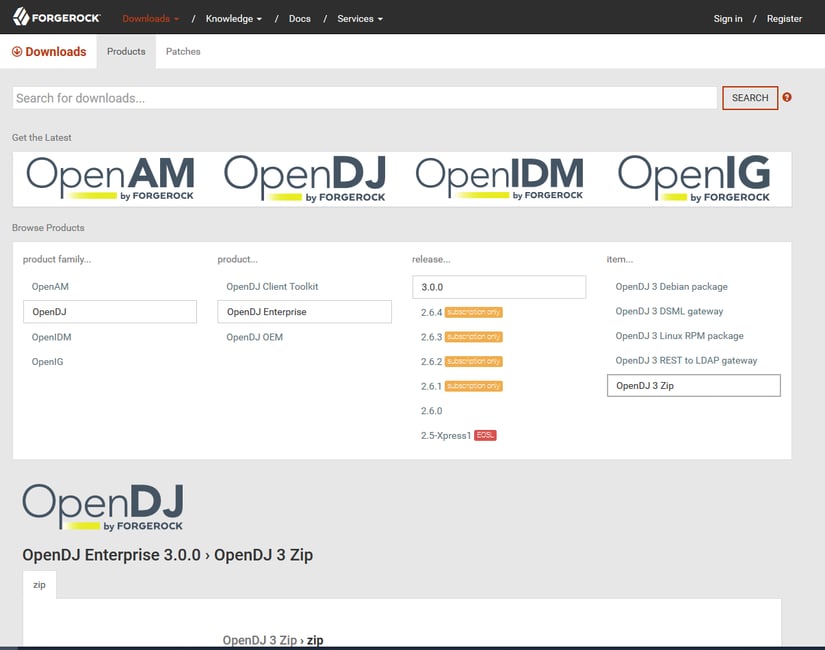
In order to install OpenDJ, we first must get the current distribution from the official website of ForgeRock. Take into account that community versions are the only releases that are available for the general public (otherwise a subscription to the commercial ForgeRock support services is required). For this installation process, we are going to download the ZIP distribution. Remember that to download the file you need to be subscribed to the ForgeRock community:
Unzip the file, and execute the bundled console installer:
unzip OpenDJ-3.0.0.zip
sudo mv opendj/ /opt/
sudo chown ec2-user:ec2-user -R /opt/opendj/
cd /opt/opendj/
./setup –cli
Once the setup installer starts, it will ask for the configuration settings used to create the domain configuration of the Directory Server:

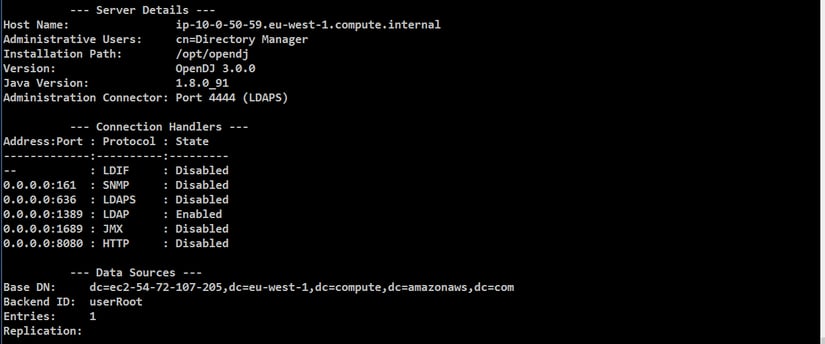
Now, check the state of the server:
cd /opt/opendj/bin/
./status
(Take into account that executing commands using OpenDJ command-line tools will prompt for the credentials of a valid user – Directory Manager, in most cases). You should get information akin to this:
OpenAM Installation
First, download the current open source available ZIP distribution of OpenAM from the ForgeRock website:
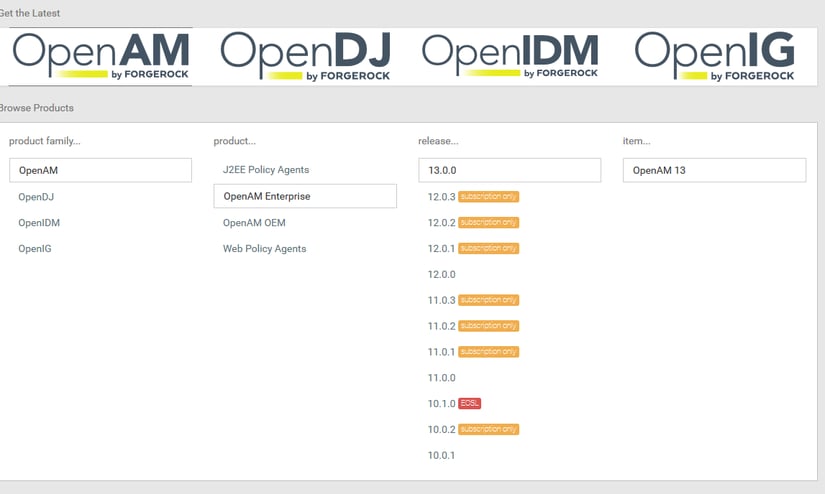
Unzip the file, and identify the WAR that will be used to deploy the application to the server:

Now, deploy the application to the Apache Tomcat Server:
cp ~/openam/OpenAM-13.0.0.war /opt/tomcat/webapps/openam.war
and access the application with the URL http://<host>:<port>/openam/:

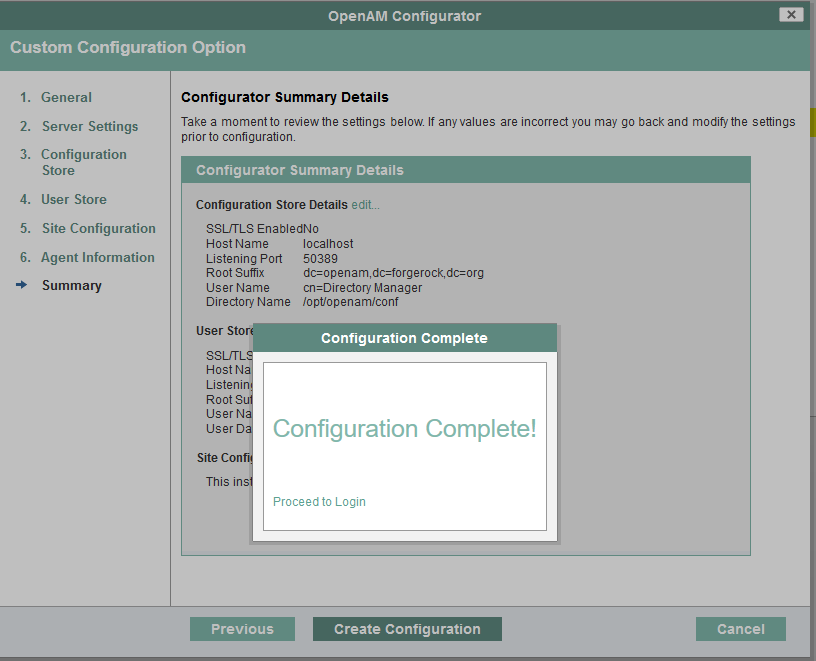
With this, we can proceed to configure OpenAM. Since we want to use our OpenDJ installation as identity and configuration store, we click on the Create New Configuration link, accept the Software License agreement and complete the following steps:
- Set a password for the OpenAM administrator user (amadmin)
- Configure the server settings.
- Assign the OpenAM web container server’s URL. Remember that this URL must be supported by a valid FQDN.
- Assign the correct domain you wish to use for the Cookies the OpenAM application uses to handle authentication. It must start with a dot (.), e.g. [.com]
- Assign the platform’s locale (by default set to en_US)
- Assign the configuration’s directory. This must be a path to an existing empty directory in the server where OpenAM is running. We recommend to use /opt/openam/conf
- Now, we proceed to configure the OpenAM configuration store.
- Select OpenDJ as the configuration data store option
- The application will complete the Host Name, Port, Root Suffix (assign the same suffix used to create the base DN when installing the OpenDJ directory server), and login credentials for the Directory Manager user. Make sure to change them appropriately.
- Next, we configure the OpenAM identity store.
- Select ‘Other User Data Store’
- In the User Store Details area, select OpenDJ for the user data storage type.
- As with the previous step, select the appropriate Host Name, Port and Root Suffix.
- Complete the password for the Directory Manager user
- Ignore the load balancer configuration (Mark NO)
- Finally assign a password for the default policy agent UrlAccessAgent (default user and agent passwords must not match!). This is done for completeness purpose since we aren’t using policy agents in this scenario.
- Press Create Configuration and the application will proceed to configure itself with the supplied parameters. Wait until it finishes:
OpenIG Installation
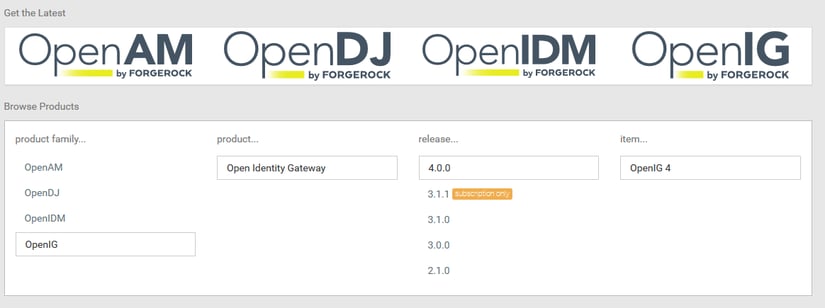
First, download the current WAR distribution of OpenIG from the ForgeRock website:
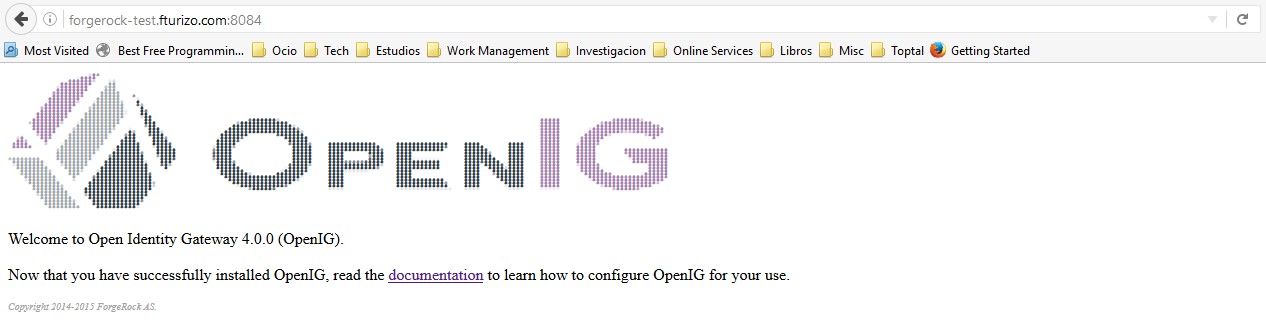
Now, deploy the application to the Apache Tomcat Server:
cp ~/openig-war-4.0.0.war /opt/tomcat/webapps/ROOT.war
It is important that you deploy this application in the ROOT context of the web container that you are using (in this case Tomcat). Since this step overrides the Tomcat default root context application (the Tomcat welcome page), you might consider using a separate web container for hosting OpenIG separate of OpenAM in a production environment.
Now, access the application in the root context to check it has been installed correctly (again, by accessing Tomcat in the ROOT context):
Click here to see Part 2 ( Access, Deploy & Test)
Related Posts
Platform Engineering vs. SRE vs. DevOps: Practical Differences for Java Teams
Published on 13 Aug 2025
by Chiara Civardi
0 Comments

You've probably been in that hallway conversation (or Teams/Zoom meeting) where DevOps, SRE and Platform Engineering all get thrown around. Sometimes these words are used interchangeably, as if they were synonyms. Sometimes they indicate ...
Why Developers Are Embracing PaaS & What That Means for Your Cloud Strategy
Published on 06 Jun 2025
by Chiara Civardi
0 Comments

As more and more organizations embrace the cloud, Platform as a Service (PaaS) solutions for application deployment and management are becoming more popular among development and DevOps teams. The promise of faster deployments, simpler ...