
Originally published on 03 Sep 2018
Last updated on 26 Sep 2018

JSF is a component oriented MVC (Model View Controller) framework that's a part of Java EE. It comes with a small set of basic components (widgets), a templating engine, and facilities for converting and validating input. JSF strongly builds on other APIs in Java EE. Request handling is build on top of the Servlet API, binding UI components to Java code is mostly done via Java EE's Expression Language, with the Java code being (named) CDI beans. Validation is often delegated to Bean Validation.
Hello World, from JSF
We'll start by creating a minimal JSF application that just displays a "Hello world" on an HTML page. Like JAX-RS, JSF has to be activated first. This is done via the @FacesConfig annotation as shown below:
@FacesConfig
@ApplicationScoped
public class ApplicationInit {

}
Next we'll create a Java class that returns our "Hello world" string and is used by the JSF page we'll create hereafter. The convention in JSF is to use one of such "backing" classes per page, and therefore this particular class is called a "backing bean". A second convention is to give this class the same name as the page that it is backing, with "Backing" added to it. An example is shown below:
@Named
@RequestScoped
public class HelloBacking {

    public String getHello() {
        return "Hello world, from JSF!";
    }

}
The @Named annotation gives this bean a name. By default this name is the simple class name with the first letter in lower case, which means it will be "helloBacking" here. The @RequestScoped annotation gives the bean a scope, which in this case means every individual request will get a new instance of this bean and the bean will be destroyed after the request. In more technical terms we say the bean is "contextual", which is where the C in CDI comes from.
Finally we create a page using JSF's default template engine, which is called Facelets. Facelets pages by default have an .xhtml extension. For this example application that page will be called hello.xhtml and would look as follows:
<?xml version='1.0' encoding='UTF-8' ?>
<!DOCTYPE html>
<html xmlns="http://www.w3.org/1999/xhtml" xmlns:h="http://xmlns.jcp.org/jsf/html">

    <h:head>
        <title>Hello</title>
    </h:head>

    <h:body>
        <p>
        JSF says:
        </p>
        <p>
            <b>#{helloBacking.hello}</b>
        </p>
    </h:body>
</html>
The source of Facelets pages are XML files, so that's why the page starts with the well known XML prolog. Note that this doesn't mean at all that the rendered output has to be X(H)TML as well.
The html tag contains an attribute for the "h" namespace. This particular namespace is known by JSF, and it will mean that we can use all the tags (representing components) in that space, which are the simple HTML components.
In JSF we can freely mix regular HTML and JSF components, as shown above. Typically one uses the h:head tag so JSF specifically knows what the header in the document is (and can subsequently use this to insert things like stylesheets and scripts).
The #{helloBacking.hello} that we see on the page is an expression in the above mentioned expression language. It refers to the named bean that we defined earlier "helloBacking", and to that bean's property "hello". Following the JavaBeans conventions the "hello" property corresponds with our "getHello()" method.
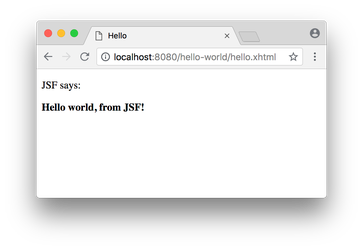
When we bundle this all together into a war called "hello-world.war" and deploy it to a default Payara server instance, we can request http://localhost:8080/hello-world/hello.xhtml in a browser, which would then render a page that looks like this:
The full source of this application can be found on GitHub, along with an automated tests that demonstrates how the application is supposed to be called:
https://github.com/javaee-samples/javaee8-samples/tree/master/jsf/hello-world
Related Posts
Boost Developer Productivity with Payara Server Maven Plugin + AI Agent
Published on 12 Sep 2025
by Gaurav Gupta
0 Comments

Managing Payara Server Just Got Smarter
Imagine managing your Jakarta EE applications not just with Maven goals, but by asking natural questions.
With the experimental AI Agent built into the Payara Server Community's Maven Plugin, you can ...
The Payara Monthly Catch - August 2025
Published on 02 Sep 2025
by Dominika Tasarz
0 Comments

Welcome aboard the August 2025 issue of The Payara Monthly Catch! With summer in full swing, things may have felt a little more quiet across the Java world - but certainly not less interesting! We hope you managed to get some rest and recharge, ...