Published on 10 Nov 2017

Further developing our introductory blog series, this post will look at how you can dynamically scale your cluster, and how Payara Server handles failover between cluster members.
Failover is the ability to continue to provide access to your website or application in the event of a server failing. It is an important part of high availability hosting, which aims to minimise downtime across your server infrastructure.
Requirements
To follow along with this blog post as I have written it, you will need:
- The cluster we configured in the last blog.
- Another new Ubuntu host with an SSH node configured.
- The rest-jcache example app from our Payara Examples repository.
Configuring our new node
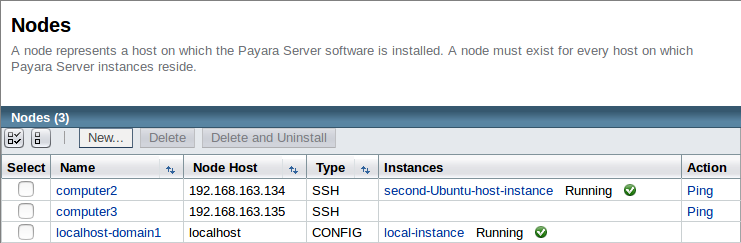
As before, our first step is to create an SSH node on our new host. For more details on what an SSH node is, and why we will be using one here, read the node overview blog. For details on how to set up an SSH node on our new host, refer back to our earlier blog on setting up a simple cluster with Payara Server.
As you can see, we have added a third SSH node aptly named "computer3".
Creating a new instance
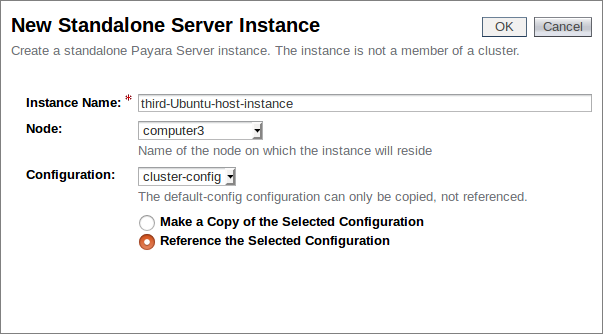
As this node will be part of our existing cluster, we will again link it to our cluster configuration we created in the previous blog. This is another advantage of using the centralised configuration from before; new nodes will automatically follow the same configuration as those already in the cluster, minimising the set up we need to do for our new instances.
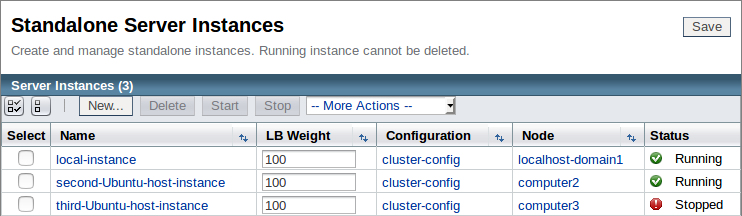
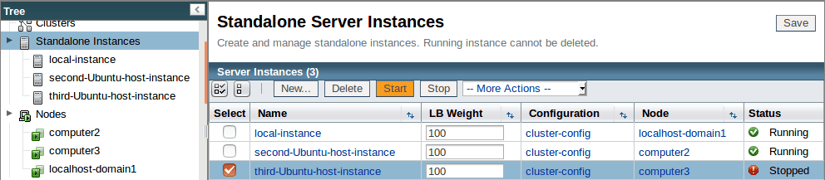
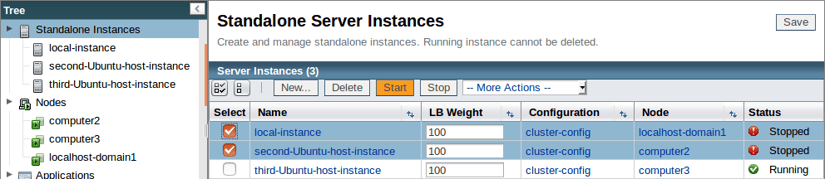
We now have three instances, with our newly created "third-Ubuntu-host-instance" assigned the same configuration as the others within our cluster:
As the cluster configuration has Hazelcast enabled, the minute we start this instance it should join our cluster. Before we start the instance, we will deploy our test application and add some session data.
Deploying our test application
We shall again be using our rest-jcache example application which we built in the previous blog. This application is a simple REST service which uses the distributed cache to store submitted data. By submitting data with a key, we can retrieve the same data from another member of the cluster, provided we again submit the same key.
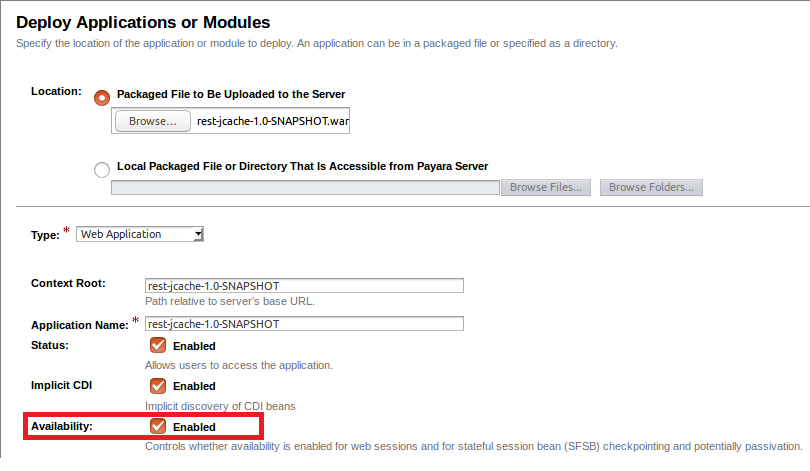
Build the application (unless you still have the war file from the previous blog) with the command "mvn clean install", and deploy it to all three of our instances. Make sure that you check the "Availability" box to enable the availability service:
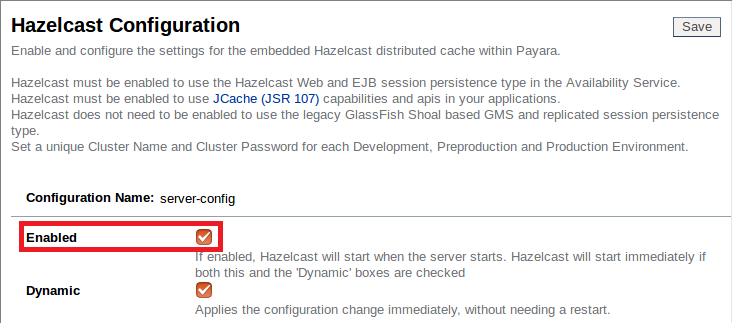
Now that we have the application deployed to all three of our cluster members (although only two are online), double check that Hazelcast is enabled:
Testing our new cluster
Testing plan
Now that we have both of our initial instances started, we shall retread our steps from the previous blog:
- Retrieve the default key
- Add a new value for the key "Payara"
- Retrieve this value from the second instance using the key "Payara"
However with this example we will be looking at how the data will react when a new node is added, and when other nodes failover. So once we have retrodden our steps we shall: - Start our third instance
- Kill our original instances
- Revive our original instances
- Retrieve the value for the key "Payara" from the second instance and compare it to the default key
Retreading our steps
Firstly, we shall retrieve the default key from the application (so that we have something to compare our later set value to) with the following curl request to the local instance:
curl "<Local Host>:<Local Instance Port>/<Application Path>?key=payara"

So the default value which we should be looking out for is "helloworld". Now that we have our default value, we should add an actual value to our key to our local host with the following command:
curl -H "Accept: application/json" -H "Content-Type: application/json" -X PUT -d "badassfish" "http://<Local Host>:<Local Instance Port>/<Application Path>?key=payara"

Hazelcast is enabled, and our application is set up for JCache, so we can now check that our instances are properly sharing their cache by sending our earlier curl request to our second node; if it's worked, instead of "helloworld" we should receive a "badassfish":
curl "<Second Host>:<Second Host Port>/<Application Port>?key=payara"

Hopefully you also got the (expected) result of "badassfish". If you didn't, double check that you have the IP's set up correctly, enabled Hazelcast, and haven't started the failover tests early!
Suffering a "failover" incident
Now that we have confirmed that our initial cluster is functioning as expected, we can move on to our failover tests.
Go back to the admin console and start our third instance:
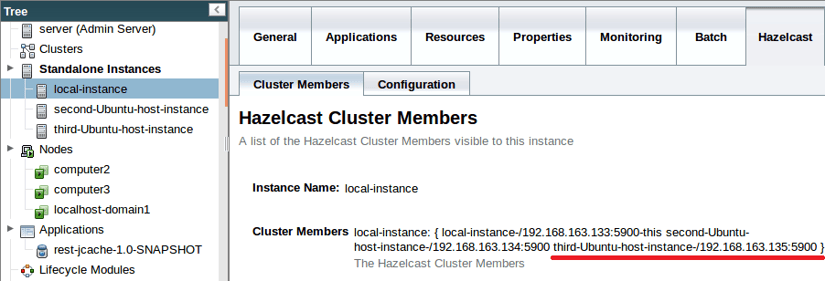
If you wish to briefly exercise your paranoia, you can check that the instance joined the Hazelcast cluster by checking the Hazelcast cluster members tab:
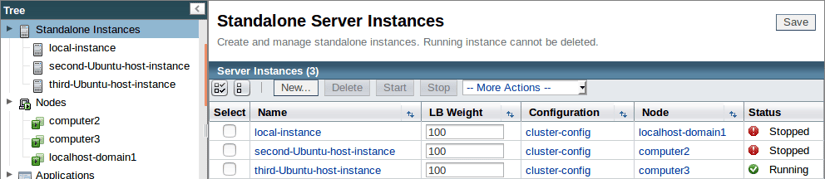
Now that our third member has joined, simulate a failover event by yanking out the power cables or otherwise shutting down our first two hosts:
Recovering from the "unexpected shutdown"
Once you have recovered from the unexpected shutdown, restart your instances:
And now having fully implemented our disaster recovery plan and restarted our hosts, we shall again check the cache of the second instance to confirm that our data is still available with the following command:
curl "<Second Host>:<Second Host Port>/<Application Port>?key=payara"

Thankfully, as you can see, our data was safely cached and so it was able to failover, preserving the cached data within the cluster, as it returned our original value. This is a simple example of Hazelcast's caching within Payara Server, but it demonstrates both the principle of failover and the benefits of high availability hosting, as we were able to dynamically add new instances to our cluster without any faff, and have them sort out their caching between themselves with no user input. In a production environment, this can serve to preserve cached data across sites, and allow your users to continue to access applications in the event of unexpected downtime, as well as allowing you to dynamically scale your infrastructure.
As usual, if you have any comments, questions, or suggestions, feel free to post below!