
Published on 18 Apr 2018

Now that Payara Server 5 is here, it’s a good time to brush up on the basics - with that in mind, I'm going to go through a few of the things you can do with the Payara Server CLI.
The Command Line Interface (CLI) is a means of controlling Payara Server from the command line (or terminal, if you prefer) allowing you to start, stop, or edit the server in a number of ways. Whilst to some the administration console is the go-to for any administration that needs to be done, the CLI can be a potentially quicker and easier way of performing any administration tasks, particularly when dealing with headless servers (a server without a GUI).

Asadmin
The Payara Server CLI is used with the asadmin utility (as in "Application Server Administration", it isn’t just gibberish). This can be found in the bin directory of your Payara Server install. All Payara Server administration commands are sub-commands of this utility, and as such, each command must be prepended with this function (e.g. ./asadmin do-a-little-dance).
A handy tip to avoid prepending asadmin to each command is to call the asadmin function on its own (e.g. ./asadmin). This will run asadmin in an interactive mode, saving you a few keystrokes if you intend to execute several commands in sequence.
You can specify additional options for most commands in the CLI, some of which are mandatory for certain commands to execute. The list of options that a command takes, as well as a description of the command and examples, can be found by passing the --help parameter to the command (e.g. ./asadmin start-domain --help). Each of these options must be prepended with "--", though some options have a shortened version for which a single dash is sufficient. For example:
./asadmin start-domain --debug true
is equivalent to:
./asadmin start-domain –d
Starting and Stopping…
Domains
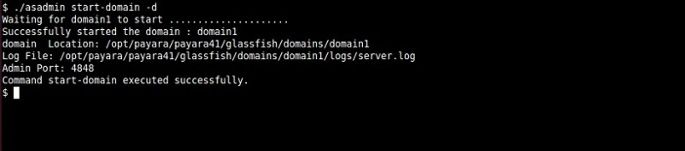
As you will likely know if you’ve already installed Payara Server, you can use the CLI to start and stop domains, clusters and instances; it's likely that the first thing you did after installing Payara Server was to use the CLI to start the default domain:
./asadmin start-domain
The start-domain command starts domain1 by default. To start an alternative domain you must specify the domain as an additional parameter like this:
./asadmin start-domain myDomain
As previously noted, you can use --help to list the available parameters that each command can take. Doing so for the start-domain command reveals the following parameters: dry-run, domaindir, upgrade, debug, verbose, and watchdog. Of particular note are the debug and verbose options, which are very useful for debugging.
Stopping a domain is as easy as starting it, the command is just stop-domain.
./asadmin stop-domain
As with when starting domains, domain1 is stopped by default. To stop an alternative domain you must specify the domain to stop:
./asadmin stop-domain myDomain
Notable options for this command are force and kill. These options are useful to specify the shutdown behaviour of the domain. The force option determines whether the domain stops immediately (true), or waits for all threads to exit before stopping the domain (false). The kill option determines how the domain process is terminated. This defaults to false, meaning that the Java platform will terminate the process; specifying this option as true will cause the operating system to kill the domain process.
./asadmin stop-domain --kill true domain1
Instances
There are two asadmin commands for starting Payara Server instances: start-instance and start-local-instance. The biggest difference between the two is that the start-local-instance command is designed solely for use with instances residing on the machine from which the command is being run from; start-instance can be used to start both local and remote instances.
./asadmin start-instance instance1
./asadmin start-local-instance instance2
Debugging is available for these commands with the --debug option, which starts the instance with debugging enabled. An additional debugging option is available to the start-local-instance command: --verbose. This allows you to have both start-up and log messages printed to the console when starting the instance, helping you to quickly see what is happening.
Another notable and useful option is --sync. This option takes one of three parameters: none, normal, and full. If using this option, you must specify one of the parameters; it is mandatory. The sync option specifies how the instance synchronises itself with the DAS (Domain Administration Server):
- The none parameter means that the instance will not synchronise itself with the DAS, so will not reflect any changes made to it since it was last synchronised. This can be useful if you know that there have been no changes made, and want the instance to start as quickly as possible.
- normal has the instance synchronise with any changes since it was last synchronised (which is typically the last time it was online). If you do not specify the --sync option, this will be the option that the start-instance or start-local-instance command will default to. As the help of the command states, this parameter causes the instance to synchronise the config directory, and the changed subdirectories in the applications and docroot An exception to the synchronisation of the subdirectories exists however: only the subdirectories that have had a change at their top level will be synchronised; if a change is made lower down the file system hierarchy, but not at the top level, then the changes will not be synchronised.
- The final option, full, is not subject to this caveat. This synchronisation parameter will synchronise all files, even if they have not been changed. This is the most thorough way of ensuring that an instance is correctly synchronised, but comes with its own downsides: it is slower than the normal and none options, and requires the DAS to be running. If the DAS isn’t running when you run this command, it’ll fail and the instance will not be able to start until it contacts the DAS again.
./asadmin start-local-instance --sync full --verbose true --debug true instance1
Just like with stopping domains, the commands to stop an instance are well named: stop-instance and stop-local-instance. The difference between the two commands are the same as the difference between the start commands; the former can be used for local and remote instances, whereas the latter can only be used for local instances.
./asadmin stop-instance instance1
./asadmin stop-local-instance instance2
As with the stop-domain command, you can specify the force and kill options, which act in the same way as they do for the stop-domain command.

Deployment Groups
The new feature in Payara Server 5 that looks to replace the clustering of old, they’re similar, but also a bit different. With any new feature though, we’ve got some new asadmin commands (yay!).
Like with clustering before it, there’s no differentiation between a remote and local start/stop command for deployment groups, so you only need to know of the following commands:
./asadmin start-deployment-group group1
./asadmin stop-deployment-group group1
These commands are devoid of any unique options, and they do exactly what they say on the tin: the start command will attempt to start every instance registered to the specified deployment group, and the stop command will attempt to stop them.
Creating...
Domains
Now things can get a little complicated. If you just want to create a new domain with default values, run this:
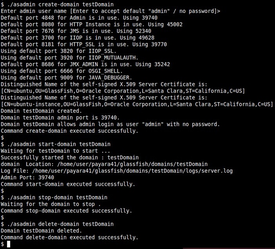
./asadmin create-domain
It will ask for you to specify a name for the domain, and an administrator username and password. It will then list the ports that it will use the default ports, and generate a self-signed certificate.
If you want to customise the domain a little, then there are a wealth of options available for this. Below are some notable ones:
- adminport - This option will specify with port will be used for administration (defaults to 4848).
- instanceport - This option specifies which port will be used for the web application context roots (defaults to 8080).
- portbase - This option is used to determine port assignments, and cannot be used with the adminport, instanceport, or domainproperties The value specified for this option will be a base value, upon which the other required ports (e.g. the administration port) are calculated by a port specific offset. So if the port base was specified as 500, the administration port would be 548 (500 + the administration port offset of 48). Each of the port offsets can be seen under the create-domain help.
- template - Useful if you already have a domain template that you wish to copy from machine to machine, this option allows you to specify a template that the domain will be created to match.
- usemasterpassword - For added security, you can protect the Payara Server keystore with a password. If not specified, then the password changeit is used; this default is fairly well known, so it is advised that you change it (get it?) when securing Payara Server.
- domainproperties - This option allows you to specify each port that will be used individually, rather than by relying on portbase. It is worth noting however that the adminport and instanceport options will override the admin and instance port specified by this command. The full list of ports that can be set are available in the command's help, though I'll list a few here: adminPort, domain.instancePort, http.ssl.port, java.debugger.port. When specifying multiple values, you separate them with a colon e.g. domain.adminPort=3456:domain.instanceport=4567
Nodes
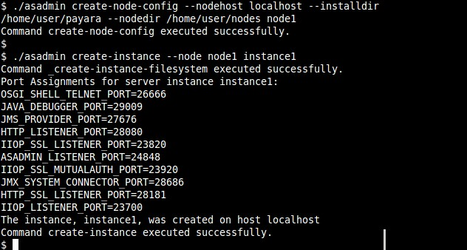
There is a command to create each kind of Payara Server node: create-node-config, create-node-dcom, and create-node-ssh. If creating a Config node with default settings, you only need to provide a name for the node. If creating an SSH or DCOM node, then you will need to provide both a name for the node, and the host name of the machine that the node will be located on.
./asadmin create-node-config configNode
./asadmin create-node-dcom --nodehost example.domain.co.uk dcomNode
./asadmin create-node-ssh --nodehost localhost sshNode
If the default values for when creating a config node are not suitable, you can have their node host, install directory, and node directory specified with the nodehost, installdir, and nodedir options respectively.
./asadmin create-node-config --nodehost localhost --installdir /home/user/payara --nodedir /home/user/nodes configNode
These options refer to the machine that will host the node, the installation directory of Payara Server on that machine, and the directory under which the nodes are stored (this particular option can probably be omitted for most configurations). The default install directory is taken as the install location of the DAS; the default settings assume that Payara Server is installed in the same location on all hosts.
Due to the relative complexity of an SSH or DCOM node in comparison to that of a Config node, they respectively have more options that can be used to create and configure them. The full list of options can be seen by passing the help option (./asadmin create-node-ssh --help), but I'll cover a few for both here.
For SSH nodes:
- force - This will force the creation of the node in the DAS configuration, even if the parameters passed in for the creation of the node fail validation. This can be useful if you know the target node will not be able to be validated against, such as if the target node host is not currently available. This option is also available to the create-node-dcom
- sshport - If you are using a non-default SSH port (22), then use this option to specify what port is being used instead.
- sshuser - This specifies the user to use when connecting to the host through SSH, which by default is the user that is running the DAS.
For DCOM nodes:
- windowsuser - This sets which Windows user to use to connect through DCOM. If not set, this defaults to the user running the DAS process.
- windowsdomain - This specifies the domain that the Windows user will be found under. This defaults to the host that the subcommand is run under.
- install - This option specifies whether or not Payara Server will be installed on the node host specified. This option is also available to the create-node-ssh
Deployment Groups
Creating a deployment group is very simple: run the create-deployment-group command and give it a name. That’s it!
./asadmin create-deployment-group guppy1
The complexity of deployment groups comes when managing them, which I’ll cover later on in a section specifically about adding/removing instances from deployment groups.
Instances
When creating instances, there are again two commands for doing this: create-instance and create-local-instance. As you can likely tell from the name, the create-local-instance command can only be run on the host on which the instance will resides; it cannot be used to create instances on remote machines. This command is used to create all types of instances: shared, standalone, and clustered.
./asadmin create-instance instance1
./asadmin create-local-instance instance2
By default, an instance will create its own config, copied from the default-config. You can change to use a pre-created one with the --config option:
./asadmin create-instance --config instance-config-1 instance3
You can specify the listen ports that the instance will use with the
--systemproperties option.
To specify the node that an instance will belong to, use the --node option, like this:
./asadmin create-instance --node node1
Setting and Changing Passwords
You can use the CLI to manage the admin and master passwords of Payara Server. The two passwords are managed with the following commands:
./asadmin change-admin-password
./asadmin change-master-password
The change-admin-password command is specific to a domain, so has the following two options to allow you to specify the domain to use: domain_name, and domaindir. If multiple admin users exist, you can specify which user to change the password of like this:
./asadmin --user admin change-admin-password
The change-master-password command has the following options: nodedir, which specifies the directory containing the node for which the password will be changed; domaindir, which specifies the domain directory used, and savemasterpassword, which dictates whether or not the master password will be saved to disk (which is pretty bad practice if you weren't aware).
Deploying an Application
Deploying an application can be quite a complicated affair depending on your environment set up. Conversely, deploying an application with the CLI can be significantly quicker than deploying it by the admin console if you know what you're doing!
To deploy an application to the default instance (the server where the admin console is installed), simply enter the following:
./asadmin deploy $path_to_war
Once you have your Payara Server environment set up, you're not likely to be deploying to the default server instance, so the target option will likely be of use to you, as it specifies where your deployment will be deployed to. With this option, you can specify that the component be deployed to an instance or a deployment group.
./asadmin deploy --target group1 testWar
./asadmin deploy --target instance1 testWar

The CLI also has a deployment option not available from the admin console – deploy-remote-archive. This command can be used to deploy an application not just from a URL, but also from a Maven repository using Group, Artifact, Version (GAV) coordinates.
There is no special flag to differentiate between a URL and Maven GAV coordinates – the command should figure it out on its own, making the following identical:
./asadmin deploy-remote-archive https://raw.githubusercontent.com/Pandrex247/Payara_PatchedProjects/Payara-Maven-Deployer/fish/payara/testing/clusterjsp/1.1/clusterjsp-1.1.war
./asadmin deploy-remote-archive --additionalRepositories https://raw.github.com/Pandrex247/Payara_PatchedProjects/Payara-Maven-Deployer fish.payara.testing,clusterjsp,1.1
If you’ve a sharp mind, you’ll see an option I haven’t discussed yet: --additionalRepositories. This option is used to provide a comma separated list of maven repositories to search for the specified application in; by default the command will only look in Maven Central.
Adding and Removing Instances from Deployment Groups
The main feature that differentiates deployment groups from the clustering of old is that the instances in a deployment group are more flexible – an instance is no longer tied to a cluster for its life, and can belong to more than one deployment group.
To accommodate this new flexibility, there are two new asadmin commands for adding and removing instances from a deployment group:
./asadmin add-instance-to-deployment-group --instance instance1 --deploymentgroup group1
./asadmin remove-instance-from-deployment-group --instance instance1 --deploymentgroup group1
These commands largely do what they say on the tin, having only a couple of configuration options denoting the instance to remove, and the deployment group to remove it from. Both of the configuration options are mandatory, so you’ll be prompted to enter whichever one you forget to specify:

Another place where things can get complicated, Hazelcast has been present in Payara Server and Micro for quite a while, but with Payara 5 it’s even more heavily integrated – it would be remiss of me not to at least mention how to configure it!
The domain data grid is achieved using Hazelcast, so the configuration commands are named after that relationship:
./asadmin get-hazelcast-configuration --target server-config
./asadmin set-hazelcast-configuration --target config1
The set command has a multitude of options, so I’ll only go over the most commonly used ones here:
- --enabled – Whether or not Hazelcast (and so by extension clustering) should be enabled.
- --target – The config to configure.
- --dynamic – Whether or not Hazelcast should be restarted to reflect the changes.
- --startport – The port number to attempt to bind to (Hazelcast will increment upon this number until it finds a free port). Note that this is a domain-wide setting.
- --clustername – The name of the Hazelcast cluster to join; useful for separating domains, as you probably won’t want the instances from one domain to cluster together with another.
- --clusterpassword – The password to join the cluster.
- --lite – Whether or not the instances using this config should be classed as “lite” members, meaning that they don’t store data within their own memory.
New in Payara 5 is an option to change how Payara instances cluster with each other, configured with the --clustermode option. Note that this is another option that is domain wide – you can’t figure one config to use cluster mode, and another to use a different one.
Domain Discovery Mode
This is the default option used by Payara Server, and by being the default, will hopefully not require any extra configuration out of the box.
In fact, all you need to do is set the discovery mode to domain, and that’s it! There’s no extra configuration required with regards to telling each instance where to find the DAS – it’s figured out from the address the DAS used to bind Hazelcast to.
./asadmin set-hazelcast-configuration --clustermode domain
TCP/IP Mode
This cluster mode is aimed more at being used with Payara Micro in cloud environments, so I’m not going to go into detail about it in this blog.
In short though, it’s for use in environments where there a) may not be a DAS, and b) multicast can be problematic (or just impossible!). Functionally it’s a bit like a reverse of the domain discovery mode: with the domain discovery mode, you tell each instance where to find the DAS, with TCP/IP mode, you tell the DAS where to find the other instances.
Multicast Mode
This is how Hazelcast did it’s clustering back in Payara Server and Micro 4, and remains the default for Payara Micro.
There haven’t been any changes to this mode (outside of having to specify to use it with Payara Server) – you just have to tell it the multicast group and port number with the respective options:
./asadmin set-hazelcast-configuration --clustermode multicast --multicastgroup 224.2.2.3 --multicastport 54327
Wrapping Up
That's it for this introduction to the Payara Server CLI. You will have taken your first steps to navigating the technical wilderness that is the CLI, though the path stretches on for quite a way yet (for almost as long as I'm stretching this metaphor). Hopefully you can also see that the CLI can be a viable alternative to using the admin console to administer your Payara Server, rather than some needlessly complex thing used by people to show off!
Give it a try: